
Don’t Skip This Step: What You Need to Know Before Installing a Backflow Preventer on Your Irrigation System
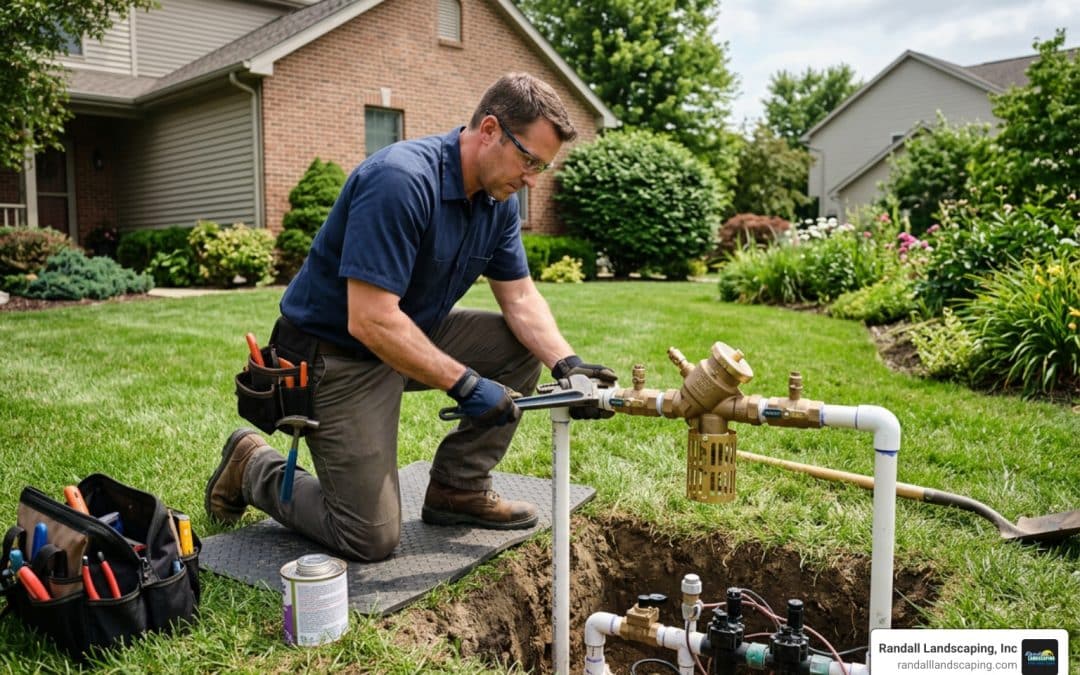
Installing a backflow preventer on your irrigation system is one of the most important steps you can take to protect your home’s drinking water from contamination.
Here’s the quick version of how to do it:
- Shut off the main water supply or irrigation shut-off valve
- Drain the system completely by opening the lowest faucet and all zones
- Choose the right device for your hazard level (PVB, DCVA, RPZ, or AVB)
- Install the device at least 12 inches above the highest sprinkler head, above ground
- Dry-fit all components before applying Teflon tape or PVC cement
- Attach the backflow preventer with flow arrow pointing away from the water main
- Turn water on slowly and inspect every joint for leaks
- Schedule annual testing with a certified backflow tester
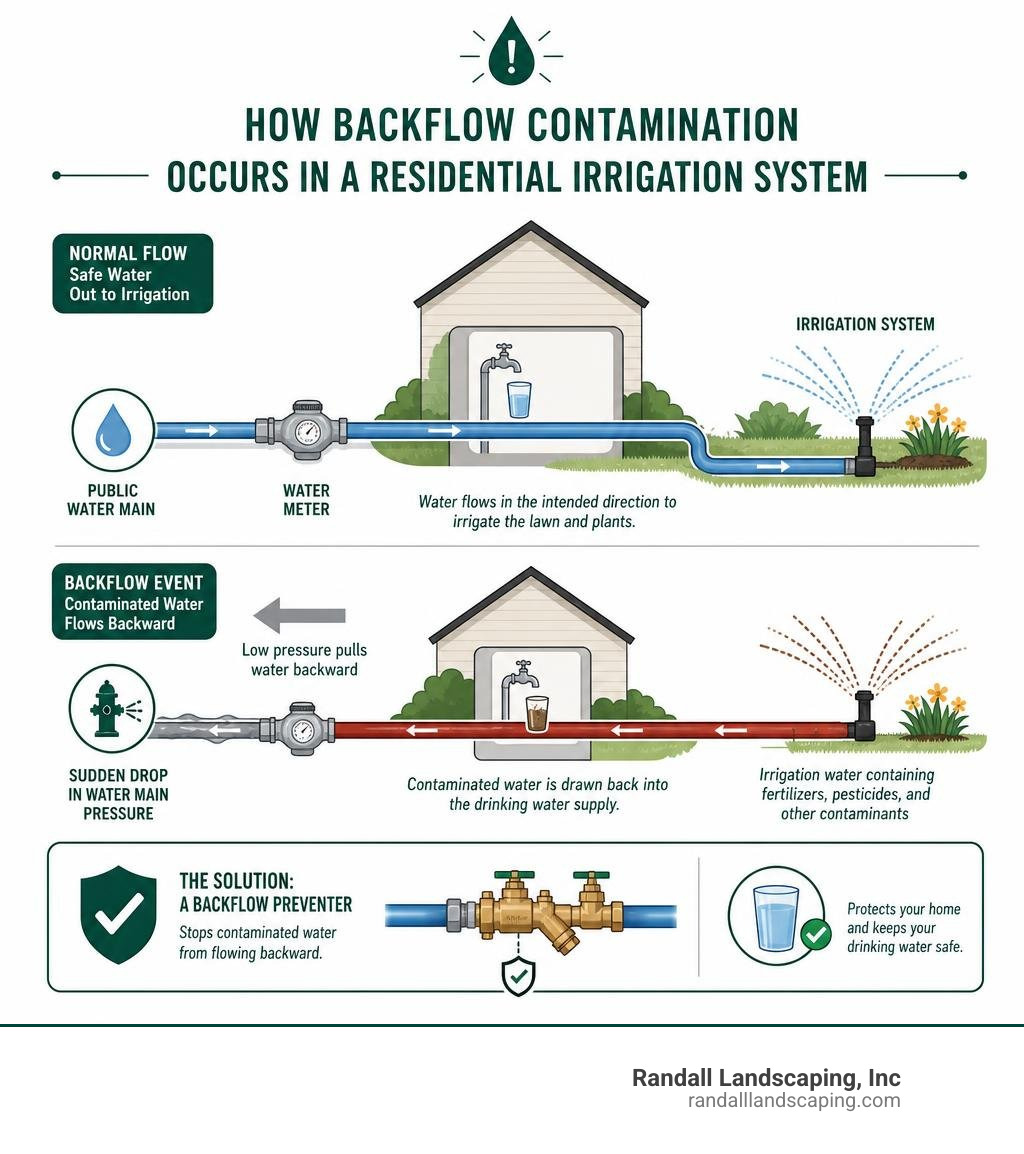
Imagine filling a glass of water only to find it’s been contaminated by fertilizer or pesticides from your own sprinkler system. That’s not a far-fetched scenario — it’s exactly what backflow is, and it happens more often than most homeowners realize. A sudden drop in water main pressure (from a nearby fire hydrant use or a main break) can literally pull irrigation water back into your home’s drinking supply. The fix is straightforward, but it has to be done right.
I’m Tommy Randall, owner of Randall Landscaping, Inc., and I’ve been installing backflow preventers on irrigation systems across Southern New Hampshire and the Merrimack Valley since 2006. In this guide, I’ll walk you through everything you need to know — from choosing the right device to passing your annual inspection.
Why Installing a Backflow Preventer Irrigation System is Essential
When we turn on our kitchen faucets to fill a kettle or grab a glass of water, we expect 100% pure, clean drinking water. However, the plumbing network that delivers this water is a two-way street if it isn’t properly protected. When you set up a lawn sprinkler system, you are connecting your clean, potable drinking water directly to an outdoor environment filled with potential contaminants. This direct link is called a cross-connection, and without a reliable defense mechanism, it poses a significant risk to your family’s health and public safety.
Irrigation lines sit underground, where water pools around sprinkler heads. This standing water can easily mix with lawn fertilizers, chemical pesticides, pet waste, stagnant dirt, and harmful bacteria. If this toxic cocktail gets sucked backward into your home plumbing, the results can be disastrous. Installing a backflow preventer irrigation system acts as a strict one-way street, ensuring that clean municipal water can flow out to your lawn, but absolutely nothing from the lawn can creep back into your home.
What is Backflow and Cross-Connection?
To understand how contamination happens, we have to look at the physics of water pressure. Water naturally flows from areas of high pressure to areas of low pressure. Backflow is the unwanted reversal of this flow, and it occurs under two specific conditions:
- Backsiphonage: This happens when there is a sudden drop in the supply-side water pressure. Think of it like drinking through a straw. If a water main breaks down the street, or if local firefighters hook up to a nearby fire hydrant to extinguish a blaze, the pressure in the municipal main line plummets. This creates a vacuum or suction effect that pulls water backward out of your private plumbing and irrigation lines directly into the clean water supply.
- Backpressure: This occurs when the pressure on the downstream side (your irrigation system) becomes higher than the pressure on the supply side. This can happen if your irrigation system is connected to an auxiliary pump, a highly pressurized well system, or even due to thermal expansion in thermal lines. When the irrigation pressure overcomes the municipal supply pressure, it forces the non-potable water backward through the connection.
Local Codes and Regulations
Because the public water supply is a shared resource, municipal water departments and state plumbing boards take backflow prevention incredibly seriously. In Massachusetts and New Hampshire, plumbing codes strictly regulate how and where backflow preventers must be installed.
For example, communities like North Andover, MA, maintain rigorous standards through initiatives like the North Andover Cross Connection Control Program. Local regulations often require that any backflow assembly installed on an irrigation system must be registered with the town, installed by a licensed professional, and tested immediately upon installation. Failing to comply can result in hefty fines, and more importantly, the water department may shut off your water service to protect the municipal grid. Before you dig or cut any pipes, always check in with your local building department to verify which specific devices are approved for your neighborhood.
Choosing the Right Device and Location
Selecting the proper hardware is half the battle when installing a backflow preventer irrigation setup. Not all devices are created equal, and choosing the wrong one can lead to failed code inspections or, worse, an unprotected system. The choice depends on the layout of your yard, whether you use chemical injectors, and the specific rules of your local water district. If you’re looking to modernize your setup, you can read More info about essential irrigation system upgrades to see how a new backflow setup fits into a smart system.
PVB, DCVA, RPZ, and AVB Explained
There are four primary types of backflow preventers used in residential and commercial irrigation systems. Each operates differently and is rated for different hazard levels:
| Device Type | Full Name | Hazard Rating | Above/Below Ground | Continuous Pressure Allowed? |
|---|---|---|---|---|
| PVB | Pressure Vacuum Breaker | High Hazard | Above Ground Only | Yes |
| DCVA | Double Check Valve Assembly | Low Hazard Only | Above or Below Ground | Yes |
| RPZ | Reduced Pressure Zone | High Hazard | Above Ground Only | Yes |
| AVB | Atmospheric Vacuum Breaker | High Hazard | Above Ground Only | No |
- Pressure Vacuum Breaker (PVB): The PVB is the most common device used for residential lawn sprinklers in Southern New Hampshire and the Merrimack Valley. It contains a spring-loaded check valve and an air relief valve. It is designed to protect against backsiphonage but cannot handle backpressure. It must be installed above ground.
- Double Check Valve Assembly (DCVA): A DCVA consists of two spring-loaded check valves acting in series. It is highly reliable for low-hazard applications (systems without chemical additions) and is the only major assembly that can legally be installed underground in an approved utility box in certain jurisdictions.
- Reduced Pressure Zone Assembly (RPZ): The RPZ is the gold standard of backflow prevention. It features two independent check valves separated by a pressure-differential relief valve. If either check valve fails, the relief valve dumps the water out of the bottom to prevent contamination. Because it can handle both backpressure and backsiphonage under high-hazard conditions, it is required if you use lawn fertilizer injectors.
- Atmospheric Vacuum Breaker (AVB): This is a simple, cost-effective option, but it comes with a major catch: you must install one AVB on every single zone valve downstream of the control valves, and they cannot be subjected to continuous water pressure for more than 12 hours.
Choosing the Right Device Before Installing a Backflow Preventer Irrigation Line
To make the right choice, you must perform a basic hazard assessment of your landscape. If your system is a straightforward grass-watering setup, a PVB is usually the ideal and most cost-effective solution. However, if you plan to inject liquid fertilizers directly through your sprinklers, or if you have a dog wash station or pool fill line tied to the same system, you are dealing with a “high-hazard” cross-connection. In this case, plumbing codes will mandate an RPZ assembly.
Additionally, look at your property’s topography. If your house sits on a hill and some sprinkler heads are physically higher than the water main connection, a PVB might not work correctly unless it is elevated even higher. For detailed positioning strategies, check out How to choose and install a backflow prevention assembly to ensure your layout matches industry standards.
Height, Clearance, and Above vs. Below Ground Rules
Where you put the device is just as critical as which device you buy. If you are installing a PVB or an RPZ, they must be installed above ground. A common DIY mistake is burying a PVB in a valve box to hide it. This is a major code violation. If a buried PVB experiences a pressure drop, it will pull dirty groundwater from the flooded box directly into your drinking water.
- The 12-Inch Rule: A PVB must be installed at least 12 inches above the highest sprinkler head or highest point of ground in the entire system. If you have a terraced yard with a sprinkler head on a hill that sits 5 feet higher than your water meter, your PVB must be piped up so that it sits at least 6 feet above the meter level.
- Clearance: You must leave at least 12 inches of open clearance on all sides of the device. This ensures that certified testers can easily attach their testing equipment and perform mandatory annual maintenance.
- The Vault Hazard: While some commercial properties install double checks in underground vaults, this is highly discouraged for residential properties. NIOSH statistics show that 92 fatal injuries occur each year in confined spaces like water utility vaults, often due to toxic atmospheres or sudden flooding. Furthermore, 70 percent of engineers and water jurisdictions report that vaults flood, which instantly creates a high-risk cross-connection if the device becomes submerged. Keep your device above ground in a protective, insulated enclosure!
Step-by-Step Installation Guide
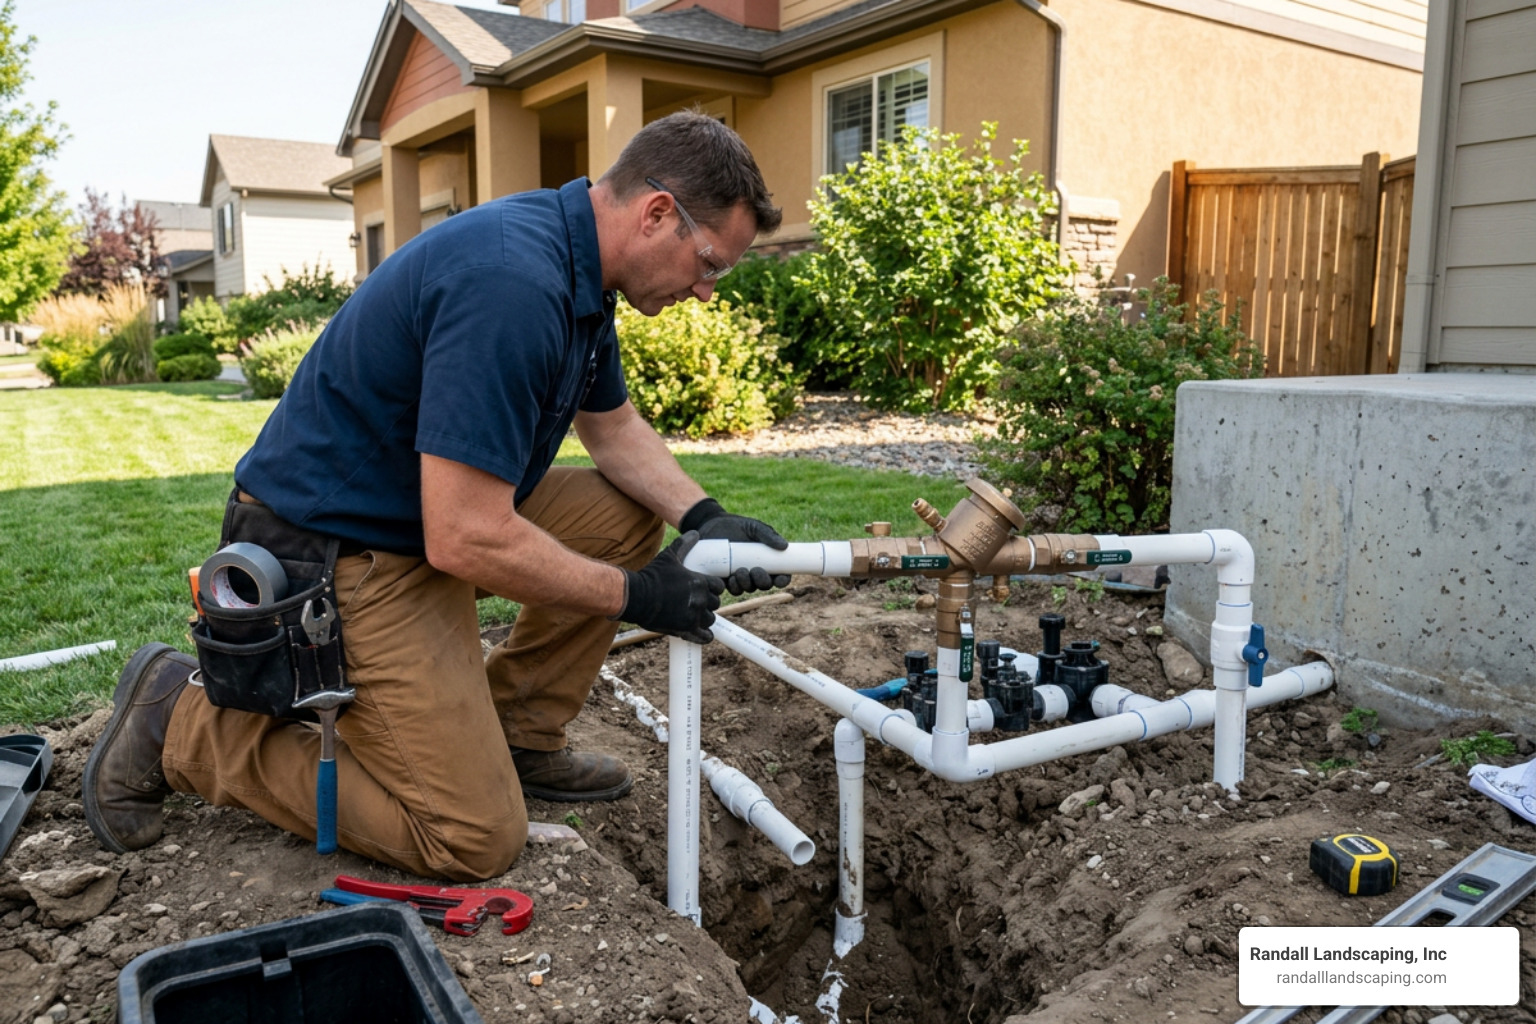
Now that you have chosen the right device and mapped out its location, it is time to roll up your sleeves and get to work. While replacing an existing backflow preventer is a manageable weekend project for an experienced DIYer, cutting into your main water line for a brand-new installation often requires a licensed professional to ensure compliance with local plumbing codes.
Tools and Materials Checklist
Before you make your first cut, gather all your tools and materials. Having everything on hand prevents those frustrating mid-project trips to the local hardware store in Methuen or Dracut.
- Required Tools:
- PVC pipe cutter or fine-toothed hacksaw
- Pipe deburring tool (or utility knife)
- Two adjustable wrenches (to tighten brass fittings without twisting the pipe)
- Tape measure and marker
- Safety glasses and heavy-duty work gloves
- Required Materials:
- The approved backflow preventer assembly (e.g., PVB or RPZ)
- PVC primer and PVC cement (for PVC lines)
- Teflon tape (wrap 4 to 5 times around male threads; avoid liquid pipe dope on plastic threads)
- Threaded transition fittings (brass-to-PVC adapters)
- Two slip-joint unions (installed on either side of the device for easy winter removal)
- An additional shut-off valve (installed upstream of the supply-side union)
Step-by-Step Guide to Installing a Backflow Preventer Irrigation Setup
Follow these steps carefully to ensure a leak-free, code-compliant installation. For more safety tips, you can refer to Stop Contamination: Your Step-by-Step Guide to Installing a Backflow Preventer Safely.
Step 1: Shut Off the Main Water Supply
Locate your main water shut-off valve (usually inside your basement or near your water meter). Turn it off completely. If you have a dedicated outdoor shut-off valve for your irrigation line, close that as well.
Step 2: Drain the System
Open the lowest outdoor faucet or run an irrigation zone manually to relieve all water pressure and drain the standing water out of the pipes. Keep a bucket handy to catch any residual water when you cut the pipe.
Step 3: Measure and Cut the Pipe
Using your backflow preventer and union fittings as a physical template, measure the section of pipe you need to remove. Mark the pipe clearly. Use your pipe cutter to make clean, perfectly square cuts. Use your deburring tool to clean up any plastic burrs or rough edges.
Step 4: Dry-Fit All Components
Assemble the entire layout — including the adapters, unions, and the backflow preventer — without any glue or tape first. This “dry-fit” step is crucial to ensure that all pipes align perfectly and that you have met the height and clearance requirements. Double-check that the flow direction arrow on the side of the valve body points away from the water supply and toward the sprinkler zones.
Step 5: Apply Sealant and Glue
Disassemble the dry-fitted parts. Apply 4 to 5 wraps of Teflon tape to the male threaded adapters and thread them into the backflow preventer’s brass body. Tighten them firmly using two wrenches. Next, apply PVC primer and PVC cement to the slip joints, insert the pipes, and hold them firmly for 15 to 30 minutes to allow the solvent weld to cure.
Step 6: Attach the Backflow Preventer
Connect the backflow assembly to the newly installed unions. Hand-tighten the union collar nuts first, then snug them up with an adjustable wrench. Do not overtighten, as plastic union collars can crack under excessive force.
Step 7: Slow Water Turn-On and Leak Check
Ensure all test cocks on your backflow preventer are closed. Slowly open the main water supply valve. Reintroducing water too quickly can cause a water hammer, which can rupture plastic fittings or damage the delicate internal springs of your new backflow valve. Once the system is pressurized, inspect every single joint, thread, and union for any signs of weeping or leaking.
Maintenance, Winterization, and Cost Considerations
Once your backflow preventer is installed, your job isn’t quite finished. Because these devices protect your drinking water, they require regular maintenance, seasonal protection from New England’s harsh winters, and mandatory annual testing. To understand how these ongoing costs fit into your overall landscaping budget, check out our guide on the More info about underground water sprinkler system costs.
Protecting Your System from Freezing
In places like Salem, NH, and Andover, MA, freezing winter temperatures are a guarantee. Water expands when it freezes, and because PVBs and RPZs are installed above ground, they are highly susceptible to catastrophic freeze damage. If water freezes inside the brass body of your backflow preventer, it will crack the internal plastic poppets or split the heavy metal casing open, resulting in an expensive replacement come spring.
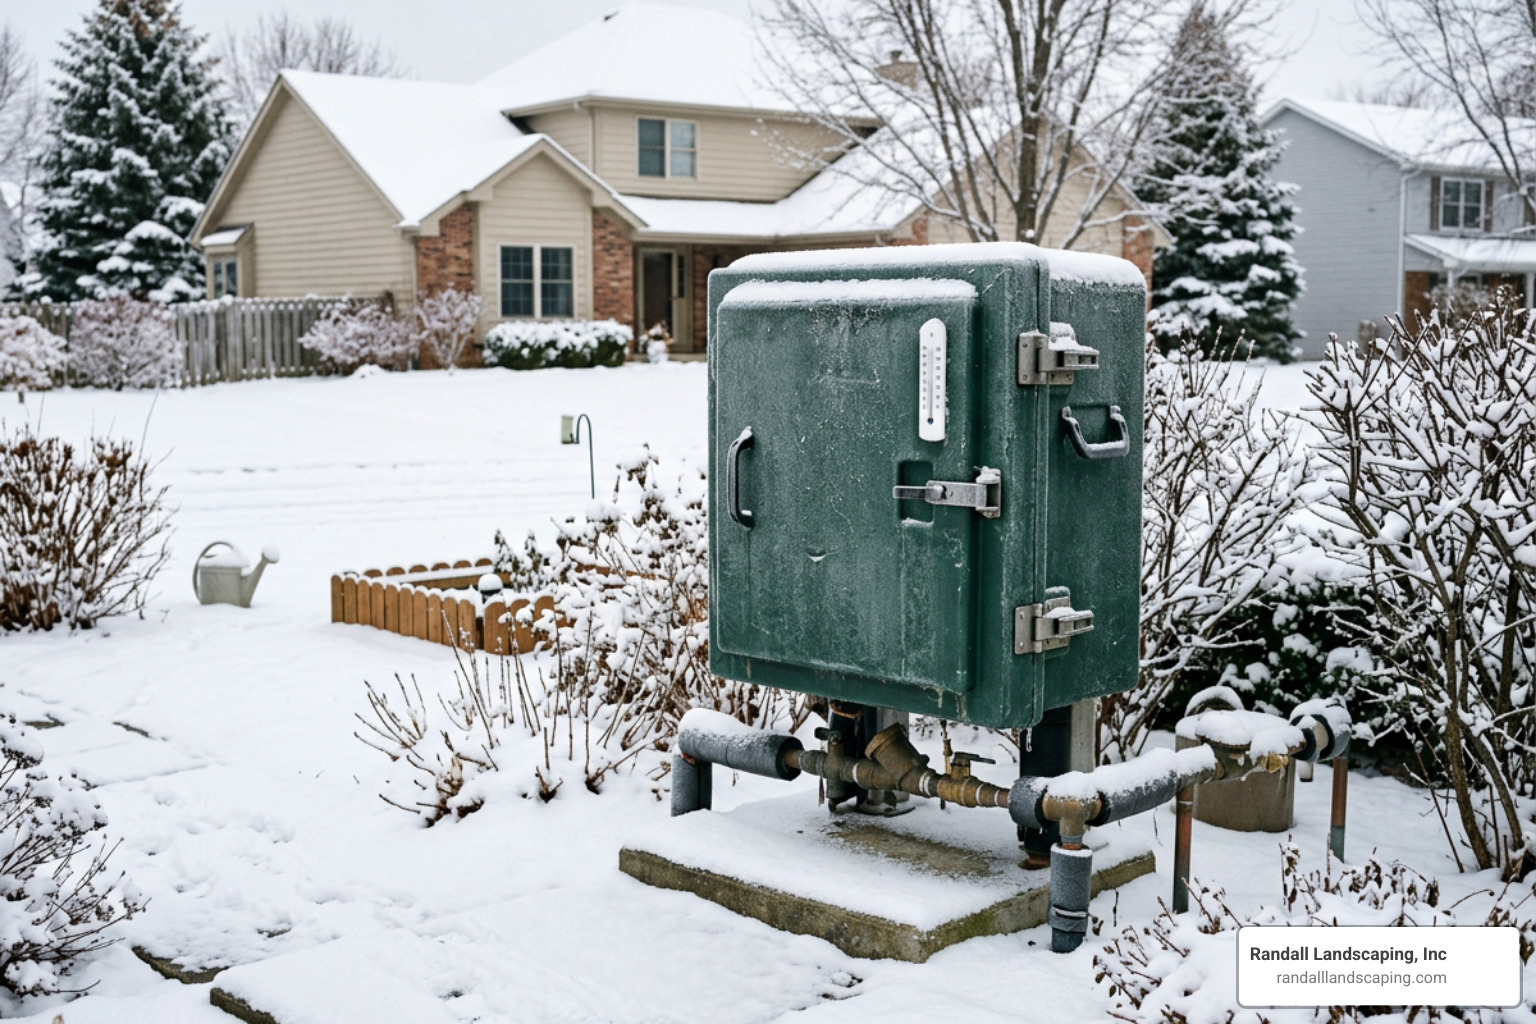
To protect your investment, you must winterize the system every autumn:
- Shut off the indoor supply valve that feeds the outdoor irrigation line.
- Open the test cocks on your backflow preventer to a 45-degree angle. Leaving them fully open or fully closed can trap water behind the ball valves, causing them to split.
- Connect an air compressor to the blow-out port located downstream of the backflow preventer. Never blow high-pressure compressed air directly through the delicate internal components of the backflow preventer itself, as this can shred the rubber seals.
- For detailed technical steps on winter storage, refer to the Installation and Winterization Guide.
- If you choose to leave the device outside, cover it with a specialized, ASSE 1060-compliant insulated hot box or freeze bag. However, because we recommend installing unions on either side of the device, the absolute safest method is to simply unscrew the unions, remove the backflow preventer entirely, and store it in your heated basement or garage for the winter.
Testing Requirements and Average Costs
To ensure your backflow preventer continues to work flawlessly, local water authorities require that all backflow assemblies be tested and certified at least once per year. This test must be performed by a certified backflow prevention assembly tester using calibrated pressure gauges. The tester will verify that the check valves hold a minimum pressure differential (typically at least 1.0 PSID) and that the air relief valves open exactly when they are supposed to.
Cost Disclaimer: Please note that the following price ranges are average costs compiled from national internet data. They do not represent the actual service costs or pricing of Randall Landscaping, Inc.
- DIY Installation Materials: If you choose to install a basic PVB yourself, the raw materials, fittings, and the device itself typically run between $150 and $350.
- Professional Installation: Having a licensed plumber or professional irrigation contractor install a new backflow preventer generally ranges from $450 to $1,500+ depending on the complexity of the plumbing, the size of the main line, and whether an above-ground insulated enclosure is required.
- Annual Certification Testing: Hiring a certified tester to inspect and file the compliance paperwork with your local water department usually costs between $75 and $250 per year.
Frequently Asked Questions about Irrigation Backflow
Can I install a backflow preventer myself?
In many municipalities across Southern New Hampshire and the Merrimack Valley, homeowners are legally permitted to install backflow preventers on their own residential property. However, there is a catch. The installation must still strictly adhere to local plumbing codes, pass a formal inspection by the town’s building inspector, and be certified by a licensed tester immediately after installation. If your project involves cutting into your home’s main copper water main before the meter, we highly recommend hiring a licensed professional to avoid water damage and code violations.
Why is my backflow preventer leaking from the vents?
If you notice water dripping or spraying from the bottom vents of your PVB or RPZ, it usually indicates one of three things:
- Normal Pressure Fluctuations: RPZ devices are designed to dump small amounts of water when municipal pressure fluctuates. This is normal behavior and means the device is doing its job.
- Debris in the Check Valves: If the leak is constant, a tiny piece of solder, pipe tape, or dirt has likely washed down the line and become lodged in the rubber seal of the first check valve, preventing it from closing fully.
- Failed Internal Components: Over time, the internal rubber O-rings, springs, or diaphragms can wear out and crack. Fortunately, you can easily purchase a rebuild kit for popular models (like the Febco 765) to replace the internal poppet and bonnet assembly without removing the entire brass valve body.
How often does my backflow preventer need to be tested?
By law, your backflow preventer must be tested at least once per year, typically in the spring when you turn your sprinkler system back on. Some high-hazard commercial properties or municipal districts may require biannual testing. Regular testing is non-negotiable because internal parts can degrade over time without any visible outward signs of failure.
Conclusion
Installing a backflow preventer irrigation system is not just a regulatory hurdle — it is a fundamental safety measure that keeps your family’s drinking water safe from harmful chemicals and lawn contaminants. While a handy homeowner can tackle a basic installation with the right tools and a bit of patience, getting the height, location, and plumbing connections perfectly right is critical to passing inspection and ensuring absolute safety.
If you live in Amesbury, Andover, Atkinson, Boxford, Dracut, Georgetown, North Andover, North Reading, Pelham, Salem, Windham, Methuen, Lawrence, or Plaistow, you don’t have to tackle this complex project alone. At Randall Landscaping, Inc., we bring quality work and 100% reliability to every property we service.
Whether you need a brand-new backflow assembly, a spring startup test, or a complete system upgrade, we are here to help. Contact us today to schedule your Professional Sprinkler System Installation Services and enjoy the peace of mind that comes with a perfectly safe, beautiful lawn!