Why Laying Pavers the Right Way Matters

Laying pavers is an effective way to create a durable, attractive walkway or patio. When done correctly, a paver installation offers excellent drainage, resists cracking better than concrete, and adds significant curb appeal. A proper installation can last for 25+ years, is easy to repair, and requires minimal maintenance.
The key to success is proper base preparation. A well-compacted gravel base prevents settling and provides the drainage needed to keep pavers level for years. The basic process involves:
- Excavating the area.
- Installing a compacted crushed stone base (4-8 inches).
- Spreading and leveling 1 inch of bedding sand.
- Laying the pavers.
- Cutting edge pavers to fit.
- Installing edge restraints.
- Filling joints with polymeric sand.
I’m Tommy Randall, owner of Randall Landscaping. Since 2006, my team and I have been laying pavers for patios, walkways, and driveways throughout Massachusetts and New Hampshire. We’ve learned that the difference between a project that lasts and one that fails is always the installation technique—especially getting the base right.

Planning Your Project: Tools, Materials, and Calculations
Proper planning is the most important step. Before you begin, define your project’s scope—a simple garden path has different requirements than a patio or driveway that must support heavy loads. This determines your material choices and base depth.
Safety is non-negotiable. Always use:
- Safety goggles to protect from flying debris.
- Work gloves to prevent cuts and blisters.
- Steel-toed boots to protect your feet from dropped pavers.
Also, call 811 a few days before digging. This free service marks underground utility lines to prevent dangerous accidents.
Once your scope is defined, you can calculate your material needs. Precision here prevents delays and extra supply runs. You can use an online Product Estimator or follow the guidelines below. For larger projects, consider our professional hardscaping services for expert guidance.
Essential Tools and Materials
Having all your tools and materials ready will streamline the project.

Tools:
- Shovel, rake, and wheelbarrow
- Tape measure and 4-foot level
- Rubber mallet
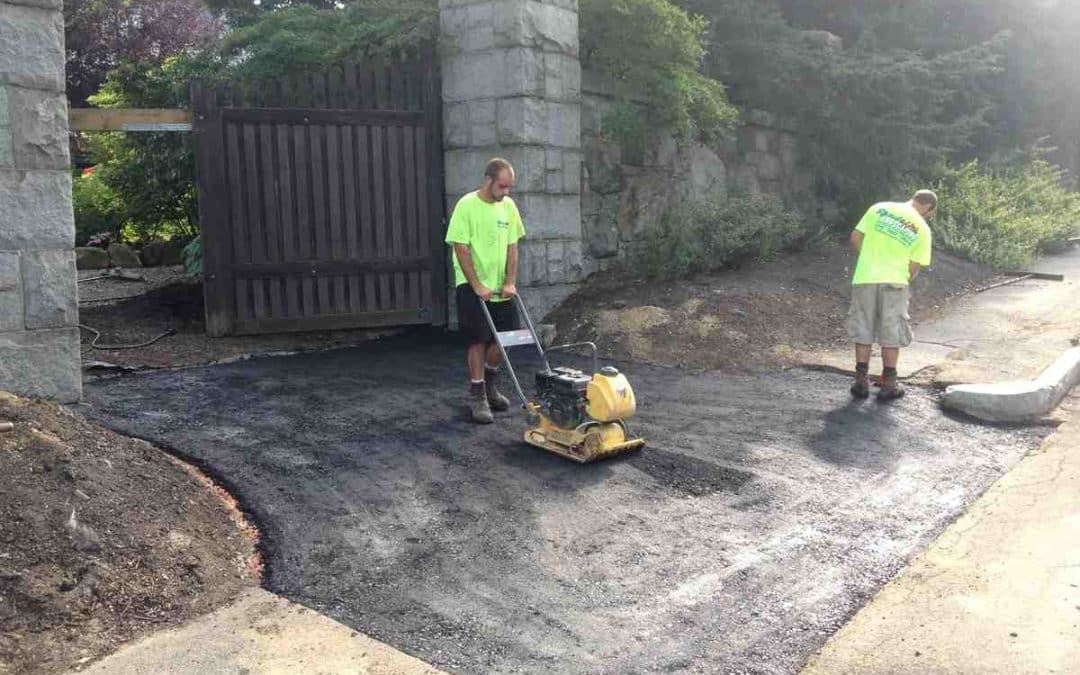
- Plate compactor (essential for proper compaction; can be rented)
- Masonry saw with a diamond blade (a wet saw is best)
- Screed rails (PVC pipes work well) and a straight 2×4
- String line and stakes
- Push broom and garden hose with a spray nozzle
Materials:
- Pavers: Order 5-10% extra for cuts and waste.
- Crushed Stone/Gravel Base: 3/4-inch crushed stone is standard.
- Bedding Sand: Washed concrete sand.
- Edge Restraints: Plastic, aluminum, or concrete.
- Polymeric Sand: For filling joints.
- Geotextile Fabric (Recommended): Prevents the base from mixing with the soil.
How to Ensure Proper Drainage and Slope
Improper drainage is the most common cause of paver failure. To prevent water from pooling and causing damage, you must build in a slope. The standard is a 1/4-inch drop per foot (or 1 inch of drop for every 4 feet of length), directing water away from buildings and foundations.
Use stakes and a mason’s line to set this slope during the layout phase. This string line will be your guide for excavation and base installation, ensuring every layer maintains the correct drainage angle.
Calculating Base Material Depth
The depth of your base material determines the longevity of your project. Don’t cut corners here.
- Walkways and Patios: A 4-inch depth of compacted crushed stone is sufficient for foot traffic. In areas with soft soil or harsh freeze-thaw cycles (like New Hampshire and Massachusetts), increase this to 6 inches.
- Driveways: To support vehicle weight, you need a minimum 8-inch depth of crushed stone. For more details, see our driveway pavers page.
Use 3/4-inch crushed stone (often called “quarry process” or “crusher run”). To calculate the amount needed, multiply your project’s square footage by the base depth in feet (e.g., 4 inches = 0.33 feet) to get cubic feet. Divide by 27 to get cubic yards, and add 10% extra for compaction.
The Complete Guide to Laying Pavers: A Step-by-Step Process
With planning complete, it’s time to build. This process turns your preparation into a beautiful, functional reality.

Step 1: Excavation and Ground Preparation
First, mark the project perimeter with stakes and string or marking paint. Calculate your digging depth by adding the thickness of your pavers (e.g., 2.5 inches), the sand bed (1 inch), and the compacted base (4-8 inches). For a walkway, this is typically 7-8 inches total.
Excavate the entire area to this depth, removing all grass, roots, and debris. Then, use a plate compactor to compact the exposed subgrade (the soil underneath). This creates a firm foundation. In soft or clay soils, lay geotextile fabric now to prevent the base from sinking into the soil over time.
Step 2: Installing the Paver Base
The base layer provides stability and drainage. We use 3/4-inch crushed stone, aiming for a compacted depth of 4-6 inches for walkways and 8+ inches for driveways.
Spread the stone in 2-3 inch layers. Lightly dampen each layer and compact it thoroughly with a plate compactor, making several passes. Repeat until you reach the desired depth. Constantly check that the base maintains the 1/4-inch per foot slope you established with your string lines. For more technical details, consult the Technical Notes from The Brick Industry Association.
Step 3: Adding the Bedding Sand
The 1-inch layer of bedding sand creates a perfectly level surface for the pavers. We use washed concrete sand for this.
To get a uniform 1-inch depth, use a technique called “screeding.” Lay two parallel screed rails (like PVC pipes) on the compacted base. Pour sand between them, then drag a straight 2×4 across the rails to level the sand. Only screed an area you can immediately cover with pavers, and do not walk on the leveled sand.
Step 4: Properly Laying Pavers for a Level Surface
Now, start laying pavers. Begin at a corner or straight edge, working across the sand bed. Use a “click-and-drop” method: gently click the bottom edge of the new paver against the one already in place, then drop it straight down. Do not drag pavers across the sand.
Aim for tight joints (1/8 to 3/16 inch); many pavers have built-in spacer bars to help. Use string lines to keep your rows straight. Periodically check for levelness with a long level, tapping high pavers down with a rubber mallet. If a paver is too low, lift it and add a little sand underneath.
Step 5: When and How to Cut Pavers
Lay all full-sized pavers first, leaving gaps at the edges or around obstacles. This allows you to do all your cutting at once, which is more efficient.
Measure the gaps carefully and mark the pavers for cutting. For the cleanest cuts, use a masonry wet saw with a diamond blade. This minimizes dust and produces a professional finish. For certain rustic styles, a paver splitter can also be used. When creating custom paver patios with curves, you may need to create a template to trace the cut.
Safety is paramount when cutting. Always wear safety goggles, hearing protection, and a dust mask.
Step 6: Installing Edge Restraints
Edge restraints are vital for locking the pavers in place and preventing them from shifting over time. Common types include plastic, aluminum, and concrete.
Place the restraint snugly against the outer edge of the pavers. Secure it to the compacted base by driving long galvanized spikes every 8-12 inches along the entire perimeter. This creates a contained system that ensures the long-term integrity of your walkway.
Step 7: Filling Joints with Polymeric Sand
The final step is filling the joints with polymeric sand. This is a mix of sand and polymers that hardens when wet, locking pavers together, preventing weeds, and deterring insects.
First, ensure the paver surface is completely dry. Spread the polymeric sand generously and use a push broom to sweep it into the joints until they are full. Then, run the plate compactor over the entire surface to settle the sand deep into the joints. Sweep more sand in to top off the joints.
Finally, use a hose with a spray nozzle to gently mist the surface, activating the polymers. Avoid flooding the area. Allow it to dry completely (usually 24 hours) before use.
Advanced Considerations: No-Base Installations and Common Mistakes
While a proper base is always recommended, it’s worth understanding the shortcuts and common pitfalls.

The Pros and Cons of Laying Pavers Without a Base
Laying pavers directly on soil is tempting for its lower cost and quicker installation time. However, the cons far outweigh the pros. Without a proper base, you can expect:
- Shifting and Settling: Pavers will become uneven within a single season.
- Poor Drainage: Water will pool, causing erosion and frost heave.
- Weed and Insect Issues: Gaps will open up, inviting weeds and ants.
- Short Lifespan: The installation may fail in just a year or two, becoming a tripping hazard.
When is a No-Base Installation Acceptable?
Skipping the base is only acceptable for temporary or purely decorative applications, such as:
- Temporary paths for an event.
- Individual stepping stones in a low-traffic garden bed.
For these uses, the soil must be naturally firm and well-draining. For anything else, a base is required. If a full base seems excessive, a minimal 1-2 inch base or ground stabilizer grids are better than nothing but are not substitutes for a proper installation on functional walkways. For lasting results, proper techniques are key, as shown in our hardscaping services.
Common Mistakes to Avoid When Laying Pavers
Even with good intentions, projects can fail. Avoid these common mistakes:
- Improper Base Compaction: Not using a plate compactor or not compacting in 2-3 inch layers will lead to settling.
- Incorrect Slope: Forgetting the 1/4-inch per foot slope will cause water to pool against your foundation.
- Uneven Sand Layer: A bedding sand layer that isn’t exactly 1 inch deep and perfectly level results in a wavy, uneven surface.
- Gaps in Edge Restraints: Failing to install restraints snugly against the pavers and spike them securely allows the project to spread apart.
- Improper Joint Filling: Not using polymeric sand or not activating it correctly with water leaves the pavers open uped and vulnerable to weeds.
For more insights, this guide on Common Paver Installation Mistakes is a useful resource. And always remember to call 811 before you dig.
DIY vs. Professional Installation: When to Call the Experts
There’s great satisfaction in a successful DIY project. However, it’s important to be realistic about the scope, time, and physical effort involved in laying pavers.

Before you decide, consider these factors:
- Project Complexity: A simple, straight path is a manageable DIY task. However, curves, intricate patterns, multiple levels, and retaining walls require experience to execute properly.
- Time Commitment: A paver project is not a single weekend job. It involves excavation, material transport, base preparation, and detailed finishing work that can take up a significant amount of your free time.
- Equipment: While you can rent a plate compactor and masonry saw, using them effectively and safely takes practice. Professionals own this equipment and have years of experience.
- Physical Demands: This work involves moving tons of material, lifting heavy pavers, and spending hours on your knees. It is physically strenuous.
Consider hiring a professional for:
- Large Projects: Expansive patios or long driveways where the scale of work is significant.
- Complex Designs: Any project with curves, patterns, or multiple elevations.
- Challenging Site Conditions: Properties with poor drainage, clay soil, or steep slopes require expert solutions to prevent failure.
For guaranteed quality on your patio and walkway installations, consider a trusted company like Randall Landscaping. We have served the Merrimack Valley and Southern New Hampshire since 2006, including communities like Amesbury, Andover, Atkinson, Boxford, Dracut, Georgetown, North Andover, Salem, and Windham. Our reputation is built on quality work that stands the test of time.
Conclusion
Properly laying pavers is a rewarding project that adds lasting value and beauty to your property. The key to a durable, low-maintenance walkway lies in the steps we’ve outlined, especially the commitment to a well-compacted base and proper slope for drainage. These foundational elements are what ensure your project will endure for decades.
For those ready to tackle a DIY installation, we encourage you to proceed with patience and precision. However, if your project is large, complex, or you simply want to ensure a flawless result without the weeks of hard labor, professional help is a wise investment.
Whether you build it yourself or partner with an expert, the goal is a stunning walkway you can be proud of. For professional guidance and flawless execution, explore our Paver Walkway Contractors Ultimate Guide. At Randall Landscaping, we’ve been changing outdoor spaces across the Merrimack Valley and Southern New Hampshire since 2006, and we would be honored to help bring your vision to life.