The Fast Track to a Perfect Lawn
Professional sod installation is the quickest way to achieve a lush, green lawn without waiting months for grass seed to grow. If you’re looking to understand what professional sod installation involves, here’s what you need to know:
Professional Sod Installation at a Glance:
- Soil preparation – Removal of old grass, tilling soil, adding amendments
- Grading – Creating proper drainage with 1-2% slope away from structures
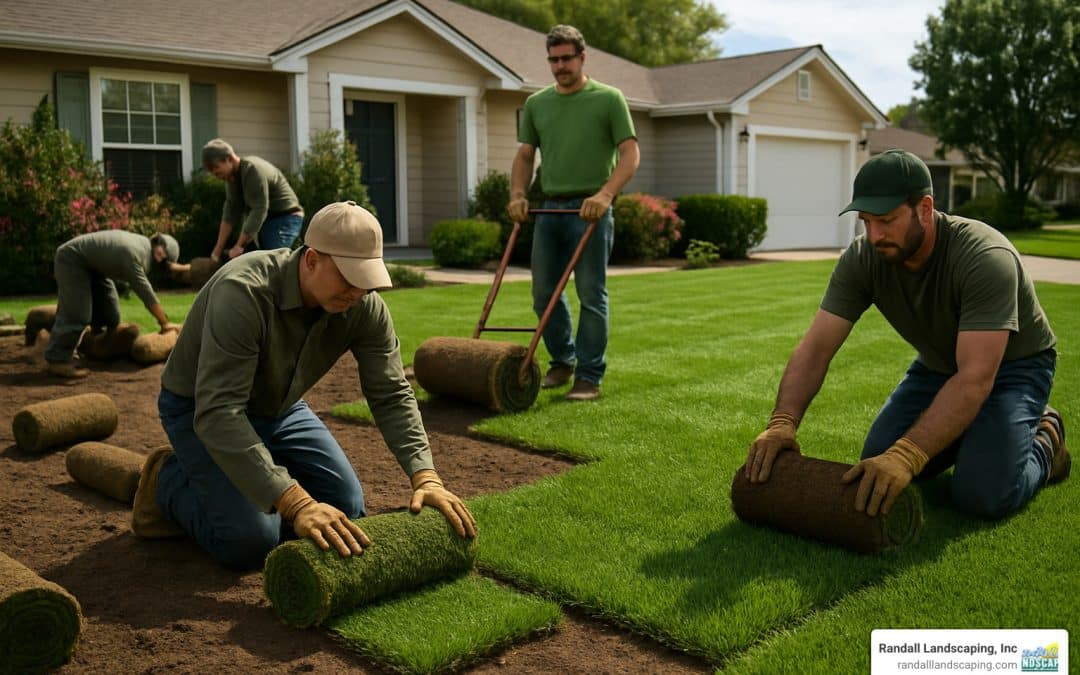
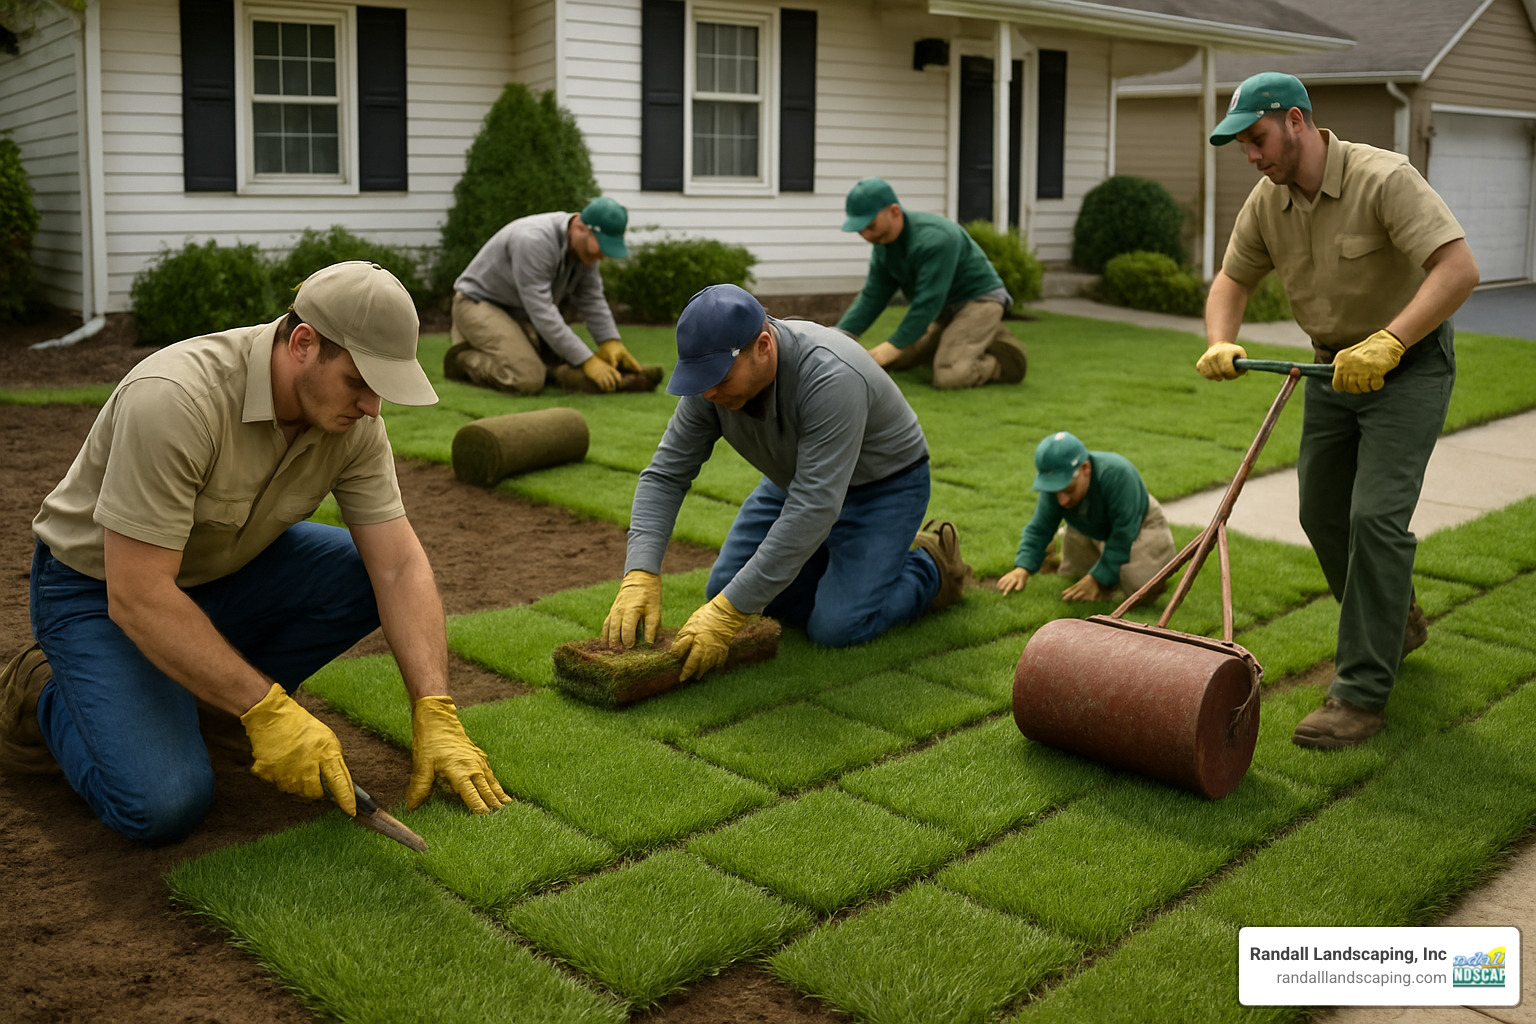
- Sod laying – Installing fresh grass in a brick-like pattern with tight seams
- Rolling – Pressing sod into soil contact to eliminate air pockets
- Initial watering – Thorough soaking within 30 minutes of installation
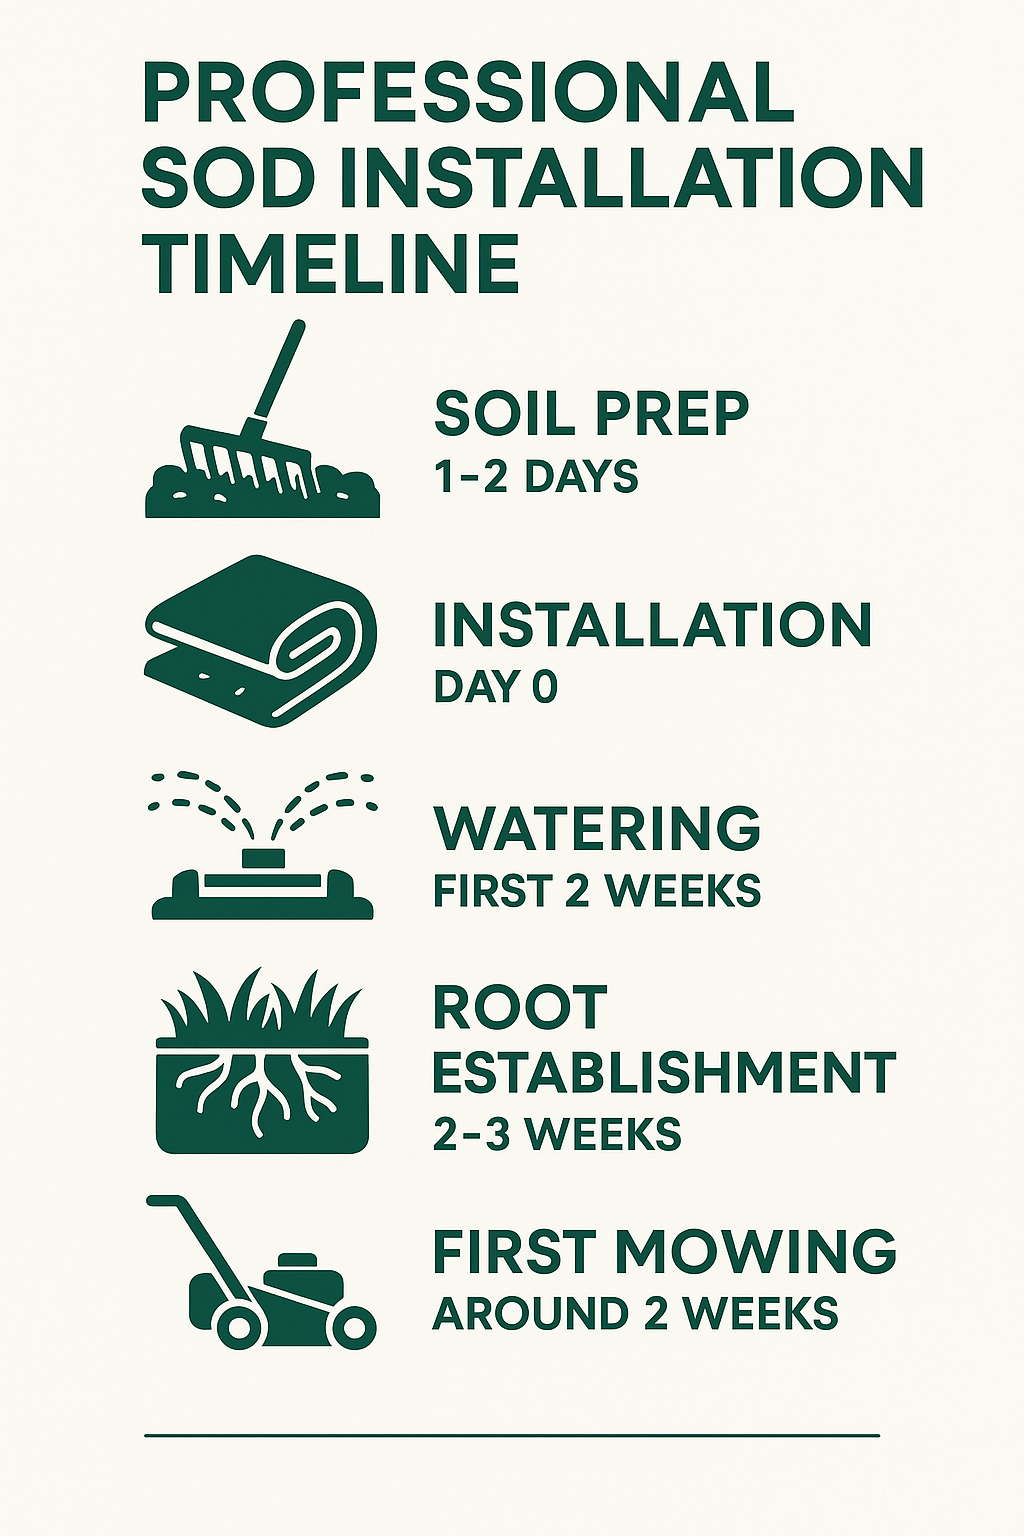
- Establishment period – Special care for 2-3 weeks until roots develop
Installing sod delivers immediate results and transforms your property instantly, unlike seeding which can take months to establish. While DIY installation is possible, professional services ensure proper soil preparation, expert grading, and seamless installation that leads to healthier, longer-lasting results.
Growing a lawn from seed takes patience, effort, and perfect weather conditions. With professional sod installation, you get an instant lawn that’s fully established in about two weeks, allowing you to enjoy your outdoor space sooner.
I’m Tommy Randall, and as the owner of Randall Landscaping, I’ve overseen hundreds of professional sod installation projects across Massachusetts and New Hampshire since 2006, changing bare dirt into vibrant, healthy lawns that stand the test of time.
Sod vs Seeding: Key Differences & Benefits
Choosing between sod and seed is one of the biggest decisions you’ll make when creating a new lawn. As we’ve helped hundreds of homeowners throughout the Merrimack Valley and Southern New Hampshire transform their properties, we’ve seen how this choice affects both immediate satisfaction and long-term lawn health.
Professional sod installation offers remarkable benefits that simply can’t be matched by seeding, especially for homeowners who value immediate results and minimal maintenance headaches:
| Feature | Sod | Seed |
|---|---|---|
| Establishment Time | 2-3 weeks | 1-3 months |
| Initial Appearance | Instant green lawn | Bare soil until germination |
| Weed Competition | Minimal – dense turf suppresses weeds | High – seeds compete with weed seeds |
| Erosion Control | Immediate protection | None until establishment |
| Water Requirements | High initially, then normalizes | Consistent light watering for weeks |
| Best Installation Season | Spring through fall (even summer with proper watering) | Fall ideal, spring acceptable |
| Cost | $0.35-$3.00 per sq ft (materials + labor) | $0.10-$0.30 per sq ft (materials + labor) |
| Labor Intensity | Moderate to high | Low to moderate |
I often tell our clients that with sod, you’re essentially buying time. “That gorgeous green turf has been carefully nurtured for 14-18 months by professional growers,” I explain. “You’re investing in skipping the most challenging phase of lawn establishment.”
Why Homeowners Pick Sod
When we talk with homeowners across Methuen, North Andover, and surrounding communities, they consistently mention these compelling reasons for choosing professional sod installation:
Instant results transform your property overnight. Just last spring, we installed sod for a Methuen family who was hosting a graduation party. Three weeks later, their guests were enjoying games on a lush, established lawn – something that would have been impossible with seed.
Fewer weeds make maintenance significantly easier. The dense mat of established grass in sod creates an immediate barrier against weed seeds, unlike the scattered bare spots that inevitably occur with seeding.
Erosion stop capabilities provide immediate protection. A North Andover client whose property backed up to a conservation area chose sod specifically to prevent soil runoff – an environmental benefit that seed simply couldn’t provide.
Beyond these primary benefits, sod offers remarkable water savings in the long run. While it needs consistent moisture during the first two weeks, seeded lawns require careful, frequent watering for months. The establishment speed also means your lawn is ready for light use in weeks rather than months.
When Seeding Makes Sense
Despite my enthusiasm for sod, I’m always honest with clients about situations where seeding might be the better choice:
The budget option is certainly seeding, particularly for very large properties. If you’re landscaping acres rather than a standard residential lot, the cost difference becomes significant.
For large acreage in areas like Windham or Pelham, the logistics of sod delivery and installation can become challenging, making seed a more practical alternative.
Properties with extremely difficult access might also favor seeding, as might homeowners seeking specific grass varieties not commonly available as sod in our region.
That said, for most residential properties throughout the Merrimack Valley and Southern New Hampshire, professional sod installation delivers value that far exceeds its additional cost. The immediate curb appeal, reduced maintenance headaches, and faster time to enjoyment make it the preferred choice for homeowners who value both their time and their outdoor living space.
Picking the Perfect Sod for Your Lawn
Selecting the right type of sod is crucial for long-term lawn success. In the Merrimack Valley and Southern New Hampshire, climate conditions require careful consideration of grass varieties.
“Soil testing before sod selection is one of the most overlooked steps in professional sod installation,” notes our turf specialist. “We’ve seen beautiful sod fail simply because it wasn’t matched properly to the existing soil conditions.”
At Randall Landscaping, we consider several key factors when recommending sod varieties for your property. Your lawn’s success starts with understanding your unique climate zone – the Merrimack Valley and Southern NH fall primarily in USDA zones 5b-6a, which means cool-season grasses thrive here, handling our cold winters and moderate summers beautifully. (See the USDA Plant Hardiness Zone Map for more detail.)
Your soil type matters tremendously too. The sandy soils closer to coastal areas like Salisbury need different grass varieties than the heavy clay soils common throughout Lawrence or Methuen. We often find that taking the time to evaluate soil composition saves homeowners significant headaches down the road.
Sun exposure is another critical factor. That gorgeous Kentucky bluegrass might look perfect in your neighbor’s sunny yard, but if your property sits under mature oak trees, you’ll need specialized shade-tolerant varieties to achieve similar results.
We also consider how you’ll use your lawn. A family with three active kids and a golden retriever needs a more resilient turf than someone primarily interested in curb appeal. And finally, we look at irrigation availability – some properties have sophisticated sprinkler systems while others rely on rainfall or manual watering.
Regional Sod Recommendations
For our Massachusetts and New Hampshire service area, we typically recommend these cool-season grass varieties that have proven successful over our many years of installations:
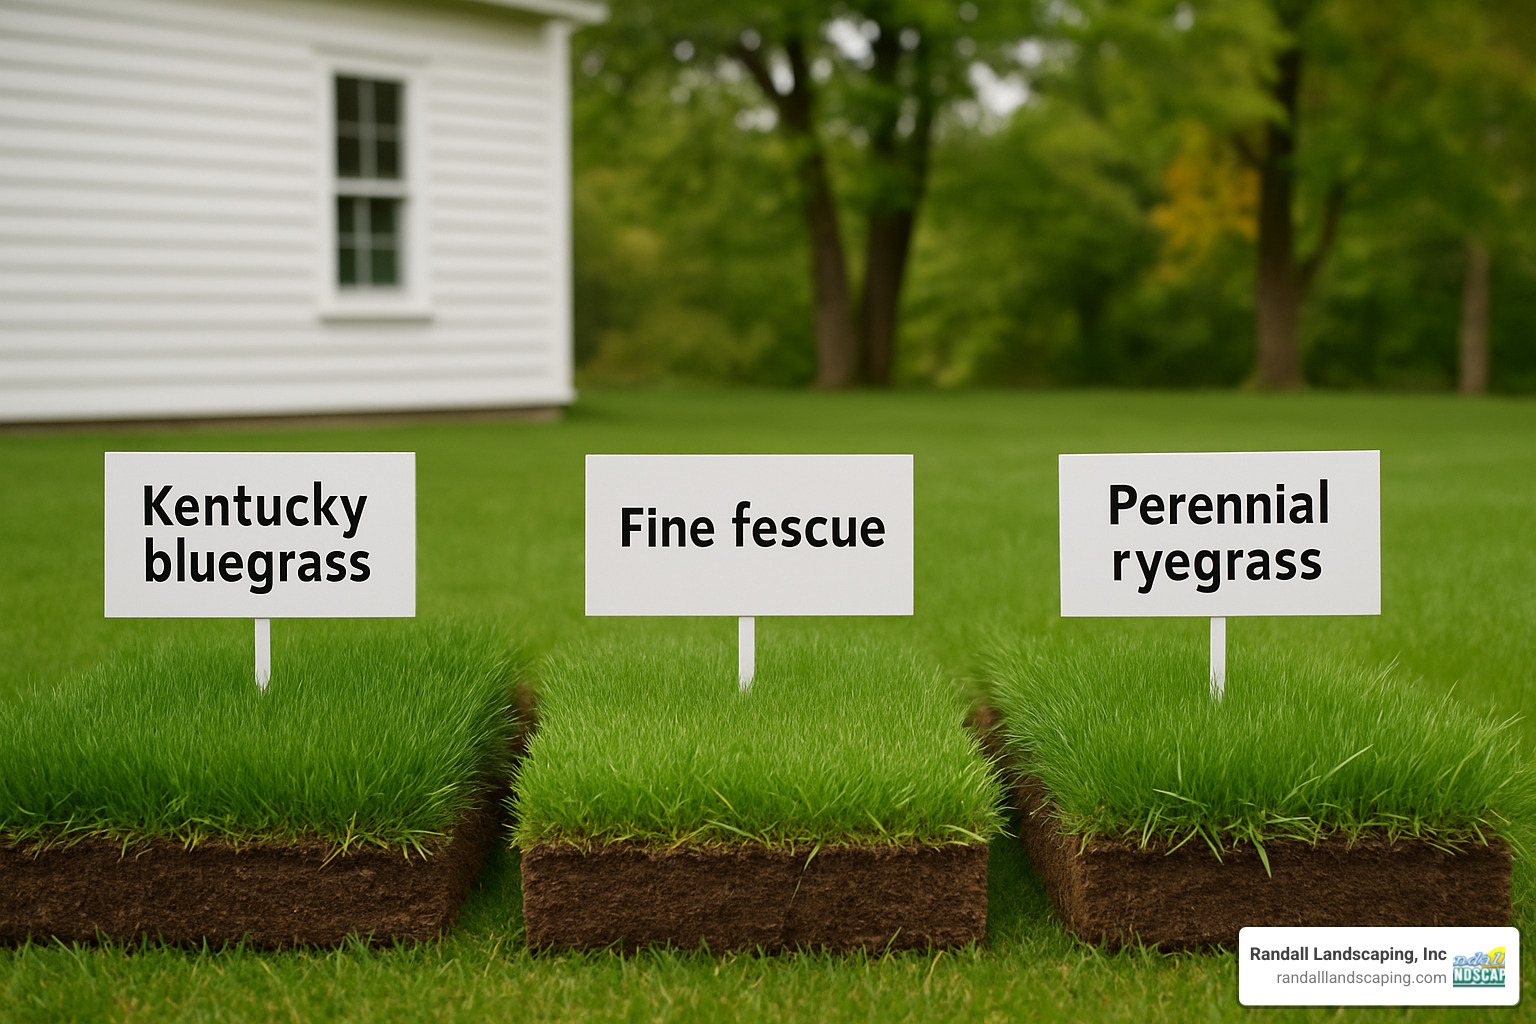
Kentucky Bluegrass has earned its reputation for excellence in sunny locations. Its self-healing properties mean it can recover from minor damage, and that rich blue-green color creates a carpet-like appearance that homeowners in Andover and North Andover particularly love.
Tall Fescue Blends offer remarkable adaptability with excellent drought tolerance and good shade performance. We’ve had great success with these varieties in mixed-sun properties throughout Windham and Salem, where they handle varying conditions with minimal fuss.
Fine Fescue Mixes deliver superior shade tolerance, making them ideal for wooded properties in Boxford and Georgetown. They require less fertilizer and water than other varieties, making them environmentally friendly options for eco-conscious homeowners.
Perennial Ryegrass Blends establish quickly and stand up well to wear and tear. These qualities make them suitable for active families in Dracut and Methuen who don’t want to wait long before enjoying their outdoor spaces.
Most of our professional sod installations actually use carefully crafted blends of these varieties, offering balanced performance across various conditions rather than putting all your eggs in one basket with a single grass type.
Matching Sod to Site Conditions
Every property presents unique challenges that require thoughtful solutions. For shaded areas where trees filter the sunlight, we recommend fine fescue blends that can thrive with as little as 4 hours of filtered sunlight. “Shade-grown grass is more susceptible to disease since it stays covered with dew longer,” cautions our turf expert. “We often adjust our maintenance recommendations for these areas to prevent fungal issues.”
Drought-prone sites with sandy soils or limited irrigation in towns like Atkinson or Plaistow benefit from drought-resistant tall fescue varieties. These grasses develop deeper root systems that can seek out moisture even during dry periods, reducing the need for constant watering.
Athletic families in North Reading and Pelham love how Kentucky bluegrass and perennial ryegrass blends recover quickly from wear and tear. These varieties have special cells at the base of each plant that allow for rapid regeneration after being trampled during backyard soccer games.
Poor soil conditions present in some older developments require special attention. Where construction fill has left challenging growing conditions, we may recommend extensive soil remediation before installing specific hardy sod varieties. This extra step makes all the difference between a struggling lawn and a thriving one.
A client in Merrimack Valley recently shared: “I was skeptical when Randall suggested a different grass type for my backyard than my front yard, but three years later, both areas are thriving despite very different sun conditions. That attention to detail is exactly why we hired professionals.”
The perfect sod for your lawn isn’t just about aesthetics – it’s about creating a sustainable, low-maintenance green space that will thrive in your specific environment for years to come.
Professional Sod Installation Process (Step-by-Step)
Professional sod installation is much more than simply rolling out grass onto dirt. It’s a carefully choreographed process that requires planning, precision, and attention to detail at every turn.
At Randall Landscaping, we’ve refined our installation process over thousands of projects throughout the Merrimack Valley and Southern New Hampshire. Here’s the comprehensive workflow we follow for every sod project:

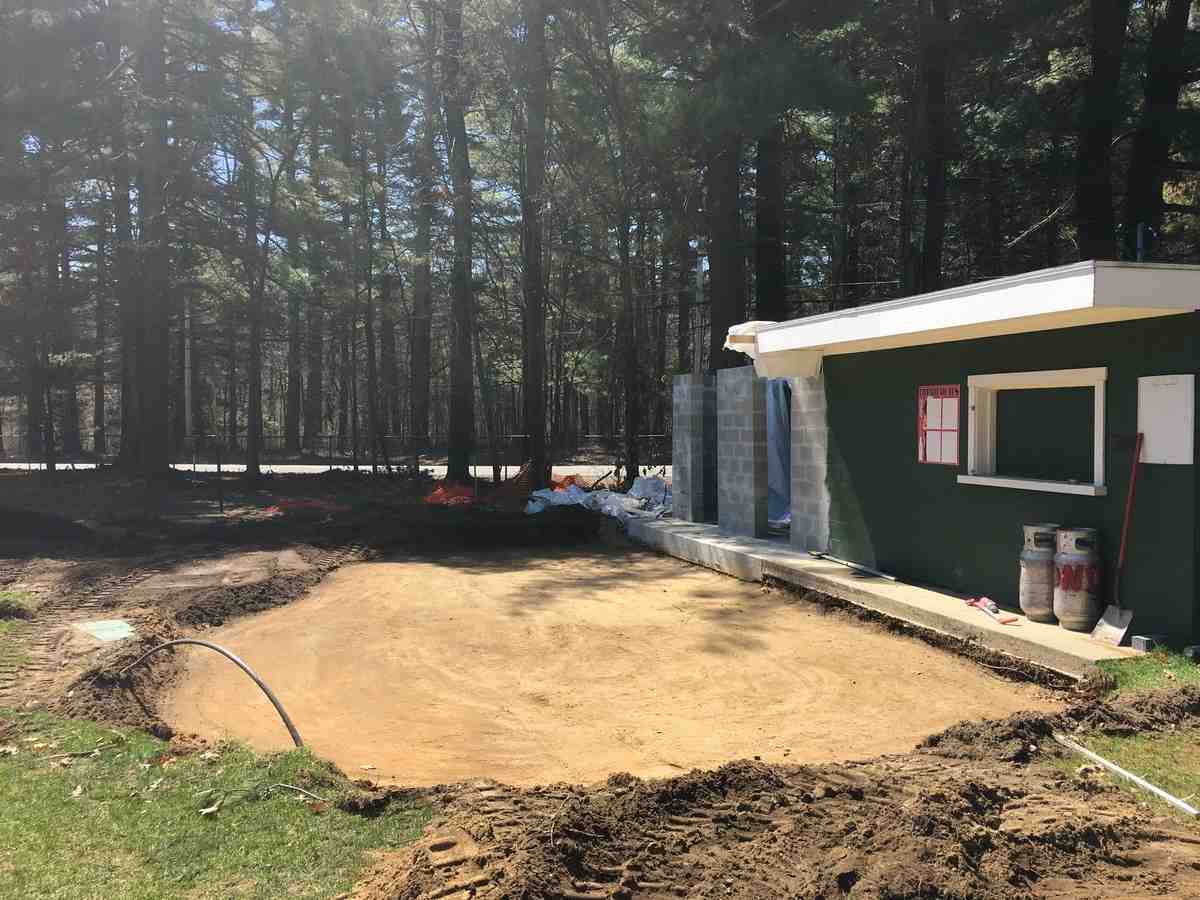
Soil Preparation Essentials for Professional Sod Installation
The foundation of successful professional sod installation lies in thorough soil preparation. As Jake, one of our veteran crew leaders often tells clients, “Sod is only as good as what’s underneath it!”
We start by completely clearing the site of existing vegetation. For those Boxford properties with thick established weeds, we might use specialized equipment to strip the top layer without disturbing the soil structure beneath. This clean slate is essential for what comes next.
Soil testing isn’t just a formality—it’s our roadmap. We collect samples from multiple areas of your property to analyze pH and nutrient levels. New England soils are notoriously acidic, and knowing exactly what we’re working with allows us to make precise amendments custom to your specific conditions.
“I remember a project in North Andover where the soil test revealed extremely acidic conditions,” shares Tommy, our owner. “We added twice the usual amount of lime, and that lawn is still thriving five years later. Without that test, we would have been guessing.”
Based on test results, we incorporate amendments like lime to raise pH (very common in our region), or organic matter like compost to improve soil structure. For clay-heavy soils common in parts of Lawrence, we might add sand to improve drainage.
Next comes the deep tilling, where we loosen the top 4-6 inches of soil. This critical step relieves compaction and allows new sod roots to penetrate quickly. For severely compacted sites, like that former construction staging area we renovated in Methuen last year, we might use a chisel plow to reach deeper soil layers.
Grading is where science meets art. We establish proper drainage patterns with a gentle 1-2% slope away from your home’s foundation. That translates to a 1-2 foot drop over 100 feet of distance—just enough to prevent pooling without creating erosion concerns.
When necessary, we add a layer of quality topsoil to achieve the ideal growing medium depth. This is particularly important for sandy properties in coastal areas like Salisbury, where moisture retention is a challenge.
The final soil preparation steps include a starter fertilizer application rich in phosphorus to encourage rapid root development, followed by a light rolling to create a firm but not compacted base. This eliminates air pockets that could prevent good sod-to-soil contact.
“Like the strength of a building comes from its foundation, your lawn’s long-term health depends on what we do before the first piece of sod ever touches the ground,” notes our soil specialist Maria. “This is why we never cut corners during preparation.”
Day-Of Professional Sod Installation Timeline
The day of professional sod installation requires military-like precision and coordination. Early morning typically begins with sod delivery, which we arrange within 24 hours of harvesting to ensure maximum freshness.
“We prefer night-harvested sod whenever possible,” explains our procurement specialist. “It’s cut during cooler temperatures, which means less stress on the grass and better performance once installed.”
Our crews begin installing immediately upon delivery, starting from a straight edge—typically a driveway or walkway—and working outward. This provides a solid reference point and ensures the most visible areas look their absolute best.
The placement technique is crucial. Each piece is laid tightly against adjacent pieces, with seams staggered in a brickwork pattern. This prevents those telltale straight lines that can be visible as the lawn matures and creates a more natural-looking finished product.
“The secret is in the seams,” shares Mike, our lead installer with 22 years of experience. “No gaps, no overlaps—each piece needs to kiss its neighbor perfectly.” Around obstacles like trees, beds, and hardscape features, we use sharp utility knives to make precise cuts.
For curved areas—like that winding garden path we installed in Andover last spring—we use a dart-cutting technique similar to what tailors use to fit fabric around contours. It’s a small detail that makes a huge difference in the finished appearance.
Once a section is laid, we roll it with a water-filled roller to press the sod firmly against the soil. This step eliminates air pockets and ensures good root-to-soil contact, which is essential for quick establishment.
Within 30 minutes of installation, we begin thorough irrigation, applying approximately 1 inch of water. This initial soaking needs to penetrate through the sod and into the soil beneath, creating the perfect environment for roots to begin growing downward.
Before we consider a project complete, we conduct a thorough edge inspection, checking all areas along hardscapes to ensure proper height alignment and making any necessary adjustments.
A typical 1,000 square foot lawn can be completely transformed by our professional crew in a single day. For larger projects, like that 12,000 square foot estate in North Andover, we carefully phase the work to ensure no sod sits uninstalled for more than a few hours.
The result? A lush, vibrant lawn that looks like it’s been growing in place for years, not hours. And with our careful attention to every step in the process, your new lawn will have the strongest possible foundation for long-term success.
Cost of Professional Sod Installation & Choosing a Contractor
Let’s talk dollars and sense when it comes to professional sod installation. Understanding what goes into the cost helps you budget properly and recognize the true value you’re getting when that beautiful green carpet transforms your property.
Based on our experience serving the Merrimack Valley and Southern New Hampshire since 2006, here’s what homeowners typically invest in a professional installation:
Average Cost Ranges for Professional Sod Installation:
– Materials Only (Sod): $0.35-$0.85 per square foot
– Full Installation (Including Labor & Materials): $0.75-$3.00 per square foot
– Typical 1,000 sq ft Lawn: $750-$3,000 total project cost
Note: These are average costs based on internet data and not actual costs for Randall Landscaping. Your specific project may vary based on site conditions and requirements.
Average Pricing & What Influences It
When we prepare estimates for our clients, several key factors come into play that can significantly affect your final investment.
The size of your property naturally impacts cost, but not always in the way you might think. While larger projects have a higher total price tag, they often benefit from lower per-square-foot costs thanks to efficiency of scale. That small urban yard in Lawrence might actually cost more per square foot than that sprawling estate in Boxford!
Site accessibility can be a hidden cost factor many homeowners don’t consider. If our crews need to wheel materials through narrow gates or around obstacles, the additional labor adds up. As one of our foremen likes to say, “The distance from the truck to the backyard is measured in sweat, not feet.”
The condition of your existing soil often determines how much preparation work is needed. Poor soil might require additional amendments like compost or lime, especially common in our New England soils which tend toward acidity. Some properties need extensive grading work to ensure proper drainage – something you’ll appreciate during our region’s spring thaws and summer thunderstorms.
Your choice of sod variety affects pricing too. Premium Kentucky bluegrass costs more than standard mixes, but its self-healing properties and rich color might be worth the investment for your front yard showcase.
Don’t forget about debris removal – hauling away old turf and soil can add considerably to project costs, especially with rising disposal fees in our area. And timing matters too – installations during peak seasons (spring and fall) may come at premium prices due to high demand.
Questions to Ask Before Hiring a Professional Sod Installation Company
Finding the right contractor makes all the difference between a lawn that thrives for years and one that struggles from day one. Here’s what to ask when interviewing potential installers:
Start with basics about their experience and specialization. At Randall Landscaping, we’re proud that lawn installation represents a significant portion of our business – it’s not just a side service we offer.
Always verify insurance and licensing. Any reputable contractor should readily provide proof of liability insurance and workers’ compensation coverage. This protects both you and the workers on your property.
The soil preparation process reveals a lot about a contractor’s quality standards. Listen for specific steps like soil testing, amendment addition, and proper grading techniques. If they gloss over this critical phase, consider it a red flag.
Ask about their sod source and freshness guarantees. Quality sod should be installed within 24 hours of harvesting – we often arrange early morning deliveries so installation can begin immediately while the sod is at its freshest.
Professional installers should be able to explain their installation technique in detail, including how they handle seams (staggered in a brick pattern) and ensure soil contact (water-filled roller).
Don’t overlook warranty terms. Quality installers typically offer at least a 30-day establishment warranty, though terms vary. Understand exactly what’s covered and what might void that coverage.
Proper irrigation guidance is essential for new sod success. Your installer should provide detailed watering instructions specific to your property and the season of installation. Some companies (like ours) can even help with irrigation system adjustments or installation.
Ask about post-installation support – will they check in after a week or two? Do they offer follow-up fertilization or troubleshooting if issues arise?
Be clear on payment terms before work begins. Be wary of contractors requesting full payment upfront – a reasonable deposit followed by payment upon satisfactory completion is standard practice.
Finally, request references from recent installations in your specific area. A quality contractor will happily provide these, and following up with these homeowners can provide valuable insights into the company’s reliability and quality.
“The questions clients ask tell me a lot about how they’ll be to work with,” shares Tommy Randall. “The best projects come from homeowners who do their homework and understand what goes into quality installation.”
At Randall Landscaping, we welcome these questions during the estimation process – they help us demonstrate the value we bring to your professional sod installation project.
More info about Residential Landscaping Services
New Sod Care & Long-Term Maintenance
The beauty of professional sod installation is that it gives you an instant lawn – but keeping it lush and healthy requires attentive care, especially during those crucial first weeks. Think of your new sod like bringing home a new pet; it needs consistent care to thrive in its new environment.
Watering & Mowing Schedule for Professional Sod Installation
Water management is the make-or-break factor for new sod success. Without proper moisture, even perfectly installed turf can quickly deteriorate.
“I always tell clients that the watering schedule is their homework assignment,” says Tommy Randall. “Follow it diligently, and you’ll be rewarded with a lawn that looks like it’s been there for years.”
For best results, follow this proven watering timeline:
Week One (Days 1-7):
Your new sod is in survival mode and needs consistent moisture. Water 3-4 times daily for about 5-10 minutes per session, focusing on morning and afternoon waterings. The goal is to keep the sod consistently moist without creating puddles. Lift a corner occasionally to check that water is reaching the soil beneath – that’s where roots need to grow.

Week Two (Days 8-14):
As roots begin developing, it’s time to encourage them to grow deeper. Reduce to once-daily watering but increase the duration to about 30 minutes. This deeper watering trains roots to reach down into the soil rather than staying near the surface. By day 14, you should feel some resistance if you gently tug on a corner of the sod – a good sign that roots are establishing.
Weeks Three-Four (Days 15-28):
Now you’re transitioning to a normal lawn care routine. Water every other day for 30-40 minutes, continuing to encourage deep root growth. Your sod should be firmly rooted by now, and the grass will likely be ready for its first haircut when it reaches about 3-3.5 inches tall.
After First Month:
Congratulations! Your sod has established itself. You can now water according to your grass type’s needs – typically about 1 inch per week, applied in 1-2 deeper waterings rather than frequent light sprinklings.
“Many homeowners have the best intentions to manually water their new sod – but the reality is, life happens,” notes our irrigation specialist. “That’s why we often recommend installing or adjusting irrigation systems as part of the professional sod installation process.”
When it comes to mowing your new lawn, patience is key. Wait until the sod is firmly rooted and reaches about 3-3.5 inches in height – typically 2-3 weeks after installation. Set your mower deck high for the first cutting, removing no more than one-third of the blade height. Sharp mower blades are essential to prevent tearing the still-developing grass. For the first few mowings, avoid sharp turns that could potentially lift edges of not-fully-established sod.
For fertilization, less is more initially. The sod comes pre-fertilized from the farm, so additional fertilizer too soon can actually burn developing roots. Wait approximately 6 weeks before applying a balanced fertilizer with nitrogen, phosphorus, and potassium. After that, follow a seasonal fertilization schedule appropriate for your specific grass type and regional needs.
Research from the Turfgrass Producers International confirms that proper watering during the establishment phase is the single most important factor in successful sod installation. Their studies show that proper watering in the first 14 days can increase root establishment by up to 300% compared to inadequate irrigation.
Scientific research on turf watering can be found at Turfgrass Watering Guide and Post-Installation Care
More info about Landscape Maintenance Services
Troubleshooting Common Sod Problems
Even with perfect installation, occasional issues can arise with new sod. Here’s how to spot and solve common problems:
Poor Rooting can show up as sod that lifts easily when pulled, curling edges, or general yellowing. This typically happens from insufficient watering, poor soil contact, or inadequate soil preparation. The solution is usually increasing your watering frequency, rolling areas with poor contact, and ensuring proper soil moisture beneath the sod.
Brown Patches appearing as circular or irregular brown areas in otherwise green turf can be concerning. These might be caused by fungal disease, insect damage, pet urine, or inconsistent watering. Adjust your watering to morning hours only (evening watering promotes fungal growth), apply appropriate fungicide if disease is confirmed, and repair severely damaged areas if necessary.
Seam Separation shows up as visible lines or gaps between sod pieces. This typically happens due to shrinkage from drying out, improper installation, or soil settling. The fix is ensuring consistent moisture across the entire lawn and filling noticeable gaps with quality topsoil. In severe cases, overseeding those areas might be necessary.
Slow Greening where your sod remains pale or yellowed weeks after installation can be frustrating. This may indicate nutrient deficiencies, soil pH issues, or simply shock from the harvest and installation process. Once roots are established, a light fertilization might help, but soil testing is the best way to identify specific deficiencies. Sometimes, patience is the best solution as the sod recovers from transplant shock.
“One Andover client called in a panic about yellow patches in their new lawn,” recalls our service manager. “We finded they were overwatering in some areas, creating anaerobic soil conditions. A simple adjustment to their irrigation system solved the problem within a week.”
At Randall Landscaping, we don’t just install your sod and disappear. We provide ongoing support to help you steer these early challenges and establish a healthy, vibrant lawn that will be the envy of your neighborhood for years to come.
Frequently Asked Questions about Professional Sod Installation
How soon can I walk on my new sod?
It’s natural to be excited about your new lawn, but patience is key for long-term success. For the first week after professional sod installation, try to stay off your new grass as much as possible. The occasional careful step to move a sprinkler is fine, but regular foot traffic should wait.
“We always tell our Merrimack Valley clients to do the ‘tug test’ before resuming normal lawn activities,” says our customer service team. “Just gently pull up on a corner of sod – if you feel resistance, that means roots are beginning to establish.”
After about 2-3 weeks, when the sod has knitted firmly into your soil, you can return to normal use. For families with children and pets, this waiting period can be challenging. Some of our clients in Andover and North Andover opt for phased installation, keeping part of their yard accessible while new sections establish.
What warranty should I expect from installers?
Reputable companies typically offer a 30-day establishment warranty on professional sod installation, provided you follow the proper care instructions. A good warranty should cover:
The sod’s ability to root properly (assuming proper watering)
Any significant discoloration not caused by improper care
Grading or drainage issues that were part of the installation scope
At Randall Landscaping, customer satisfaction drives everything we do. If your sod doesn’t establish properly despite following our care instructions, we’ll address the issue promptly – that’s our promise to you.
Be aware that most warranties come with customer responsibilities, particularly regarding watering. Many installers around Salem and Windham require automated irrigation systems for summer installations to ensure warranty coverage. This requirement isn’t arbitrary – consistent watering is absolutely critical during those first few weeks.
How much effort does DIY sod require compared to hiring pros?
Many homeowners in Southern New Hampshire underestimate the challenge of DIY sod installation. What looks straightforward on weekend home improvement shows is actually quite demanding in reality.
With DIY installation, you’ll need to rent or buy specialized equipment like sod cutters, rototillers, and lawn rollers. Timing becomes critical – sod begins deteriorating quickly after harvest, so you’ll need to install it within hours of delivery. Those pallets are heavy too, weighing 1,500-3,000 pounds each, making this a physically demanding project.
Professional sod installation brings efficiency and expertise to the table. Our crews arrive with all necessary equipment and the knowledge to handle soil testing, amendments, and proper grading techniques. The work typically progresses 2-3 times faster than DIY efforts, and you benefit from our years of experience.
“A family in North Reading called us midway through their DIY sod project,” our operations manager recalls with a smile. “They were surprised by how physically demanding and technically challenging the process was, especially when working around landscape features. We helped rescue their project, and they told us they wished they’d hired professionals from the start.”
For most homeowners in Merrimack Valley, the value of professional sod installation significantly outweighs potential DIY savings, particularly when considering your lawn’s long-term health and appearance. After all, your lawn is an investment in your property’s value and your family’s enjoyment of the outdoors.
Conclusion
A beautiful, healthy lawn isn’t just a pretty addition to your home—it’s a valuable investment that improves your property’s curb appeal, creates usable outdoor space, and provides environmental benefits. Professional sod installation offers the quickest and most reliable path to achieving the lawn you’ve always wanted.
Here at Randall Landscaping, we’ve transformed countless bare and troubled yards throughout the Merrimack Valley and Southern New Hampshire into lush, vibrant landscapes. Our clients often tell us how surprised they are at the immediate change—and how delighted they remain years later.
“The difference between a DIY lawn and professional installation is like night and day,” one of our North Andover clients shared. “We tried seeding ourselves for two years with patchy results before calling Randall. We wish we’d done it sooner!”
What makes professional sod installation so valuable? It all comes down to expertise at every stage:
First, proper soil preparation creates the foundation for success. Just as you wouldn’t build a house on a poor foundation, your new lawn needs properly prepared soil to thrive long-term. Our team tests and amends your soil specifically for your property’s unique conditions.
Next, expert installation techniques ensure your new lawn not only looks good immediately but establishes strong roots quickly. The way we stagger seams, roll for soil contact, and carefully fit around landscape features makes a noticeable difference in both appearance and health.
After installation, the first few weeks are critical. Our detailed care instructions, follow-up support, and availability to answer questions help you steer this crucial establishment period with confidence. Many clients tell us they appreciate having an expert to call when they notice something unusual during those first few weeks.
While DIY sod installation might appear cost-effective initially, the expertise, proper equipment, and warranties we provide deliver superior long-term value. We often hear from clients who tried the DIY route first but ended up calling us to fix issues—which ultimately costs more than hiring professionals from the start.
Whether you’re establishing a lawn for a new construction home in Windham, renovating a tired landscape in Methuen, or addressing problem areas in your Andover property, professional sod installation gives you immediate results that only get better with time.
Ready to transform your outdoor space with a lush, healthy lawn that’s the envy of the neighborhood? Contact us today to schedule a consultation and find how our professional sod installation services can help you create the outdoor space you’ve always dreamed of having.
More info about new lawn installation