What You Need to Know About Rain Sensor Installation (Quick Answer)
Rain sensor installation is one of the simplest upgrades you can make to an irrigation system — and one of the smartest.
Here’s a quick overview of how it works:
- Mount the sensor in an open spot that gets direct rainfall — a roof eave, fence post, or gutter edge works well.
- Run the wires (wired models) or mount the receiver near your controller (wireless models).
- Connect to your controller by removing the jumper wire between the sensor terminals and attaching the sensor wires.
- Adjust the sensitivity dial to your preferred rainfall threshold (typically 1/4 inch for most lawns).
- Test the system by pressing the manual test pin — your sprinklers should shut off within seconds.
That’s the short version. Read on for the full step-by-step breakdown.
Your sprinklers don’t know it’s raining. Without a rain sensor, your system will happily run a full watering cycle in the middle of a downpour — wasting water, oversoaking your lawn, and sending fertilizer straight into the storm drain. Studies show that a properly installed rain sensor can cut outdoor water use by up to 30%, which adds up fast over a New England summer.
The good news? This is a DIY-friendly upgrade that most homeowners can complete in under an hour. Whether you have a Hunter, Rain Bird, Orbit, Toro, or another brand of irrigation controller, the process follows the same basic logic.
I’m Tommy Randall, owner of Randall Landscaping, Inc., and since 2006 I’ve installed and serviced irrigation systems across Southern New Hampshire and Massachusetts — including more rain sensor installations than I can count. If you want to get rain sensor installation right the first time, this guide will walk you through everything, from picking the right sensor to wiring it up and testing it.

Related content about Rain sensor installation:
Why Rain Sensor Installation is a Game-Changer for Your Lawn
Water is a precious resource, especially during our dry, hot spells in places like North Andover, MA, or Salem, NH. When you let your sprinklers run during a rainstorm, you aren’t just wasting money on your water bill; you’re also damaging your landscaping.
Overwatering leads to soggy lawns, shallow root systems, and a higher susceptibility to turf diseases like red thread or dollar spot. It also causes nutrient runoff, washing away the expensive fertilizers you applied to keep your lawn green. By pausing your watering schedule automatically, you prevent oversaturated soil and ensure your grass grows deep, healthy roots. Local guidelines, such as those found on the Water Conservation – Rain Sensors | North Andover, MA page, highlight how crucial these small devices are for municipal water conservation efforts.
Integrating a rain sensor is one of the most cost-effective Level Up Your Lawn: Essential Irrigation System Upgrades you can make. It transforms a standard, rigid watering schedule into a responsive, semi-smart system that respects the local weather.
Wired vs. Wireless Rain Sensors: Which is Right for You?
When planning your rain sensor installation, your first major decision is choosing between a wired and a wireless model. Both utilize hygroscopic expansion discs (small cork-like discs that swell when wet and contract as they dry), but they communicate with your controller differently.
- Wired Rain Sensors: These models are highly reliable and budget-friendly. They require a physical wire to run from the outdoor sensor location back to your indoor or outdoor controller. If your controller is in the garage and you can easily mount the sensor on a nearby eave, a wired model is an excellent choice.
- Wireless Rain Sensors: These systems use a battery-powered transmitter on the sensor and a receiver wired directly into your controller. They are incredibly easy to install because you don’t have to fish 25 to 50 feet of wire through your siding, soffits, or foundation. They typically feature a wireless range of 300 feet to 700 feet line-of-sight, making them ideal for larger properties or complex layouts.
| Feature | Wired Rain Sensors | Wireless Rain Sensors |
|---|---|---|
| Average Cost | Lower upfront cost | Moderate upfront cost |
| Installation Difficulty | Harder (requires routing physical wire) | Easier (no wire path to plan outdoors) |
| Power Source | Low-voltage draw from controller | Batteries in sensor (typically last 5-8 years) |
| Signal Reliability | 100% immune to wireless interference | High, but limited by range and physical obstacles |
| Smart Features | Basic shutoff | Often include freeze sensors, bypass modes, and low-battery alerts |
Many wireless models, such as those detailed in the WRS 53770 manual, also feature built-in freeze sensors that shut off your system when temperatures drop to 37°F or below, preventing dangerous ice patches from forming on your driveway or walkways.
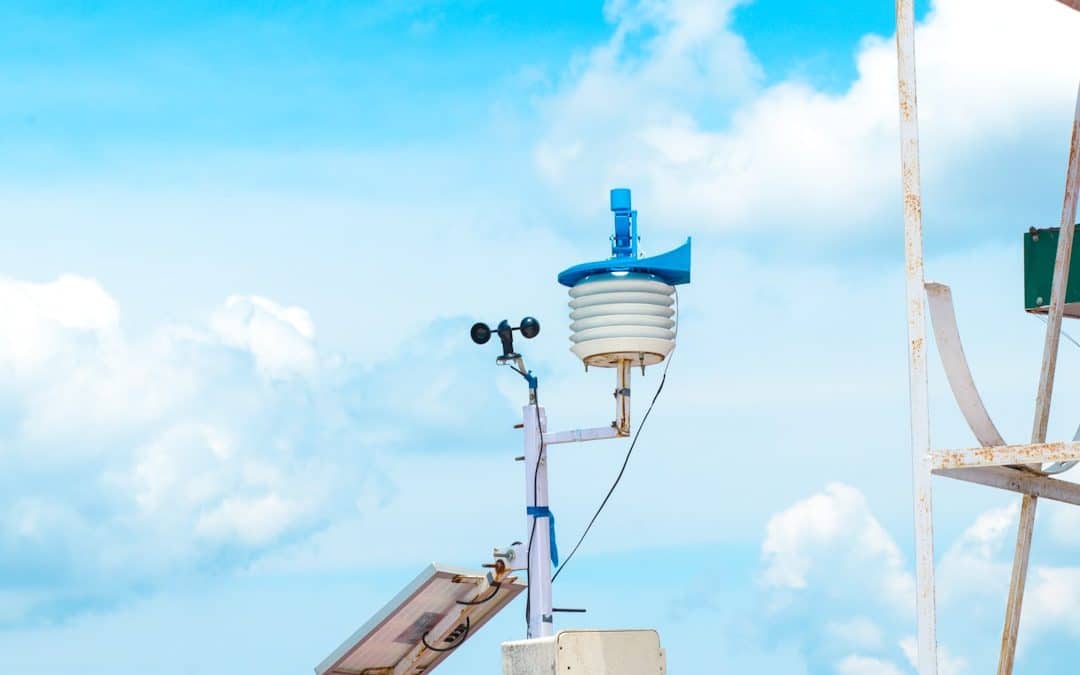
Choosing the Perfect Location and Mounting Your Sensor
Location is everything. If you mount your rain sensor in the wrong spot, it will either fail to shut off your system when it rains, or it will keep your sprinklers off for days after the storm has passed.

To ensure accurate performance, follow these location guidelines:
- Unobstructed Rainfall: Mount the sensor in a completely open area. Avoid placing it under roof overhangs, gutters, mature trees, or tall privacy fences that could shield it from falling rain.
- Away from Sprinkler Spray: Make sure no sprinkler heads can spray water directly onto the sensor. If your sprinklers wet the sensor, it will shut down your system prematurely during a normal watering cycle.
- Similar Sun Exposure: Try to mount the sensor where it receives a similar amount of sunlight as your lawn. If you mount it in a dark, damp, northern corner of your house, the hygroscopic discs will stay wet and keep your system off long after your sunny front yard has dried out and needs water.
- Height and Accessibility: Mount it high enough to prevent vandalism or accidental damage from lawnmowers, but close enough to the roofline or gutter so you can safely clean it once a year.
Common Mounting Options:
- Gutter Mount: Many kits include a quick-clip bracket that clamps directly onto the edge of your gutter with a simple thumbscrew. This is the fastest and least invasive mounting option.
- Wall/Eave Mount: Using stainless steel screws, you can secure the mounting bracket directly to a fascia board, siding, or a wooden fence post. Ensure the bracket holds the sensor in a perfectly vertical orientation so water collects evenly.
Step-by-Step Wired and Wireless Installation
Before you begin, always remember the golden rule of working on irrigation electronics: Disconnect the power to your controller. While irrigation systems run on safe, low-voltage 24VAC power, shorting out a live terminal with a screwdriver can permanently fry your controller’s main circuit board.
If you need to extend the wire on a wired sensor beyond the standard 25 feet included in the box, use high-quality, outdoor-rated direct burial wire. Use 20 AWG wire for runs up to 50 feet, 18 AWG for up to 100 feet, and 16 AWG for anything longer.
For reference, standard wired models like the RSD Rain Sensor utilize a simple two-wire connection that interrupts the common circuit when wet.
Wired Rain Sensor Installation on Hunter Controllers
Hunter controllers make rain sensor installation incredibly straightforward because they feature dedicated, color-coded sensor terminals (labeled “SEN” or “SEN/SEN”).
Here is how to install a wired Hunter Rain-Clik or similar sensor:
- Locate the controller’s terminal strip and find the two terminals labeled SEN.
- You will see a metal or plastic jumper wire connecting these two terminals. This jumper completes the electrical circuit; without it (or a connected sensor), the controller will not run any watering cycles. Remove this jumper wire and save it in a safe place.
- Route your rain sensor wire through the bottom access opening of the controller cabinet.
- Insert one of the sensor wires into one SEN terminal, and the other wire into the second SEN terminal. Tighten the screws securely.
- Turn the controller’s bypass switch to “Active” (or “Sensor ON”) so the system recognizes the new hardware.
For detailed official diagrams, you can consult the Wired Rain-Clik Installation Instructions | Hunter Industries manual. If you aren’t comfortable routing wires through your walls or foundation, our team at Randall Landscaping can handle your Professional Sprinkler System Installation or upgrade quickly.
Rain Sensor Installation on Non-Hunter Controllers
If you have a controller without dedicated sensor terminals, don’t panic. You can still install a rain sensor by wiring it “in-line” with your system’s common wire. This method works on any standard 24VAC controller on the market.
- Locate the terminal labeled C or COM (Common) on your controller’s terminal strip.
- Disconnect the main common wire (usually white) that runs out to your sprinkler valves.
- Take one of your rain sensor wires and connect it directly to the C terminal on the controller.
- Take the second rain sensor wire and twist it together with the valve common wire you just disconnected, securing them with a waterproof wire nut.
- By doing this, you have placed the rain sensor switch in the middle of the common circuit. When the sensor gets wet, it opens the switch, breaking the connection and instantly shutting off all valves.
For more information on wiring configurations, check out the Rain-Clik ™ Rain Sensors Installation Instructions sheet.
Wireless Rain Sensor Installation and Pairing
Installing a wireless rain sensor, like the Rain Bird WR2 or Toro model, involves installing a receiver next to your controller and mounting the wireless transmitter outdoors.

Here is how to install and pair a wireless system:
- Mount the Receiver: Fasten the wireless receiver to the wall right next to your irrigation controller using screws or double-sided tape.
- Wire the Receiver: A wireless receiver requires both power and sensor connections. It typically has four wires:
- Two Red Wires (Power): Connect these to the 24VAC terminals on your controller to power the receiver.
- White and Blue (or Green) Wires (Sensor): Connect these to your controller’s SEN terminals (after removing the jumper wire).
- Position the Antennas: For maximum signal range, ensure the receiver’s antenna points straight up, and the outdoor transmitter’s antenna points straight down.
- Pair the Devices:
- Apply power to the controller.
- Press and hold the Pair or Learn button on the receiver for three seconds.
- Press and hold the manual test spindle on the outdoor sensor for three seconds.
- The signal indicator lights on the receiver will flash, confirming that the two units have successfully paired and are sharing a unique digital address code.
- Check Signal Strength: Before permanently mounting the outdoor sensor on your gutter or eave, hold it in its intended location and check the receiver’s signal indicator. A steady light indicates a strong connection, while a blinking light means you may need to relocate the sensor closer to the controller.
To see this process in action, you can watch the How to Install a Rain Bird Wireless Rain Sensor (Video) tutorial. Upgrading your system with a wireless sensor is a fantastic way to modernize your Garden Irrigation System with Timer without tearing up your lawn or siding to run wires.
Fine-Tuning, Testing, and Troubleshooting Your Rain Sensor
Once your rain sensor installation is complete, you need to calibrate it for your specific property.
Most modern rain sensors feature two primary adjustments:
- Rainfall Sensitivity Dial: This dial controls how much rain must fall before the sensor triggers a system shutdown. You can typically adjust this from 1/8 inch up to 3/4 inch. If you live in a highly humid area or have heavy clay soil that holds water, set it to 1/8 inch. For sandy soils that dry out quickly (common in parts of Southern New Hampshire), set it to 1/4 inch or 1/2 inch to allow a bit more rain to fall before pausing your sprinklers.
- Vent Ring (Drying Time): Below the rainfall dial, you’ll find an adjustable side vent ring. This ring controls how fast the hygroscopic discs dry out after a storm.
- Fully Open Vents: The discs dry out quickly, matching the drying rate of a lawn in full sunlight.
- Closed Vents: The discs dry out slowly, keeping your system paused longer. Use this setting if your yard has heavy shade or areas where water tends to pool.
For detailed calibration tips, you can refer to the Universal Wireless Rain/Freeze Sensor guide.
Testing and Verifying Your System
Don’t wait for the next major thunderstorm to find out if your rain sensor works. You can test it in under two minutes.
- Go to your controller and manually start a watering cycle on a zone you can easily see from the controller or sensor location.
- Walk over to the outdoor rain sensor.
- Locate the manual test pin or spindle protruding from the top of the sensor cap.
- Depress the spindle with your finger and hold it down for a few seconds. You should hear a distinct click as the internal switch opens.
- Look at your sprinklers. They should shut off instantly. When you release the spindle, the sprinklers should resume watering (unless your controller has a built-in delay).
- If the sprinklers do not shut off, double-check your wiring connections and verify that the controller’s bypass switch is set to “Active” rather than “Bypass.”
Troubleshooting Common Rain Sensor Issues
If your rain sensor isn’t behaving, use this quick troubleshooting checklist to diagnose the problem:
Issue 1: The system won’t turn off when it’s pouring rain.
- Check for Obstructions: Ensure no overhanging tree branches, gutters, or rooflines are blocking rain from hitting the sensor.
- Verify the Bypass Switch: Make sure your controller’s manual bypass switch is set to “Active” or “Sensor ON.”
- Inspect the Discs: Over time, dirt, pollen, and debris can build up inside the sensor housing, preventing the hygroscopic discs from expanding. Unscrew the cap, wash the discs with clean water (do not use soap), and let them dry before reassembling.
Issue 2: The system won’t turn on, even though the weather is bone-dry.
- Check the Jumper Wire: If you recently removed the rain sensor but didn’t reinstall the original jumper wire across the SEN terminals, your controller will think the sensor is permanently wet.
- Check for Broken Wires: If you have a wired model, inspect the wire path for breaks caused by weed whackers, pests, or garden tools. A broken wire creates an open circuit, which tells the controller to stay off.
- Low Battery (Wireless): If the receiver’s power light is flashing or showing an amber warning, the outdoor transmitter’s batteries are likely dead. Replace them with fresh CR2032 lithium button cells.
For comprehensive wiring schematics and diagnostics, you can download the 53770 Z troubleshooting guide.
Frequently Asked Questions About Rain Sensors
How much does rain sensor installation cost?
Based on average internet data, a professional rain sensor installation typically ranges from $150 to $750+. The wide range accounts for basic wired DIY installations on the low end versus high-end wireless systems with integrated freeze sensors installed by a licensed professional on complex commercial or residential properties.
Please note: These are average industry costs based on national internet data and do not represent actual pricing for Randall Landscaping, Inc. For an accurate, personalized quote for your property, please contact us directly.
To understand how this fits into your overall landscaping budget, you can read our comprehensive guide on the Cost of Garden Irrigation System installations.
How long do rain sensor batteries and discs last?
The hygroscopic discs inside your rain sensor are incredibly durable, but they do eventually break down after years of exposure to harsh New England winters. On average, you can expect the discs to last 5 to 10 years before they lose their elasticity and need to be replaced. Replacement disc stacks are highly affordable and take only two minutes to drop into the sensor housing.
For wireless models, the transmitter batteries are designed to last between 5 and 8 years under normal operating conditions. Most modern wireless receivers will flash a warning light when the transmitter battery drops below a certain voltage, giving you plenty of time to swap them out before the watering season starts.
Can I use a rain sensor with a smart Wi-Fi controller?
Yes! Most smart Wi-Fi controllers (like the Hunter Hydrawise or Orbit B-hyve) are fully compatible with physical rain sensors.
While smart controllers use local weather station data from the internet to adjust your watering schedule, a physical rain sensor acts as an invaluable local backup. If a sudden, localized summer thunderstorm hits your neighborhood in Windham or Boxford but misses the nearest airport weather station ten miles away, your online controller won’t know it rained. A physical rain sensor on your roof ensures your system shuts down immediately, regardless of what the internet says.
If you are thinking about upgrading your system, check out our guide on choosing the best Garden Irrigation System Timer for your property.
Conclusion
Installing a rain sensor is a simple, highly effective way to conserve water, save money, and protect the health of your lawn. Whether you choose a classic wired model or a modern wireless system, taking the time to set up and calibrate your sensor correctly will pay dividends for seasons to come.
If you live in the Merrimack Valley or Southern New Hampshire — including Amesbury, Andover, Atkinson, Boxford, Dracut, Georgetown, North Andover, North Reading, Pelham, Salem, Windham, Methuen, Lawrence, or Plaistow — and would rather leave your irrigation upgrades to the experts, we are here to help.
At Randall Landscaping, Inc., we’ve built our reputation on 100% reliable service and top-quality workmanship. Whether you need a simple rain sensor upgrade or a complete Garden Sprinkler System Installation, our experienced team will ensure your lawn gets exactly the water it needs — and none of the water it doesn’t.
Ready to upgrade your irrigation system? Contact us today to schedule a consultation with our friendly team!