The Complete Guide to Sod Installation Cost
What Is Sod Installation? (Quick Answer)
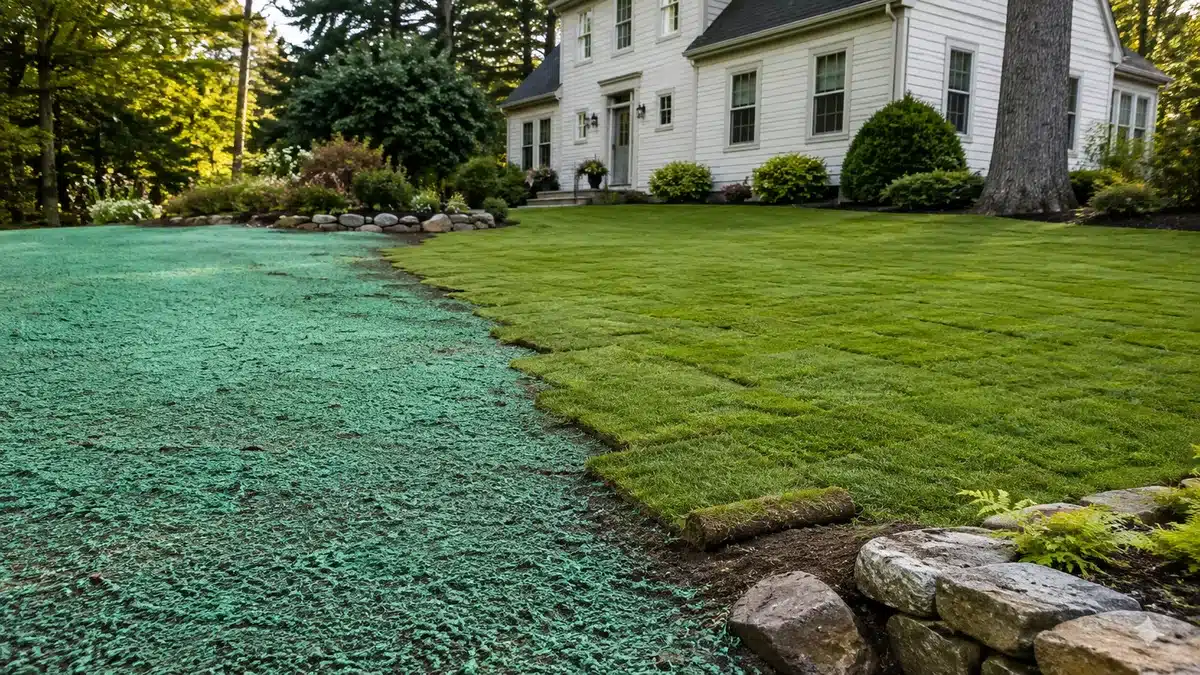
Sod installation is the process of laying pre-grown grass, cut with roots and soil attached, directly onto prepared ground to create an instant lawn. It's the fastest way to go from bare dirt to a full, green lawn.
Here's what you need to know at a glance:
| Topic | Quick Answer |
|---|---|
| Time to establish | Initial rooting in 10-14 days; fully rooted in 2-6 weeks |
| Best time to install | Fall for cool-season grasses; late spring to summer for warm-season |
| DIY material cost | ~$0.30, $0.80 per sq ft |
| Professional install cost | ~$0.75, $3.50 per sq ft (average internet pricing, not a Randall Landscaping quote) |
| Sod vs. seed | Sod is faster; seed is cheaper for large areas |
| Can you lay over old grass? | No, always remove existing turf first |
| When to first mow | 3-4 weeks after installation |
If your lawn has reached the point of no return, more weeds than grass, bare patches everywhere, or just a muddy mess after a new construction, sod gives you a real lawn in a single weekend instead of waiting months for seed to fill in.
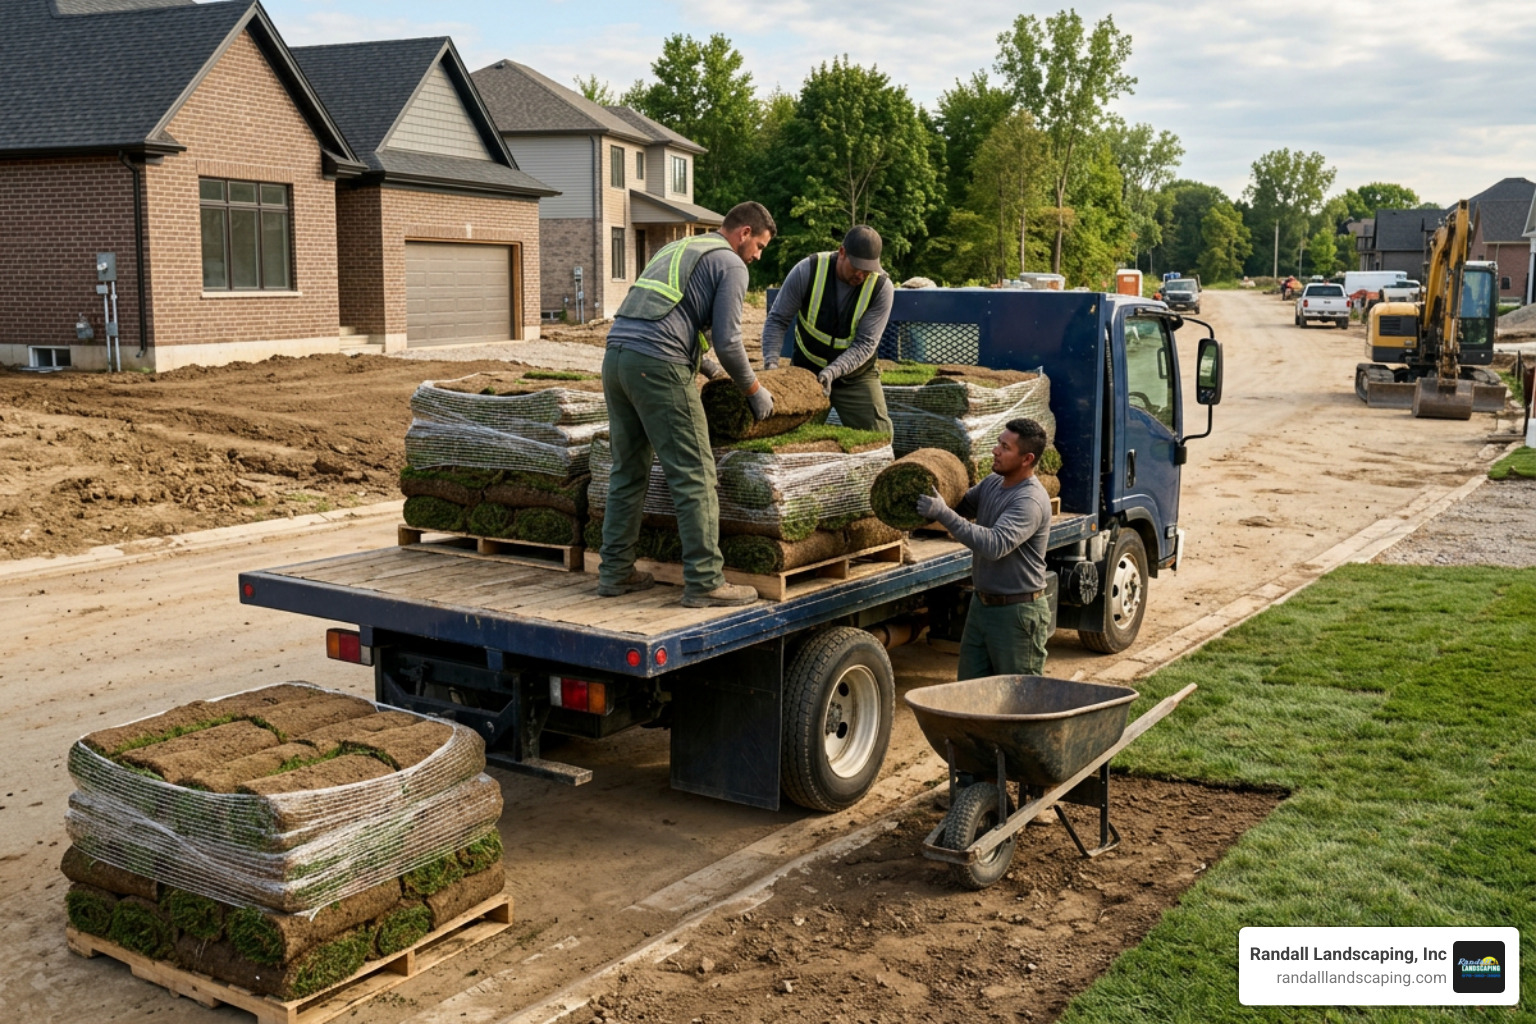
A standard pallet covers 450-500 sq ft and can weigh close to a ton. That alone tells you this isn't a small undertaking. Done right, though, it's one of the most satisfying home improvements you can make.
I'm Tommy Randall, owner of Randall Landscaping, Inc., and I've been handling sod installation projects across Southern New Hampshire and Massachusetts since 2006. In this guide, I'll walk you through everything, costs, soil prep, laying technique, and aftercare, so you know exactly what's involved whether you're doing it yourself or hiring a pro.
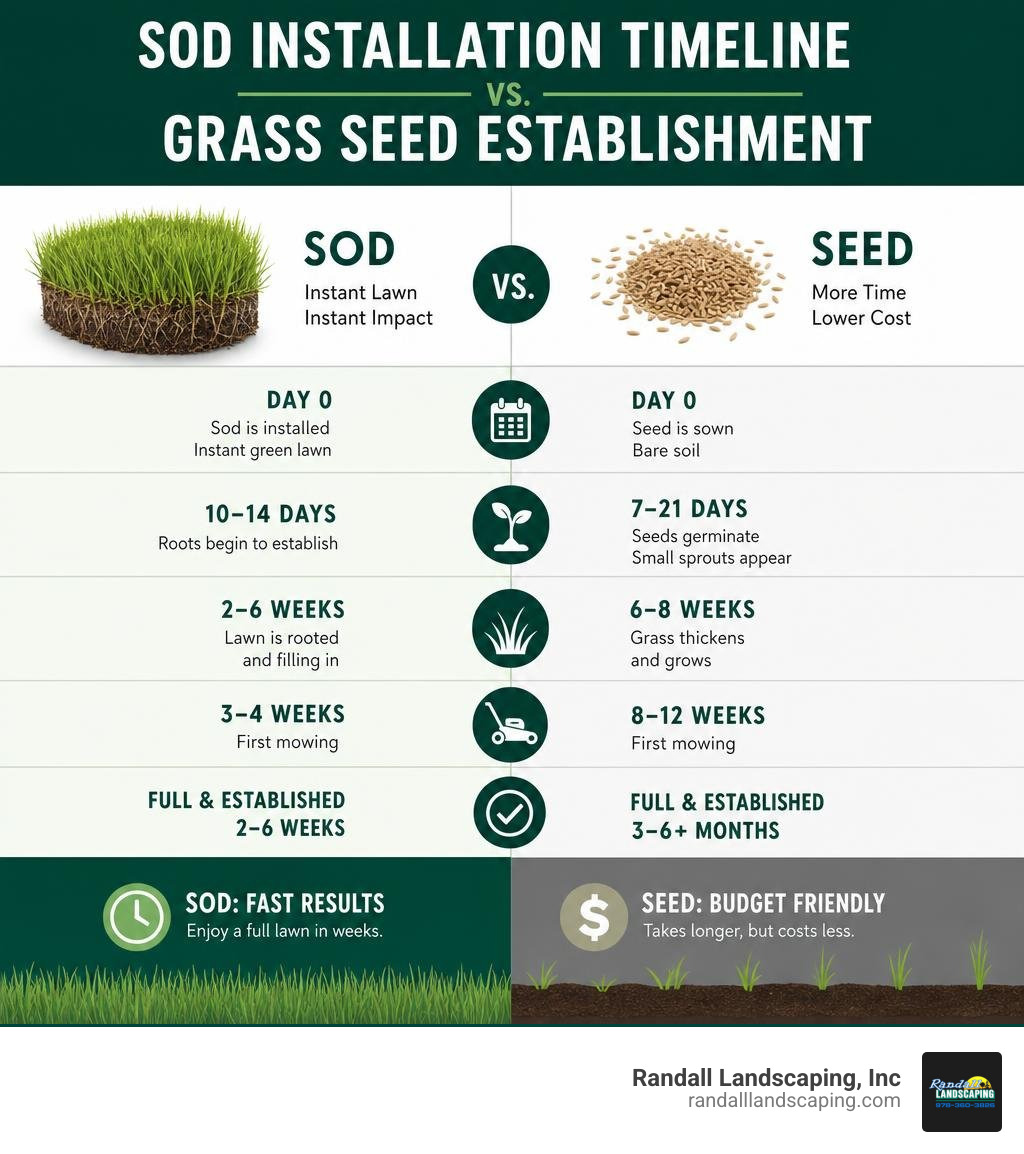
Sod vs. Seed: Pros, Cons, and Long-Term Value
When homeowners in towns like Andover, North Reading, or Windham look to overhaul a failing lawn, the debate almost always comes down to sod versus seed.
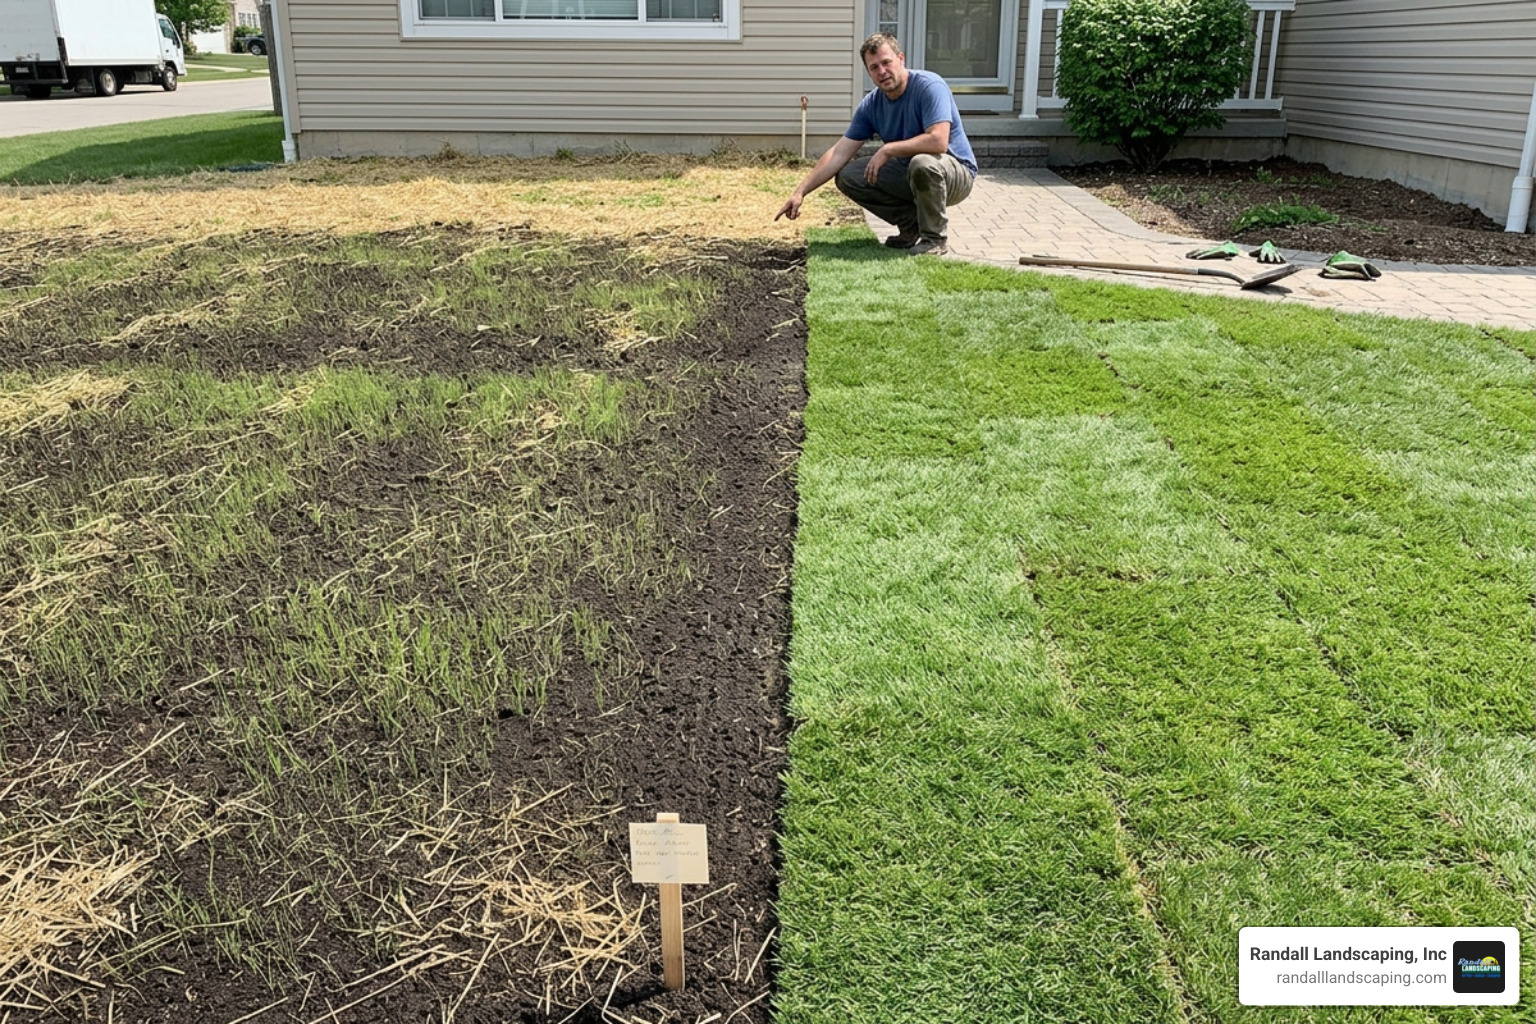
To make the right choice for your property, it helps to understand the trade-offs in cost, labor, and long-term viability. For a deep dive into the biological differences, check out our Real Grass Installation Ultimate Guide.
The Case for Sod
Sod is the ultimate choice for instant gratification. It is a mature, pre-grown turf blanket harvested directly from local sod farms.
- Instant Usability: Within two weeks of consistent watering, the roots bond with your soil, giving you a fully functional lawn.
- Erosion Control: Sod is a lifesaver for sloped properties in hilly areas of Pelham or Boxford. It acts like an anchor, immediately holding the soil in place during heavy New England rainstorms.
- Weed Suppression: Because sod is already dense and mature, weed seeds dormant in your loam struggle to find light and space to germinate.
The Case for Seed
Grass seed is significantly cheaper upfront. If you are trying to cover a massive, multi-acre commercial lot, seeding is highly cost-efficient. However, it requires immense patience and luck.
- The Long Wait: It takes 6 to 12 weeks of meticulous care just to get a delicate, patchy green haze.
- High Failure Rates: A single torrential downpour can wash away thousands of dollars of seed and topsoil, leaving muddy ruts in your yard.
- Weed Battles: All local soil contains weed seeds. When you water bare dirt to grow grass, you are also watering crabgrass, dandelions, and clover.
| Feature | Sod Installation | Traditional Grass Seeding |
|---|---|---|
| Upfront Cost | Moderate to High | Very Low |
| Establishment Speed | 2-3 weeks (fully usable) | 2-3 months (delicate) |
| Erosion Risk | Virtually zero | Extremely high |
| Labor/Care Intensity | High watering for 14 days | High watering & weed management for months |
| Initial Weed Presence | Near zero | High (competes with weeds immediately) |
Average Sod Installation Cost: DIY vs. Professional
Before ordering pallets of grass, you need to understand the financial landscape of this project.
Note: The pricing figures listed below are average costs based on national internet data and do not represent actual project pricing or quotes for Randall Landscaping, Inc.
When evaluating the sod installation price, you will find a wide range of pricing. Across the internet, professional installation typically ranges from $0.75 to $3.50 per square foot for labor and materials.
However, because every yard is unique, the actual cost can vary dramatically. For straightforward, flat yards with easy access, costs lean toward the lower end. For highly complex yards featuring steep slopes, narrow gates, extensive grading, or heavy rock removal, professional installation pricing can range anywhere from $0.75 to $7.50 per square foot, meaning specialized, high-end custom projects can easily cost more than three times the typical average.
To understand how to budget for your specific property, you can read the How to Install Sod Yourself, Step-by-Step DIY Guide (2026).
DIY Sod Installation Cost Breakdown
If you decide to tackle this project yourself to save on labor, your primary expenses will be materials and tool rentals. For a detailed analysis of raw material costs, read our guide on Sod Pricing 101: What is the Real Price for Installing Sod.
Here is what a typical DIY budget looks like for a 2,000-square-foot lawn in 2026:
- Sod Pallets: A standard pallet covers 450 square feet. For 2,000 square feet, you will need 5 pallets (which includes a 10% safety buffer for cuts and odd angles). At an average of $150 to $350 per pallet, expect $750 to $1,750 for the turf.
- Sod Cutter Rental: Essential for removing your old, dead lawn. Renting one costs roughly $80 per day.
- Rototiller Rental: To loosen compacted soil 4 to 6 inches deep. Expect $60 to $100 per day.
- Lawn Roller Rental: To press the sod flat and eliminate air pockets. Costs around $30 to $50 per day.
- Compost and Soil Amendments: To add 2 inches of organic matter across the yard, you will need about 12 to 15 cubic yards of compost, costing $300 to $500.
- Starter Fertilizer: High-phosphorus fertilizer to stimulate root growth costs about $30 to $50.
Total Estimated DIY Cost: $1,250 to $2,530 (plus a massive amount of physical labor and sweat).
Professional Sod Installation Cost Factors
If you hire a professional team to handle the job, the investment increases, but it guarantees that the heavy lifting, site prep, and technical grading are done perfectly. For more on professional pricing structures, read about the Cost of Laying Sod.
Several regional and property-specific factors influence professional rates in the Merrimack Valley and Southern New Hampshire:
- Yard Accessibility: Can our heavy machinery easily access your backyard? If we have to transport tons of sod through a narrow 36-inch pedestrian gate using wheelbarrows instead of a skid steer, labor hours will increase.
- Slopes and Terraces: Laying sod on steep banks in places like Salem or Dracut requires pinning the sod pieces down with turf staples so they do not slide. This added step increases labor time.
- Soil Preparation and Obstacles: If your soil is full of New England granite, buried roots, or heavy clay, we must spend extra time tilling, grading, and hauling away debris before we can lay a single piece of grass.
- Old Turf Disposal: Hauling away tons of stripped old grass and soil requires heavy dump trucks and disposal fees, which are built into professional quotes.
Preparing Your Yard: The Secret to Sod Success
Ask any professional greenskeeper: 90% of sod success happens before the grass even arrives. If you lay premium turf over hard, compacted, nutrient-starved dirt, it will die. Period.
To give your new lawn the best start, follow these critical preparation steps. For a comprehensive breakdown, read The Ultimate Guide to Getting Your Ground Ready for Sod.
Step 1: Soil Testing
A professional soil analysis is the smartest $20 you will ever spend. Collect soil samples from a depth of 3 to 5 inches across your yard. You are looking for:
- pH Levels: Cool-season grasses thrive in a pH range of 6.0 to 7.0. If your soil is too acidic (common in New Hampshire pine forests), you must add agricultural lime. If it is too alkaline, you will need sulfur.
- Nutrient Levels: The test will tell you exactly what nutrients your soil lacks.
Step 2: Clearing and Stripping
You must completely remove all existing grass, weeds, and debris. We recommend using a heavy-duty, walk-behind sod cutter to slice beneath the root zone of your old lawn. Do not simply till the old grass into the dirt, as it will rot underneath your new sod, creating air pockets and fungal issues.
Step 3: Tilling and Amending
Using a rototiller, loosen the soil to a depth of 4 to 6 inches. This breaks up compaction and allows new roots to easily penetrate the earth.
- Organic Matter: Incorporate 1 to 2 inches of rich compost into the top 3 inches of your native soil. This improves water retention in sandy soils (like those near Dracut) and drainage in heavy clay soils.
- For scientific guidelines on soil physical properties, refer to the Purdue University Extension Turfgrass Guide.
Step 4: Final Grading and Drainage
Rake the entire area smooth, removing any stones larger than a golf ball. Grade the soil so it slopes gently away from your home’s foundation at a rate of at least 1 foot of drop for every 50 feet of distance.
Critical Tip: Make sure the final soil level sits exactly 3/4 to 1 inch below adjacent hard surfaces like driveways, walkways, and patios. Because sod has its own layer of soil and roots, this step ensures the mature grass sits perfectly flush with your hardscaping rather than spilling over it.
Step-by-Step Guide to Laying and Establishing Sod
Once your soil is prepped and your sod is delivered, the clock starts ticking. Sod is a living, breathing plant with a very short shelf life. In the summer heat, it must be installed within 24 hours of harvest (and ideally within 12 hours) to prevent the roots from drying out and dying on the pallet.
Here is how to execute a flawless installation. For more details on the physical process, read our guide on Laying Sod.
1. Dampen the Soil
Before laying the turf, lightly mist the prepared soil. This cools the ground and prevents the dry dirt from sucking all the moisture out of the fresh sod roots.
2. Start Along a Straight Edge
Find the longest straight edge on your property, such as a driveway, patio, or fence line. Lay your first row of sod pieces end-to-end along this line.
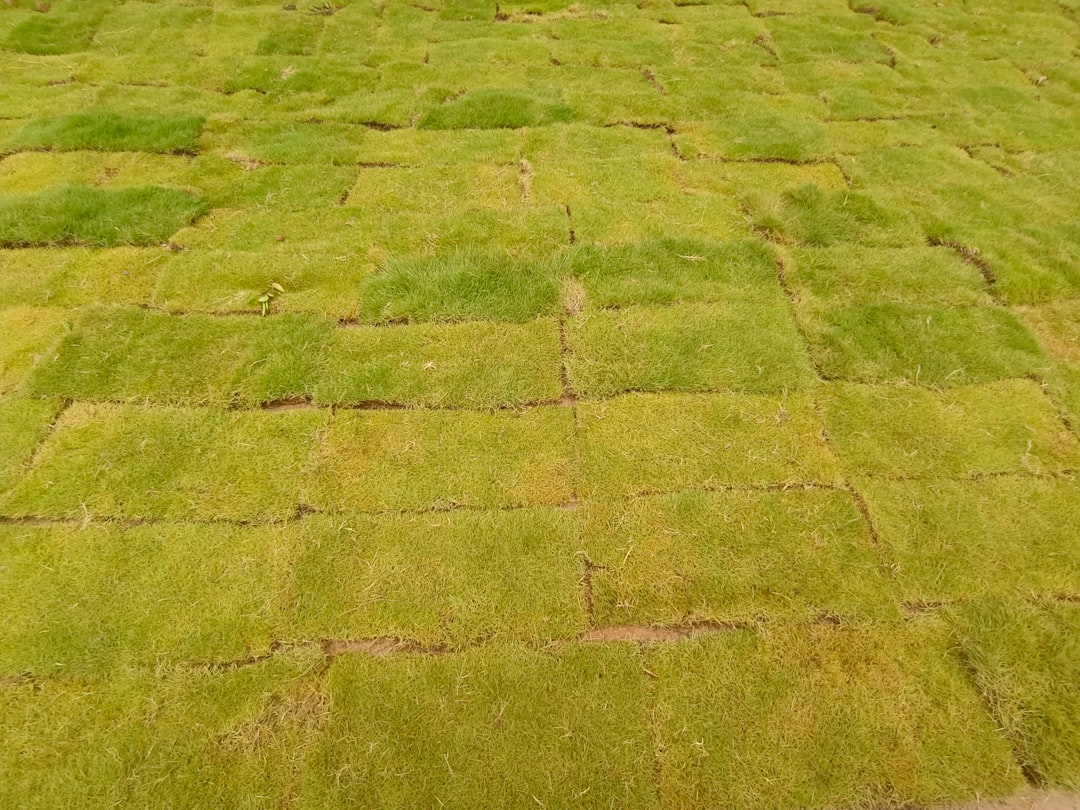
3. Use a Staggered Brick Pattern
For the second row, cut the first piece of sod in half. This ensures the seams of the second row are offset from the seams of the first row, creating a staggered brick-wall pattern. Staggering the joints is critical because it prevents water from creating erosion channels along the seams when it rains.
To see this pattern visualized and explained, check out the How to Lay Sod: Step-by-Step Guide for a Perfect Lawn, Yardcast Blog.
4. Butt Seams Tightly
Push the edges of each sod piece tightly against one another. Do not leave gaps, and do not overlap the pieces. If you overlap them, the roots will dry out in the air and die. If you leave gaps, weeds will quickly take over.
5. Managing Slopes and Obstacles
- On Slopes: Always lay sod horizontally across the slope rather than vertically down it. This prevents the pieces from shifting and sliding. Secure each piece with biodegradable turf staples.
- Around Obstacles: When trimming around trees, flower beds, or sprinkler heads, use a sharp utility knife or sod knife. Always cut from the soil side through to the grass side for a cleaner cut.
6. Roll the Lawn (The Non-Negotiable Step)
Once the sod is laid, fill a lawn roller 1/3 full of water (making it weigh roughly 200 to 300 lbs) and roll the entire yard. This presses the sod firmly into the prepared topsoil, eliminating air pockets and ensuring direct root-to-soil contact. Skipping this step is the number one reason DIY sod fails.
7. Water Immediately!
Do not wait until the entire yard is finished to start watering. If you are working on a hot day, have someone begin watering the completed sections while others continue laying the rest of the yard.
Frequently Asked Questions About Sod Installation
What is the best time of year to install sod?
In our New England climate (covering locations like Methuen, Lawrence, and Plaistow), the absolute best time of year to install cool-season sod (like Kentucky Bluegrass or Tall Fescue) is late summer to early autumn (late August through October).
During the fall, soil temperatures are warm (ideally 50°F to 65°F), air temperatures are cool, and natural rainfall is more consistent. This allows the grass to focus all its energy on deep root development before going dormant for the winter.
Spring (April to May) is the second-best window. While highly successful, spring-installed sod faces intense weed competition and requires aggressive watering as summer temperatures begin to rise.
How often should I water newly installed sod?
Watering is the single most critical factor in the first 20 days of your new lawn's life.
- Days 1-3: Water 3 to 4 times daily for 10 to 15 minutes per session. The goal is to keep the sod and the underlying soil constantly damp.
- Days 4-14: Water 2 times daily (early morning and early afternoon).
- Days 15-21: Reduce watering to once daily.
- Day 22 and Beyond: Transition to deep, infrequent watering (1 inch of water per week, delivered in 1 or 2 deep sessions) to encourage the roots to grow deep into the soil.
The Screwdriver Test: How do you know if you are watering enough? Gently push a flathead screwdriver into the lawn. It should easily penetrate 3 to 4 inches into the soil. If it is hard to push, the ground is too dry. If the soil is muddy and squishy underfoot, you are overwatering.
Can I lay new sod over my existing grass?
Absolutely not. This is a rookie mistake that will guarantee 100% failure.
For a detailed explanation of why this fails, read The Ultimate Guide to Installing Sod Over Your Current Lawn.
Sod roots require immediate, direct contact with loose, bare soil to establish. If you lay sod over existing grass:
- The old grass will suffocate, rot, and create a barrier of decaying organic matter.
- This barrier prevents the new sod roots from reaching the actual soil.
- Air pockets will form, trapping heat and moisture, which leads to root rot and fungal diseases that will kill your new turf within a week.
Conclusion
Installing a new lawn is a major investment that instantly boosts your home’s curb appeal, controls erosion, and provides a beautiful outdoor space for your family. Whether you choose to tackle the project yourself or hire a professional team, proper soil preparation and immediate, consistent watering are the keys to a lush, green result.
At Randall Landscaping, Inc., we have built our reputation on quality work and 100% reliability. We serve residential and commercial clients throughout the Merrimack Valley and Southern New Hampshire, including Amesbury, Andover, Atkinson, Boxford, Dracut, Georgetown, North Andover, North Reading, Pelham, Salem, Windham, Methuen, Lawrence, and Plaistow.
If you want to skip the back-breaking labor and guarantee a flawless, professionally installed lawn, we are here to help. Get a Professional Sod Installation Quote from our team today, and let’s transform your yard together!