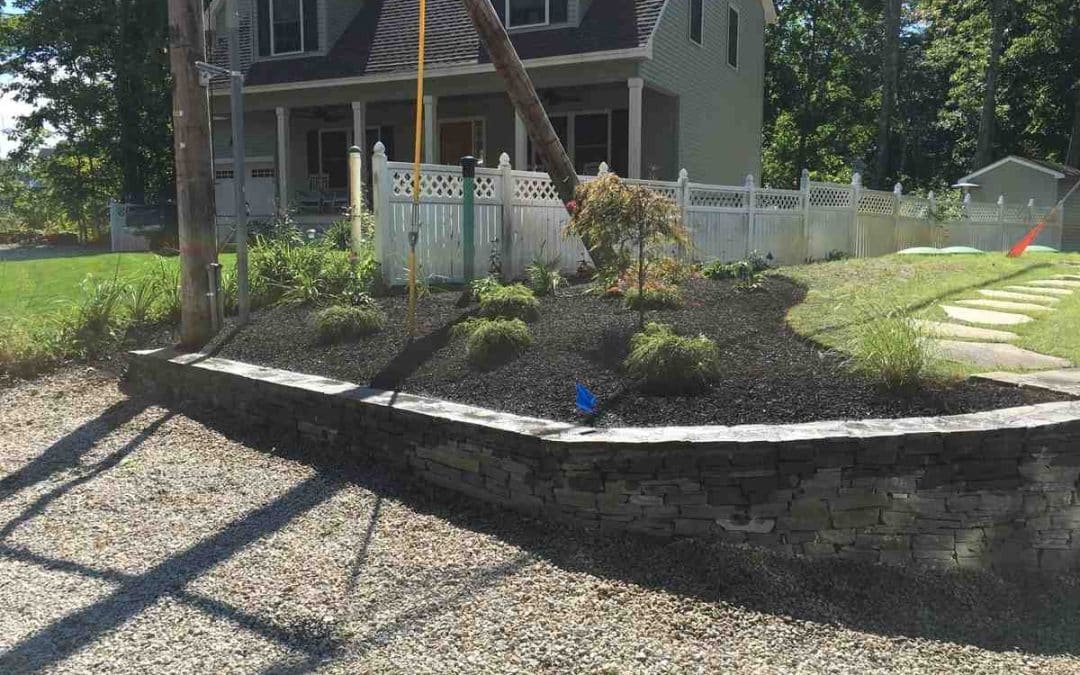
The Benefits of Professional Mulch Installation
Landscape mulch installation is the process of applying a protective layer of material over soil in garden beds and around trees to improve plant health and landscape appearance. For those looking for quick guidance, here’s what you need to know:
Quick Guide to Landscape Mulch Installation:
1. Remove weeds and debris from the area
2. Edge beds for clean borders
3. Apply pre-emergent herbicide (optional)
4. Spread mulch 2-3 inches deep
5. Keep mulch 1-3 inches away from plant stems and tree trunks
6. Water lightly after installation
Mulch is essentially sunscreen for your plants, protecting them from temperature extremes while conserving moisture and suppressing weeds. A properly mulched landscape not only looks more attractive but also creates healthier growing conditions for your plants. The right mulch, applied at the correct depth, can reduce your maintenance time and water usage significantly throughout the growing season.
I’m Tommy Randall, owner of Randall Landscaping, Inc., and with nearly two decades of experience in landscape mulch installation, I’ve perfected techniques that maximize both the aesthetic and functional benefits of mulch for properties across Massachusetts and New Hampshire.

Important Landscape mulch installation terms:
– Eco-friendly mulch options
– Moisture retaining mulch
– Mulch and edging services
Why Mulch Is “Sunscreen” for Your Yard
You wouldn’t spend a day at the beach without sunscreen, right? Well, your soil and plant roots deserve the same protection! Landscape mulch installation acts just like that protective layer for your yard, shielding it from extreme conditions while providing numerous benefits that go beyond just looking pretty.
When summer temperatures soar in places like Andover or North Reading, a proper layer of mulch keeps soil temperatures cooler, preventing your plant roots from getting “sunburned.” Then, when winter’s chill arrives across the Merrimack Valley, that same mulch layer insulates the soil, protecting delicate root systems from freezing temperatures. It’s like a cozy blanket for your plants when they need it most.
The moisture-saving power of mulch is truly remarkable. A properly installed 2-3 inch layer can reduce water evaporation by up to 70%! This means your plants stay hydrated longer between waterings, your water bill stays lower, and you spend less time dragging hoses around the yard. For our clients in drought-prone areas, this benefit alone makes landscape mulch installation worth every penny.
As organic mulches gradually break down, they’re actually feeding your soil. This natural nutrient cycling process enriches your garden beds over time, improving soil structure and fertility. Many of our Georgetown and Boxford clients have noticed healthier plants with deeper color and more vigorous growth after consistent mulching – all without extra fertilizers!
Got slopes on your property? Mulch is your best friend for erosion control. Heavy rains that would normally wash away topsoil are absorbed and slowed by a proper mulch layer. We’ve helped countless homeowners in hilly areas of Windham and Salem protect their landscapes from soil erosion through strategic landscape mulch installation techniques.
Perhaps the most immediately satisfying benefit of mulch is its weed-suppressing superpower. According to scientific research on proper mulch depth, a 2-3 inch layer of mulch can reduce weed growth by up to 90%! Imagine spending your weekends enjoying your yard instead of battling endless weeds. The mulch blocks sunlight from reaching weed seeds, preventing them from germinating in the first place.
And let’s not forget the instant curb appeal boost! Fresh mulch creates clean, defined edges between your lawn and garden beds, adding depth and dimension to your landscape. The rich colors – whether you choose natural cedar, chocolate brown, or classic black – provide the perfect backdrop to make your flowers and shrubs pop. It’s like putting a frame around a beautiful painting.
Our team at Randall Landscaping understands that proper landscape mulch installation is both an art and a science. We’ve spent years perfecting techniques that maximize all these benefits while avoiding common pitfalls that can damage your plants. Whether you’re looking to improve your mulch and edging services or explore eco-friendly mulch options, we’re here to help your landscape thrive under its protective “sunscreen” layer.
Planning Your Landscape Mulch Installation
Before you grab your gardening gloves and head to the mulch pile, taking time to plan your landscape mulch installation project will save you headaches, money, and backaches too! Think of planning as the foundation of your mulching success – just like you wouldn’t build a house without blueprints, you shouldn’t mulch without a solid game plan.
Start by clarifying what you’re hoping to achieve. Are you primarily looking to suppress those stubborn weeds that keep popping up in your perennial bed? Maybe you’re focused on improving soil health for your prized roses, or perhaps you simply want your front yard to be the envy of the neighborhood. Your specific goals will guide important decisions about mulch type, depth, and application techniques.
Getting accurate measurements is absolutely essential – and often the step most homeowners skip to their regret. For rectangular beds, simply multiply length by width to calculate square footage. Working with circular areas around trees? Measure from the trunk to the edge (that’s your radius), square that number, and multiply by 3.14. Those oddly-shaped beds that meander through your landscape require a bit more creativity – try breaking them into smaller, more manageable shapes, calculate each separately, and then add them together.
Here in New England, our climate throws everything at our landscapes – from scorching summer days to bone-chilling winters with plenty of precipitation in between. The mulch you choose needs to stand up to these challenges. At Randall Landscaping, we’ve worked with homeowners from Methuen to Pelham long enough to know exactly which mulch types perform best in our unique climate conditions.
Want expert help with your project? Learn more about our professional Mulch and Edging Services – we’d be happy to handle the heavy lifting for you!
Choosing the Right Mulch for Your Landscape
Selecting the perfect mulch is like choosing the right paint color for your living room – it needs to look great, but it also needs to function well for your specific situation. Let’s break down your options:
Bark mulch remains the superstar of the mulch world for good reason. Available in textures from fine to chunky, it decomposes slowly while gradually feeding your soil with nutrients. We find it works beautifully in established perennial beds throughout North Andover and Andover.
For those gorgeous azaleas and rhododendrons that thrive in the shady spots of Boxford and Georgetown properties, pine straw offers the perfect acidic environment these plants crave. The interlocking needles also stay put on gentle slopes better than many alternatives.
If you’re an avid vegetable gardener, consider compost as your mulch of choice. It pulls double-duty – protecting the soil surface while enriching it with valuable nutrients. Your tomatoes will thank you!
For areas where decomposition isn’t desired, rubber mulch offers incredible longevity. While it won’t feed your soil, it’s perfect for playgrounds where cushioning is important. Just remember that it’s an investment in durability rather than soil health.
Many of our clients in Dracut and Lawrence have found that stone or gravel works wonders in drainage areas or rock gardens. These inorganic options provide permanent coverage and won’t wash away during heavy downpours – a practical choice for problem areas.
The color of your mulch dramatically impacts your landscape’s overall look. Dark brown or black mulches create a sophisticated backdrop that makes plant colors truly pop – like the perfect picture frame for your garden masterpiece. Red mulch adds warmth and energy, while natural-colored mulches blend seamlessly with the surrounding environment for a more subtle effect.
For those hillside properties in Windham and Atkinson, we recommend heavier mulches that won’t wash away with the first good rain. And if you’re a pet parent, be cautious with cocoa hull mulch, which can be harmful to dogs if they decide to snack on it. Instead, stick with traditional bark or stone options in areas where your furry friends roam.
Environmentally conscious? We’ve got you covered with our Eco-Friendly Mulch Options that are sustainably harvested and free from harmful chemicals or dyes.
How Much Mulch Do You Need?
Nothing’s worse than running out of mulch halfway through your project – except maybe buying way too much and watching that extra pile sit in your driveway for months! Let’s get the math right the first time.
The basic formula is straightforward: measure your square footage, decide on your desired depth (we recommend 2-3 inches for optimal benefits), multiply these numbers, then divide by 324 to calculate cubic yards. For example, a typical 10′ × 20′ garden bed at 2 inches deep would require about 1.23 cubic yards of mulch.
Now comes the bagged versus bulk decision. Bagged mulch is perfect for smaller DIY projects – it’s easier to handle, doesn’t require coordinating delivery, and can be transported in most vehicles. The downside? It’s significantly more expensive per cubic yard, typically costing $4-$7 per bag for standard bark (with each bag covering about 12 square feet at 2 inches deep).
For larger projects, bulk mulch delivers serious savings. While it requires space for delivery and equipment to move it around, the cost advantage is substantial for areas requiring more than 2 cubic yards. Bulk mulch often contains fewer fillers and offers better quality, with internet data suggesting prices ranging from $35-$170 per cubic yard depending on type and region.
| Mulch Type | Coverage per Bag | Bags per Cubic Yard | Typical Cost Range (Internet Data) |
|---|---|---|---|
| Standard Bark | 12 sq ft at 2″ | 13-14 | $4-$7 per bag |
| Premium Hardwood | 12 sq ft at 2″ | 13-14 | $5-$8 per bag |
| Rubber | 12 sq ft at 1.5″ | 18 | $8-$12 per bag |
| Bulk (any type) | 108 sq ft at 3″ | N/A | $35-$170 per cubic yard |
Note: These are average costs based on internet data and not actual costs for Randall Landscaping.
Pro tip: Always add 10% to your calculated amount to account for uneven surfaces and settling. There’s nothing worse than being just short of completing your project!
Best Time of Year to Mulch
Timing your landscape mulch installation is like hitting the sweet spot on a tennis racket – get it right, and everything works in your favor. Here in the Merrimack Valley and Southern New Hampshire, our seasonal timing recommendations are based on years of local experience.
Spring mulching (April-May) hits all the high notes. The ground has thawed but summer heat hasn’t arrived, making this the prime window for installation. A fresh layer applied now will suppress those early-season weeds before they get established, retain precious moisture during the upcoming summer months, and protect your newly planted flowers and shrubs during their critical establishment phase. Plus, your landscape looks instantly refreshed just as outdoor living season begins – talk about curb appeal!
Fall mulching (September-November) offers different but equally valuable benefits. A fresh layer applied now acts like a cozy blanket for your plants’ root systems during winter, reducing the freeze-thaw cycle that can push perennials right out of the ground (a phenomenon called frost heaving). Fall mulch also slowly breaks down over winter, enriching your soil just in time for spring growth. Many of our clients in Pelham and Windham appreciate how fall mulching keeps their landscape looking neat through the dormant season.
We generally suggest avoiding mid-summer mulching during extreme heat. Applying mulch to already hot, dry soil can sometimes trap heat rather than dissipate it, potentially stressing your plants further. If summer application is necessary, be sure to water the soil thoroughly beforehand.
Weather forecasts should influence your timing too. Ideally, plan your landscape mulch installation when no heavy rain is expected for 2-3 days afterward. This gives the mulch time to settle naturally before getting saturated, preventing washouts and maintaining that perfectly finished look you worked so hard to achieve.
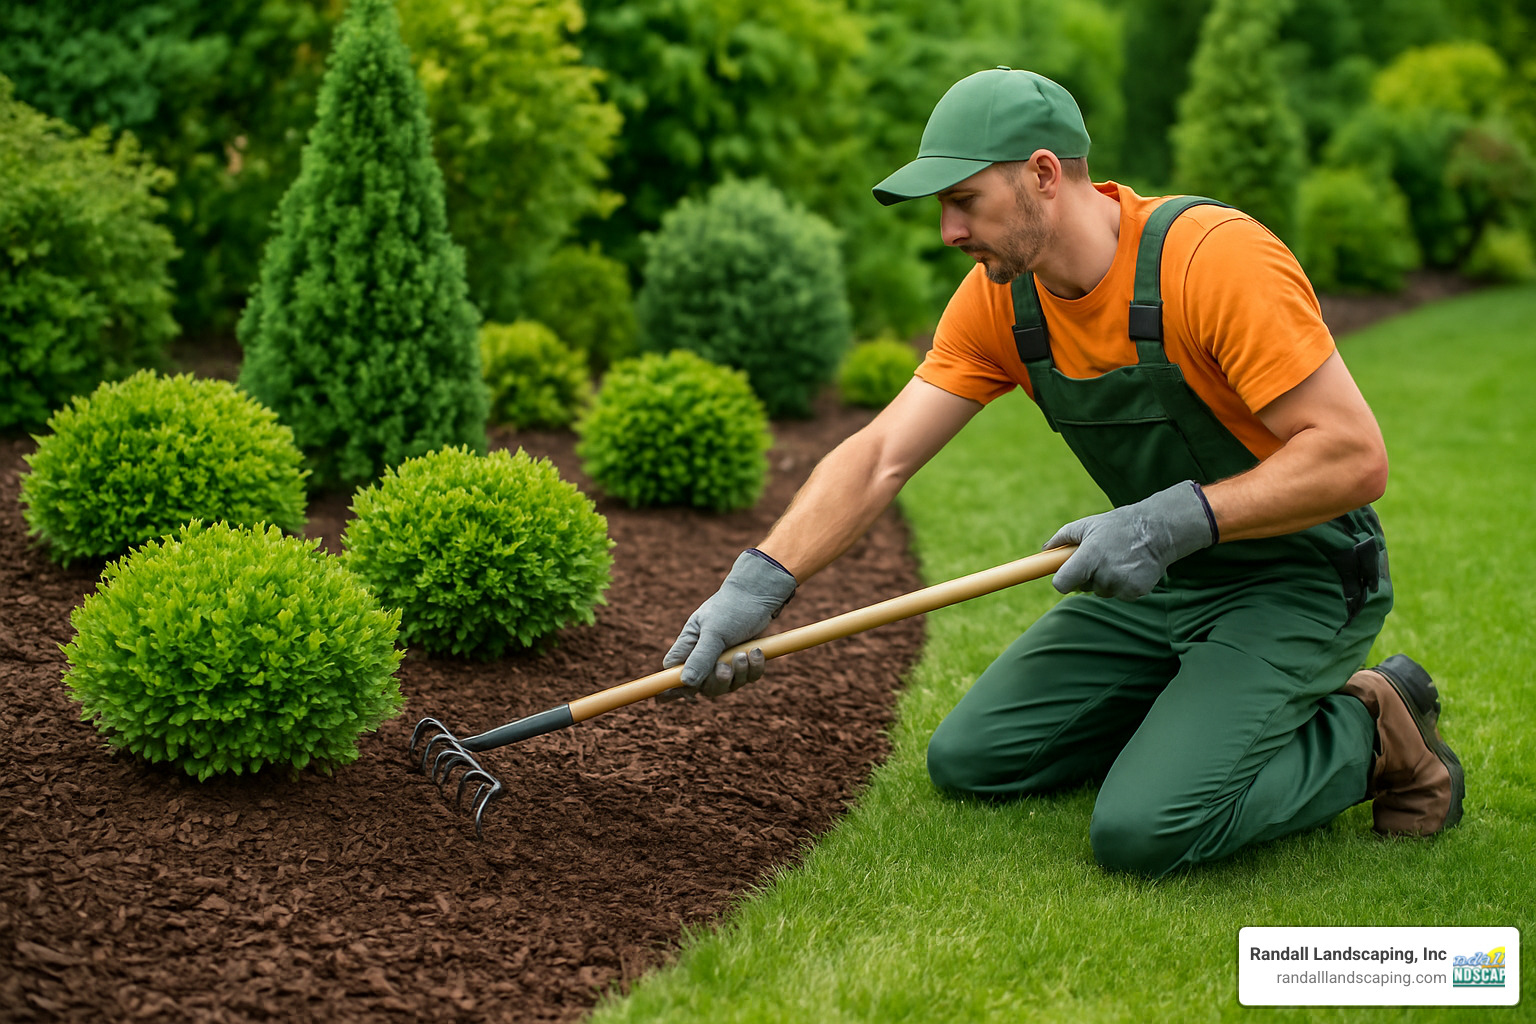
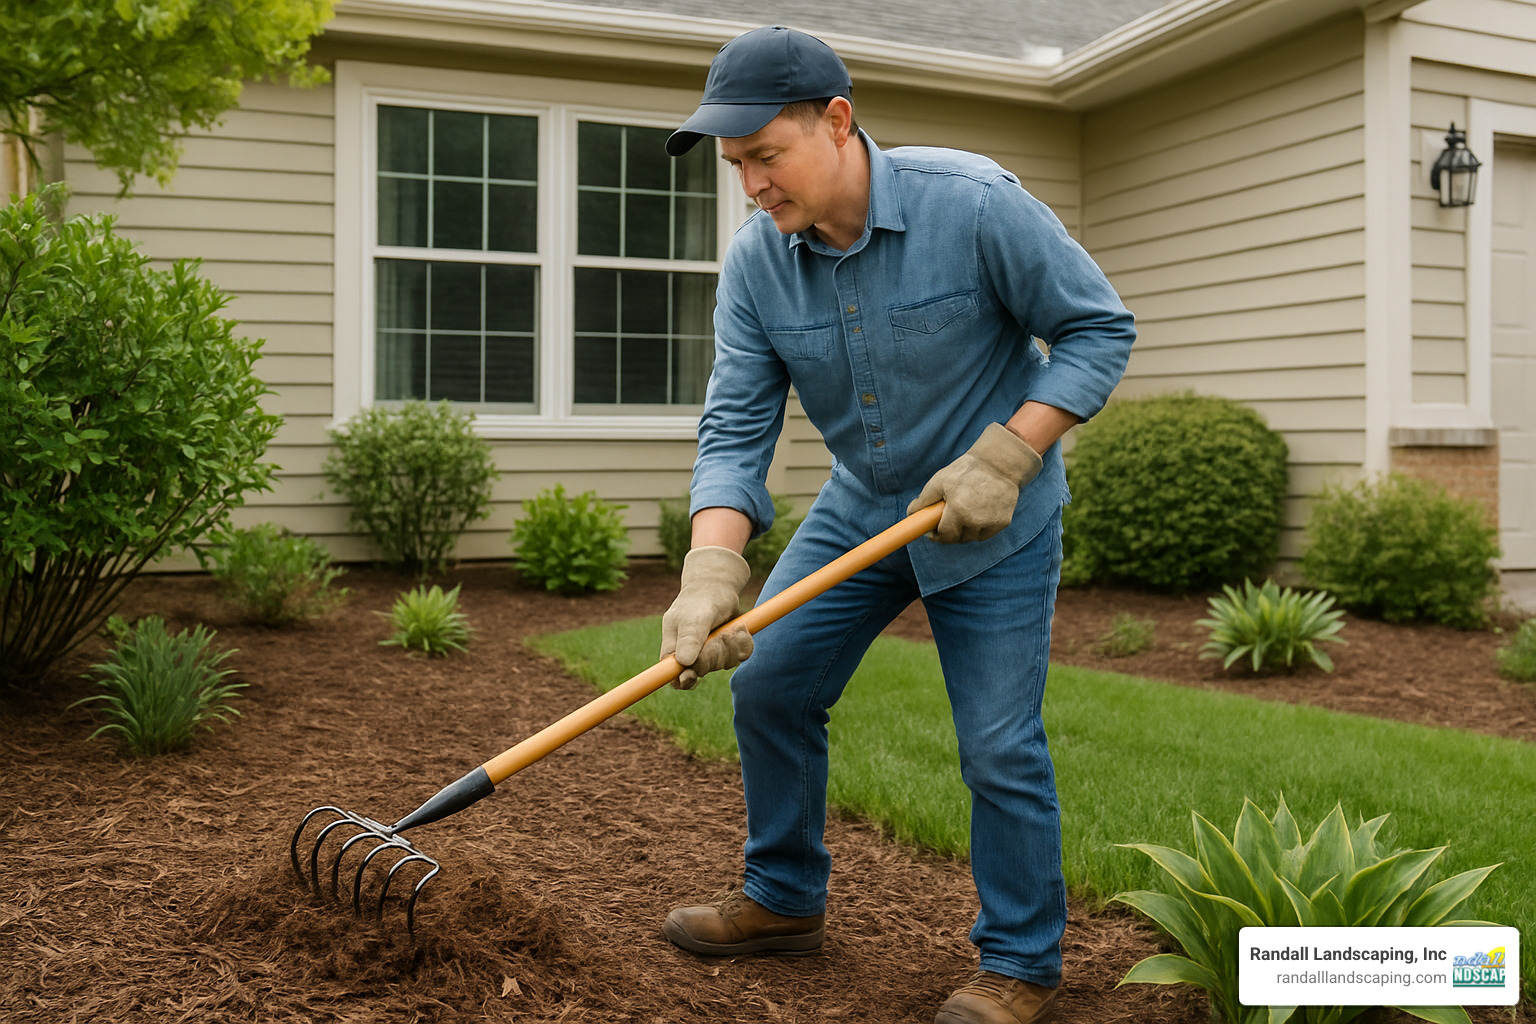
Step-by-Step Guide: Landscape Mulch Installation Like a Pro
Ready to transform your landscape? Let’s roll up our sleeves and get to work! After planning your project and choosing the perfect mulch, it’s time for the hands-on part of landscape mulch installation. I’ve helped hundreds of homeowners across the Merrimack Valley create beautiful, low-maintenance landscapes, and I’m excited to share our professional process with you.
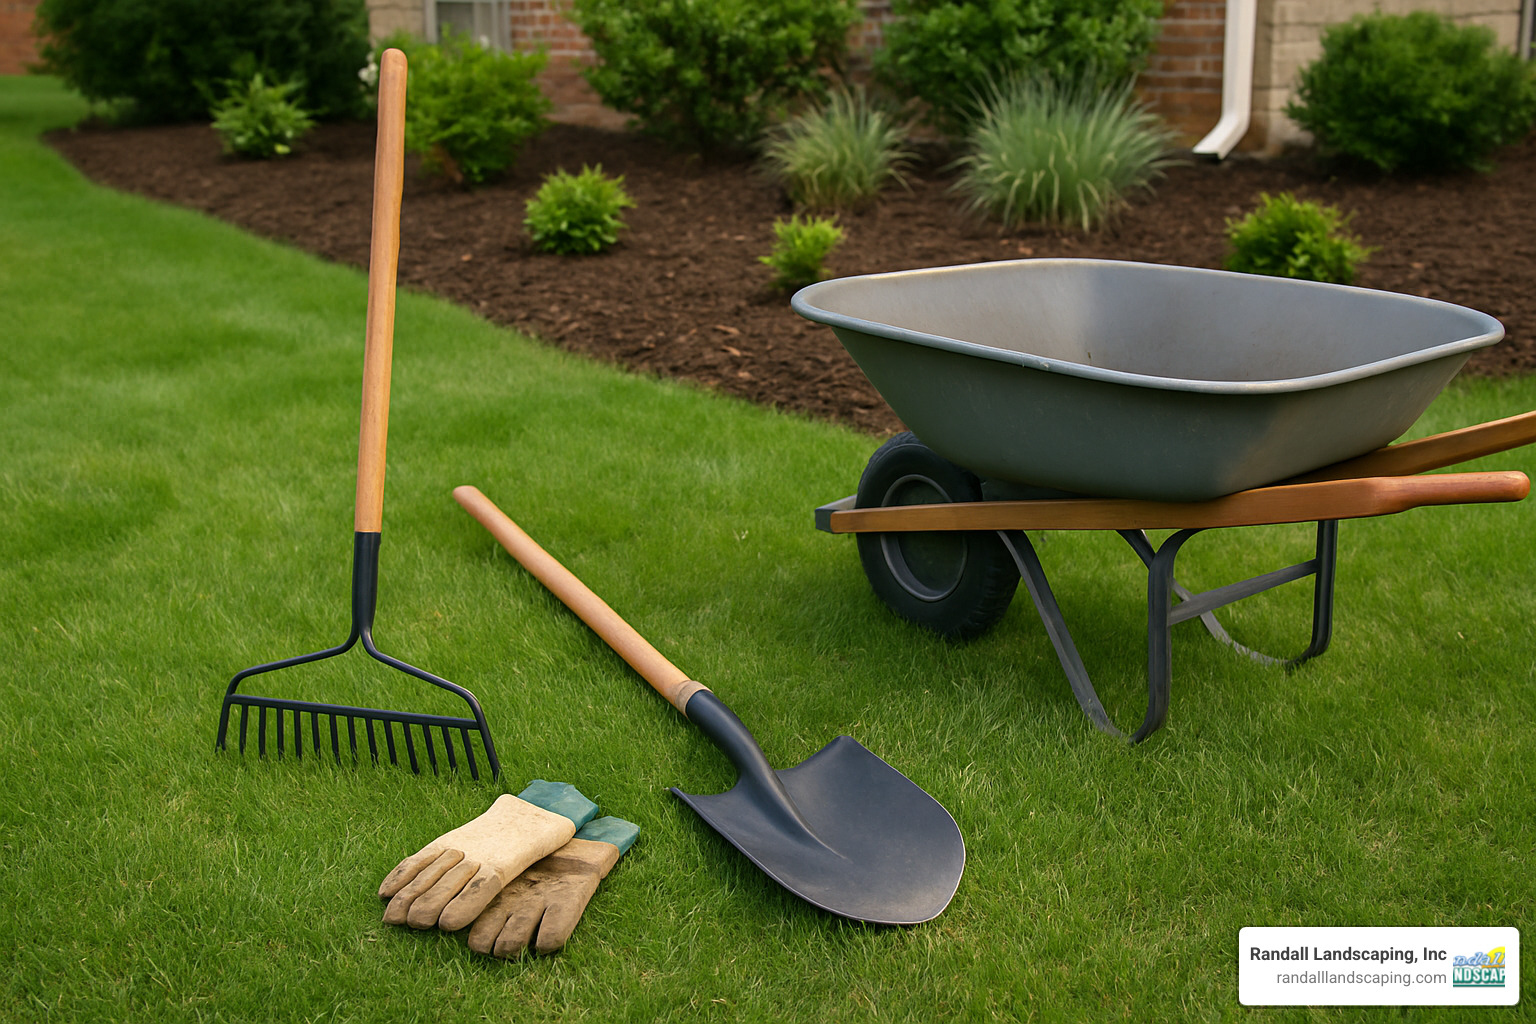
Before you begin, gather your tools. You’ll need a garden rake or bow rake for spreading, a flat shovel or edging tool for creating clean borders, a wheelbarrow or tarp for moving mulch, and garden gloves to protect your hands. Don’t forget a pitchfork or garden fork for breaking up clumps, a tape measure to check your depth, and a garden hose for pre-watering and settling.
Safety should always come first! Wear work gloves to prevent splinters, a dust mask if you’re working with dry or dyed mulch, knee pads to save your joints, and closed-toe shoes to protect your feet.
Now, follow these steps for professional results:
First, call 811 to mark underground utilities before creating any new edges – this simple step prevents costly and dangerous accidents. Next, thoroughly remove all existing weeds and debris from your beds. Those few extra minutes spent on weed removal will save you hours of maintenance later.
Create clean, defined edges using an edging tool or flat shovel – this professional touch instantly lifts your landscape’s appearance. If your soil is dry, water it thoroughly before mulching. This pre-watering helps the mulch settle and begins the moisture retention process.
For extra weed prevention, consider applying a pre-emergent herbicide following the package instructions. Then, distribute small piles of mulch throughout your bed using your wheelbarrow – this approach is much easier than trying to spread from one giant pile.
Spread the mulch evenly to a depth of 2-3 inches across your beds. This “goldilocks zone” provides all the benefits without any drawbacks of over-mulching. Keep mulch 1-3 inches away from plant stems and tree trunks to prevent rot and pest issues. Finally, taper the mulch depth near hardscapes and lawn edges for a clean transition, and lightly water the mulched area to help it settle.
Preparing Beds & Trees
The secret to successful landscape mulch installation lies in thorough preparation. I’ve seen countless DIY projects fall short simply because this crucial step was rushed.
Start by declaring war on weeds. Pull them completely, roots and all. For stubborn weeds, consider applying an herbicide a few days before mulching, but always follow label instructions carefully. Next, clear away debris, fallen leaves, and any old mulch that’s become matted or moldy. While you don’t always need to remove all existing mulch, removing decomposed layers prevents excessive buildup that can suffocate plants over time.
Creating clean, defined edges makes a world of difference. Use a flat shovel or dedicated edging tool to cut a clear line between your lawn and beds. This professional touch not only looks fantastic but also creates a natural barrier that helps contain your mulch and prevents grass from creeping into your beds.
When mulching around trees, pay special attention to the root flare – that widened area where the trunk meets the ground. This should always remain visible after mulching. If soil or old mulch has buried the flare, gently excavate it before adding new mulch. Your trees will thank you with better health and longevity.
The landscape fabric question often comes up with my clients in North Andover and Methuen. While fabric can provide additional weed suppression, it comes with significant drawbacks: it prevents organic mulch from enriching your soil, can interfere with water and air movement, often becomes exposed and unsightly over time, and eventually breaks down into a removal nightmare. For most ornamental beds, I recommend thorough weed removal instead of fabric. However, fabric might make sense under inorganic mulches like stone or in areas battling extremely aggressive weeds.
Spreading Techniques for Landscape Mulch Installation
The way you spread mulch can make the difference between an amateur-looking job and a professional finish in your landscape mulch installation project.
Begin by distributing small piles of mulch throughout your bed rather than dumping one mountain-sized pile. This approach makes spreading easier and prevents soil compaction from excessive foot traffic. When working around delicate perennials or new plantings, hand placement is your best technique. Gently place mulch around plant bases, always keeping it 1-3 inches away from stems and trunks to prevent moisture-related diseases and pest problems.
For open areas, a bow rake becomes your best friend. Use it to spread mulch evenly across the bed. The flat side of the rake is perfect for creating that smooth, finished surface that screams professional installation. Maintain a consistent 2-3 inch depth throughout – this uniform appearance lifts your entire landscape.
If you’re mulching a sloped area in Windham or Atkinson, consider using a mulch stabilizer (sometimes called “mulch glue”). These products help bind the material together without compromising its beneficial properties, preventing washouts during heavy New England rains.
When mulching near your home’s foundation, maintain at least a 6-inch mulch-free zone. This simple practice creates a dry barrier that discourages termites and prevents moisture issues against your foundation – a tip many homeowners in our service area appreciate.
For larger properties, mechanical mulch blowers can be a game-changer. At Randall Landscaping, our professional Mulch Installation & Blowing services can cover extensive areas quickly and evenly, placing mulch precisely where it’s needed without damaging your plants or creating mess on hardscapes.
Avoiding Common Mulch Mistakes
Even experienced gardeners can fall victim to these common landscape mulch installation pitfalls. Let me help you avoid them!
Over-mulching is perhaps the most frequent mistake I see in neighborhoods from Haverhill to Salem. Applying mulch too deeply (beyond 4 inches) suffocates plant roots, creates a barrier to water penetration, and often leads to fungal issues. Stick to the recommended 2-3 inch depth for optimal benefits.
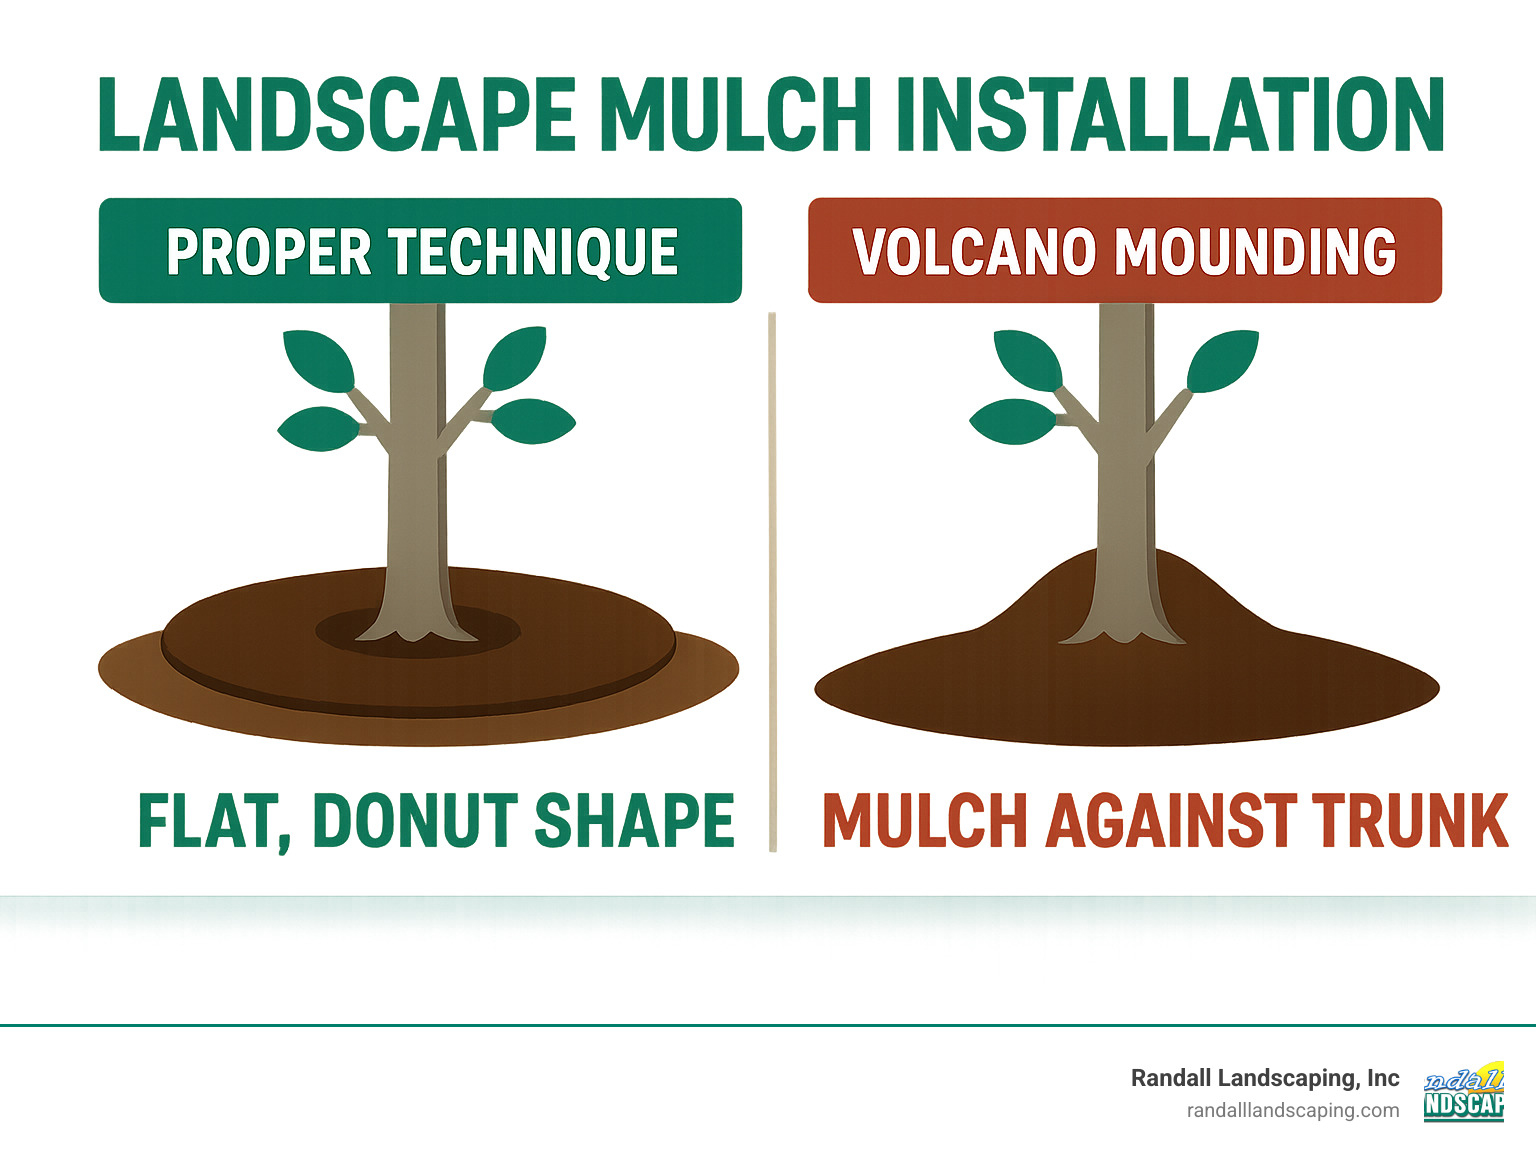
Mulch volcanoes around trees make me cringe every time I see them. These cone-shaped mounds against tree trunks might seem helpful, but according to the latest research on mulch volcanoes, they’re actually tree killers, causing bark rot, insect damage, stem-girdling roots, and oxygen deprivation. Instead, create a flat “donut” of mulch around trees, leaving space around the trunk and gradually building to your desired depth.
If you’re using dyed mulch, avoid installation before rain is forecast. Allow 1-2 days of dry time to prevent dye from washing onto your driveway or patio – a lesson many of our Andover clients have learned the hard way!
Fresh wood chips and hardwood mulches can temporarily tie up soil nitrogen as they decompose. If using these materials in your vegetable garden or around heavy feeders, consider applying a nitrogen-rich fertilizer before mulching to prevent yellowing plants.
Have you ever opened a bag of mulch that smelled like vinegar or ammonia? That sour mulch odor means it’s gone anaerobic during storage. Spread it in a thin layer for a day before installation to allow it to air out, or better yet, request a replacement batch.
Skipping preparation is like building a house without a foundation. Applying fresh mulch over weeds or debris simply hides problems temporarily while creating bigger headaches down the road. The extra hour spent on proper bed preparation saves days of maintenance later.
Finally, inconsistent depth creates an unprofessional appearance and reduces mulch effectiveness. Take time to rake and level for that consistent, polished look that makes your landscape stand out in your neighborhood.
Budget, DIY vs Hiring Pros & Cost-Saving Hacks
Let’s talk dollars and cents when it comes to landscape mulch installation. Whether you’re planning to roll up your sleeves or hire professionals, understanding the costs will help you make the best decision for your property and wallet.
Based on internet data (not Randall Landscaping pricing), mulch materials typically range from $35-$170 per cubic yard depending on type and quality. The premium end includes specialty options like rubber mulch, while standard hardwood falls on the lower end. Delivery fees generally add $50-$150 as a flat fee, with additional charges of $20-$80 per cubic yard depending on distance and accessibility.
If you’re considering professional installation, labor costs average $20-$50 per cubic yard or $60-$110 per hour based on internet data. All told, a typical residential project might run $100-$350, while extensive properties with multiple beds could potentially reach $3,000+ for complete professional service.
An experienced two-person crew can typically install about 3 cubic yards of mulch per hour, though this efficiency varies with site conditions. Hilly properties in Windham or complex garden designs in North Andover might take longer than simple, flat beds in Methuen.
It’s worth noting that regional pricing varies significantly – the same service might cost up to three times more in affluent areas compared to rural locations. Throughout the Merrimack Valley, prices generally fall in the mid-range nationally.
For more information about professional services, visit our Mulch Installation & Blowing page.
Average Mulch Installation Costs (Internet Data)
For transparency, here’s what you might expect to pay based on internet data (not Randall Landscaping pricing):
Most homeowners choose between economy hardwood mulch ($35-$50 per yard) and premium bark mulch ($45-$65 per yard). Specialty options like cedar mulch ($50-$100 per yard) or playground-certified mulch ($55-$150 per yard) cost more due to their specific properties and processing requirements.
Delivery logistics affect your bottom line too. Beyond the basic delivery fee ($50-$150, often waived for larger orders), factors like distance ($1-$3 per mile beyond service area) and accessibility can add surcharges for challenging locations.
Many homeowners opt for additional services that improve their mulch installation. Professional bed edging ($1.50-$4.50 per linear foot) creates clean definition between lawn and garden areas. Thorough weed removal ($40-$120 per hour) prevents problems later, while landscape fabric ($0.50-$1.50 per square foot) provides extra weed suppression in problem areas.
If you’re considering the DIY route, factor in equipment rental if you don’t already own the basics. A wheelbarrow ($20-$40/day), pitchfork ($10-$25/day), or even a mulch blower ($100-$250/day) for larger properties might be necessary.
DIY vs Professional Landscape Mulch Installation
Deciding between DIY and hiring pros involves weighing several important factors:
Time commitment is perhaps the biggest consideration. As a novice, expect to spend 1-2 hours per cubic yard including preparation and cleanup. That Saturday project might quickly turn into an entire weekend endeavor! Professional crews can install 3+ cubic yards per hour with proper equipment and experience.
The physical demands shouldn’t be underestimated either. A cubic yard of mulch weighs between 400-800 pounds depending on moisture content and type. That’s a lot of shoveling, wheeling, and spreading – especially on hot spring days in Haverhill or North Reading.
Equipment access matters too. DIY requires at minimum a wheelbarrow, shovel, rake, and potentially a truck for transport. Our professional teams come fully equipped with everything needed, including mulch blowers for efficient application in hard-to-reach areas.
The finished quality often reveals the difference between amateur and professional installation. Experienced crews create crisp edges, consistent depth, and proper contouring around plants. They know exactly how to handle slopes, tree rings, and plant protection to maximize both aesthetic appeal and functional benefits.
Many of our clients in towns like Dracut and Methuen initially tried the DIY route but now appreciate the value of expertise – proper techniques that prevent mulch volcanoes, ensure appropriate depth, and maximize the investment in their landscape.
Finally, reputable companies like Randall Landscaping stand behind their work with service guarantees that give you peace of mind that the job will be done right.
Money-Saving Tips Without Cutting Corners
You can reduce the cost of your landscape mulch installation without sacrificing quality by following these professional tips:
Measure twice, order once. Double-check your measurements before ordering. Most homeowners overestimate their needs by 15-25%, leading to wasted materials and money. Taking accurate measurements of your beds’ length, width, and desired depth will ensure you purchase just what you need.
Buy in bulk for significant savings. For areas requiring more than 2 cubic yards, bulk mulch is dramatically more economical than bagged products – often 40-60% cheaper per cubic yard. Those savings add up quickly for larger properties in Boxford or Georgetown.
Share delivery costs with neighbors. Many of our clients in neighborhoods throughout Andover and North Andover coordinate with neighbors to split delivery fees on larger orders. This community approach can save everyone money while still getting professional-grade materials.
Consider mulch refreshing rather than complete replacement. Instead of stripping away all existing mulch annually, try turning and fluffing what’s already there and adding a thin top layer of fresh material. This approach can cut your annual mulch needs by half or more.
Apply the correct depth – not too much, not too little. Using the recommended 2-3 inches not only promotes plant health but also reduces the amount of mulch needed compared to excessive applications of 4+ inches that some homeowners mistakenly apply.
Schedule during off-peak seasons when companies may offer discounts to fill their schedules. Early spring (March-April) or late fall (October-November) often feature better pricing than the peak May-June mulching season.
Many of our long-term clients throughout the Merrimack Valley save by bundling mulch installation with other landscape maintenance services. This approach ensures consistent care while maximizing value across all your property’s needs.
For specific information about services in your area, check out our local pages like Mulch Installation Haverhill MA.
Maintenance, Troubleshooting & Pest Prevention
Once you’ve completed your landscape mulch installation, the journey isn’t over. Like any good investment in your property, mulch requires some ongoing care to keep performing at its best. Think of it as maintaining that beautiful haircut – a little attention goes a long way!
Most organic mulches naturally begin to decompose within 6-12 months of installation. This isn’t a flaw – it’s actually part of the magic! As mulch breaks down, it enriches your soil with valuable nutrients. However, this natural process does gradually diminish both its appearance and weed-fighting abilities.
Here in the Merrimack Valley, where we experience everything from summer downpours to winter freezes, your mulch beds need regular attention. I recommend monthly quick inspections during the growing season, especially in areas that receive heavy rainfall or sit on slopes, as these spots tend to thin out faster.
When you notice your mulch becoming flat and matted (typically after heavy rains or foot traffic), grab a rake and gently fluff it up. This simple 10-minute task improves air circulation, prevents mold growth, and instantly refreshes the appearance of your beds. Your neighbors might think you’ve just had fresh mulch delivered!
Weeds are sneaky opportunists that will find any gap in your mulch armor. Pull them promptly when they appear – the longer they grow, the more established their root systems become. A few minutes of weed patrol each week saves hours of difficult removal later.
For our clients across towns like Methuen and Salem, we include regular mulch maintenance in our seasonal care programs. This approach ensures your landscape looks its best year-round without you having to remember all these maintenance details.
Refreshing & Fluffing Mulch for Year-Round Appeal
Even the highest quality mulch installation won’t look fresh forever. Over time, that rich color fades and the material compacts, losing both its visual appeal and some functional benefits. But before you call for a complete replacement, try these professional refreshing techniques.
Start with a decomposition check by digging your fingers about an inch into the mulch. If it’s becoming a thin, matted layer that breaks apart like compost, it’s definitely time for refreshing. However, if it still has good structure and just looks faded, you have options.
For mulch that’s structurally sound but has lost its vibrant color, consider using a mulch colorant product. These spray-on solutions can restore that fresh-installed look at about a third of the cost of replacement. I’ve seen dramatic changes in properties around North Andover and Andover using this approach.
Before refreshing or adding new mulch, perform a quick soil moisture test. Dig beneath the mulch layer – if the soil is consistently dry despite regular watering, your mulch may have become hydrophobic (water-repelling). This is a clear sign it needs replacement rather than just refreshing.
For most properties in our service area, I recommend this seasonal approach:
– Spring: Complete inspection and refreshing as winter damage becomes visible
– Summer: Regular weed monitoring and maintaining proper moisture levels
– Fall: Light fluffing to prepare for winter and prevent matting under snow
– Winter: Occasional checks for displacement from snow removal activities
Dealing With Fading, Mold, or Sour-Smelling Mulch
Even properly installed mulch can develop issues that need attention. Let’s tackle the most common problems you might encounter.
Color fading is natural and inevitable with organic mulches – it’s simply part of the decomposition process. Cedar and cypress mulches tend to retain their color longer than hardwood varieties. If fading bothers you, consider installing mulch in partially shaded areas when possible, or choose darker colored mulches that look natural even as they age.
Those white or yellow fuzzy patches appearing on your mulch? Don’t panic! This is usually harmless fungal growth that actually indicates healthy decomposition. We see this frequently in Boxford and Georgetown properties after humid summer periods. Simply rake the surface lightly to break up the growth and reduce watering in that area temporarily. The fungi are actually helping break down the mulch into soil nutrients!
If your mulch develops an ammonia or rotten egg smell, however, that’s a different story. This sour odor indicates anaerobic decomposition – essentially, your mulch is rotting without enough oxygen. Remove the affected mulch immediately (wearing gloves and a mask), spread it in a thin layer somewhere out of the way to air out, and replace with fresh material. Also check that the area has proper drainage, as excess moisture often causes this problem.
The most troublesome mulch issue is artillery fungus, which produces tiny black spores that can stain siding, vehicles, and anything else nearby. If you spot these persistent black specks, you’ll need to remove the affected mulch completely. Consider switching to cedar mulch, which naturally resists this fungus, and maintain a mulch-free zone near buildings if problems persist.
Can Mulch Attract Pests & How to Minimize Risks
One question I hear often from homeowners in Windham and Pelham is whether mulch attracts unwanted pests. The reality is that while mulch creates an ideal environment for plants, it can sometimes create favorable conditions for certain pests if not properly installed or maintained.
Contrary to what many believe, mulch doesn’t actually attract termites – but it can create conditions they enjoy if placed incorrectly. Maintain a 6-inch mulch-free zone around your foundation, keep mulch depth to 2-3 inches (never exceeding 4 inches), and consider using cedar mulch, which contains natural oils that repel many insects. For homes in areas with known termite activity, creating a stone or gravel buffer zone between mulch beds and your foundation provides additional protection.
Voles and mice sometimes view thick mulch layers as perfect nesting spots, especially near dense shrubs where they feel protected from predators. Keep mulch at the recommended 2-3 inch depth and maintain several inches of clear space around woody plant stems. For particularly valuable plants, consider installing physical barriers like hardware cloth. Some of our clients in rural areas of Atkinson have had success with predator urine products as deterrents.
In the damper areas of Lawrence and Dracut properties, slugs and snails can become problematic in mulched beds. They thrive in the moist environment mulch creates. Using coarser mulches like bark nuggets rather than fine materials gives these pests fewer hiding spots. Creating copper barriers around particularly vulnerable plants like hostas can also help, as slugs and snails won’t cross copper. Applying diatomaceous earth at bed edges creates another effective barrier.
Urban areas like Methuen sometimes face issues with cockroaches being attracted to mulch near buildings. Cedar mulch is your friend here – its natural oils deter many insects. Maintaining that crucial 6-inch gap between mulch and your foundation is especially important, as is ensuring proper drainage to keep mulch relatively dry.
With proper installation techniques and regular maintenance, the benefits of landscape mulch installation far outweigh any potential pest concerns. At Randall Landscaping, we’ve helped countless homeowners across the Merrimack Valley enjoy beautiful, pest-free landscapes through properly installed and maintained mulch beds.
Frequently Asked Questions about Landscape Mulch Installation
How often should I replace or refresh mulch in beds & around trees?
One of the most common questions we hear from homeowners in places like Haverhill and North Andover is about mulch replacement timing. The truth is, it varies depending on where the mulch is applied.
For flower beds, annual refreshing is typically ideal. These areas experience faster decomposition because they’re watered more frequently, have more plants accelerating the breakdown process, and are usually front-and-center in your landscape where appearance matters most. A fresh layer not only looks better but restores all those moisture-retention and weed-suppression benefits.
Around trees, you can usually extend the timeline to every 1-2 years. Tree areas tend to decompose more slowly, and since they’re primarily functional rather than decorative, you can wait longer between refreshes. Plus, that thicker initial application around trees provides longer-lasting benefits.
Our New England climate plays a role too. After a heavy winter with lots of snow in places like Windham or Salem, spring refreshing might be necessary as the weight of snow can compress mulch significantly. Similarly, particularly windy sites or slopes where water runoff occurs may need more frequent attention.
Rather than completely replacing all your mulch (which can get expensive and wasteful), we often recommend a “top-up” approach for our clients. By lightly turning the existing mulch and adding just an inch of fresh material, you’ll restore appearance and function while being kinder to both your wallet and the environment.
Should I use weed barrier fabric under mulch?
This question sparks more debate among landscapers than almost any other aspect of landscape mulch installation! After nearly two decades of experience across hundreds of properties, here’s my honest take:
Weed barrier fabric does offer some benefits. It provides an extra layer of weed suppression (especially against aggressive weeds), can reduce the initial amount of mulch needed, and creates a clean separation between mulch and soil in formal landscapes.
However, the drawbacks often outweigh these advantages. Fabric prevents organic mulch from enriching your soil as it breaks down—one of the main benefits of using mulch in the first place. It can also impede water and air movement to plant roots, eventually breaks down into unsightly shreds that are difficult to remove, and often becomes exposed as mulch shifts over time.
For most ornamental beds with perennials, shrubs, and trees across the Merrimack Valley, I recommend skipping the fabric. Instead, thoroughly remove existing weeds before mulching, consider a pre-emergent herbicide if weed pressure is high, maintain proper mulch depth, and address any weeds promptly when they appear.
That said, fabric can be appropriate in specific situations: under stone or gravel mulches that won’t decompose, in areas where you don’t plan to plant anything new, around foundation plantings as an additional termite barrier, or in commercial landscapes with minimal maintenance.
If you do decide to use fabric, invest in a high-quality, permeable product that allows water and air exchange while blocking light. Your plants will thank you!
What’s the recommended mulch depth for effective weed suppression?
Finding that “just right” mulch depth is crucial—too thin and weeds break through, too thick and you risk plant health problems. Based on our experience working in diverse landscapes from Methuen to Boxford, here’s what works best:
For fine-textured mulches like compost or small chips, 2 inches provides effective coverage without overwhelming plants. Medium-textured options like shredded bark (our most commonly used type) perform best at 2-3 inches. If you’re using coarser materials like bark nuggets, you can go a bit deeper—3-4 inches—since air and water move more freely through the larger pieces.
The absolute minimum for effective weed suppression is 2 inches—anything less simply won’t block enough light to prevent weed seed germination. For most landscape beds, 3 inches hits the sweet spot for weed control while maintaining healthy soil conditions. I strongly advise against exceeding 4 inches, as this can prevent proper water penetration and potentially suffocate plant roots.
Some situations call for special consideration. Areas with particularly aggressive weeds might benefit from the deeper end of the range (3-4 inches), possibly combined with landscape fabric or pre-emergent herbicide. Around shallow-rooted plants, stay closer to 2 inches to prevent root competition issues. For slopes and erosion-prone areas common in hillier towns like Atkinson, use 3-4 inches of heavier, interlocking mulch that won’t wash away easily.
For tree rings, maintain 2-3 inches of mulch, but always taper it down to nothing as you approach the trunk. Mulch will settle and decompose over time, so your initial application may be about 20% thicker than these recommendations.
Conclusion
There’s something magical about freshly mulched garden beds. The rich colors, the clean edges, the way plants seem to pop against that perfect backdrop. But as we’ve explored throughout this article, proper landscape mulch installation delivers far more than just visual appeal.
Think of mulch as a multitasking miracle for your landscape. It’s simultaneously protecting your soil from temperature extremes, conserving precious moisture during hot summer months, and suppressing those persistent weeds that would otherwise demand hours of your attention. All while gradually enriching your soil as organic varieties break down.
What makes the difference between mulch that delivers these benefits and mulch that falls short? It comes down to these essential practices:
Choosing the right mulch type matters tremendously. Cedar might be perfect for your front beds with its aromatic properties and pest resistance, while a simple hardwood might be ideal for your backyard perennials.
Proper depth is non-negotiable – that sweet spot of 2-3 inches provides optimal benefits without risking plant health. And always remember to create that donut shape around trees rather than the harmful “volcano” that can damage trunks and roots.
The timing of your installation can maximize benefits too. Spring mulching sets your landscape up for summer success, while fall applications provide crucial winter protection for delicate root systems.
While many homeowners successfully tackle landscape mulch installation as a DIY project, there’s undeniable value in professional installation. At Randall Landscaping, Inc., we’ve refined our techniques through nearly two decades of experience serving properties throughout the Merrimack Valley and Southern New Hampshire. We understand the unique challenges of New England soils and climate conditions, and we bring that expertise to every project, large or small.
Our approach goes beyond simply dumping mulch. We carefully prepare beds, create crisp edging, apply material at optimal depths, and ensure proper clearance around plants and structures. The result is a landscape that not only looks stunning immediately after installation but continues to thrive season after season.
For more information about our specialized mulch services in specific communities, explore our location pages such as Mulch Installation in Haverhill, MA.
Whether you’re enhancing a single flower bed or changing your entire property, quality mulch installation provides returns in beauty, plant health, and reduced maintenance that far exceed your initial investment. Trust the experts at Randall Landscaping to help you achieve the landscape of your dreams, with perfectly mulched beds that make your property the envy of the neighborhood.