
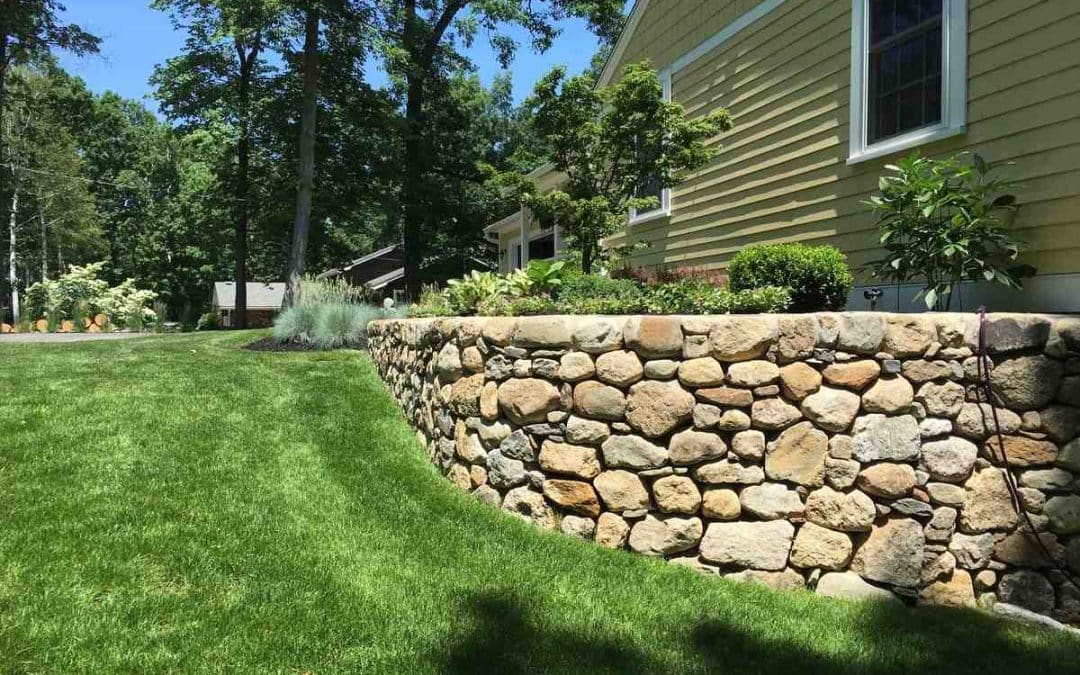
Why Your Retaining Wall Keeps Failing (And How Interlocking Blocks Fix That)
What is an interlocking block retaining wall? Here’s a quick answer:
| Feature | Details |
|---|---|
| What it is | A dry-stacked wall system using concrete blocks that lock together via lips, grooves, or pins — no mortar needed |
| How it works | Each block’s rear lip hooks over the block below, creating a slight backward lean (setback) that resists soil pressure |
| Best for | Slopes, terraces, raised patios, erosion control, garden beds |
| DIY-friendly? | Yes — for walls under 4 feet tall with proper drainage |
| Key advantage | Flexible construction that moves slightly with the ground instead of cracking like rigid mortared walls |
| Material cost | Roughly $15–$35 per sq ft for materials (internet averages) |
An interlocking block retaining wall is one of the most reliable ways to stop a slope from eating your yard — but only when it’s built right. Most walls that lean, bulge, or collapse within a few years weren’t let down by bad blocks. They were let down by a skipped drainage step, an unlevel first course, or a base that wasn’t compacted properly.
The good news? These mistakes are completely avoidable. The interlocking block system was designed to make professional-grade retaining walls accessible to homeowners and contractors alike. The blocks align themselves, the setback is built in, and no mortar or special tools are required.
But “easy to build” doesn’t mean “hard to get wrong.”
This guide walks you through everything — from how the blocks actually work, to base prep, drainage, step-by-step installation, costs, and when to call in a pro.
I’m Tommy Randall, owner of Randall Landscaping, Inc., and I’ve been designing and installing interlocking block retaining walls across Massachusetts and New Hampshire since 2006. In nearly two decades of hardscape work, the pattern is always the same: the walls that last are built on a solid base with proper drainage behind them, and the ones that fail almost always skipped one of those two things.
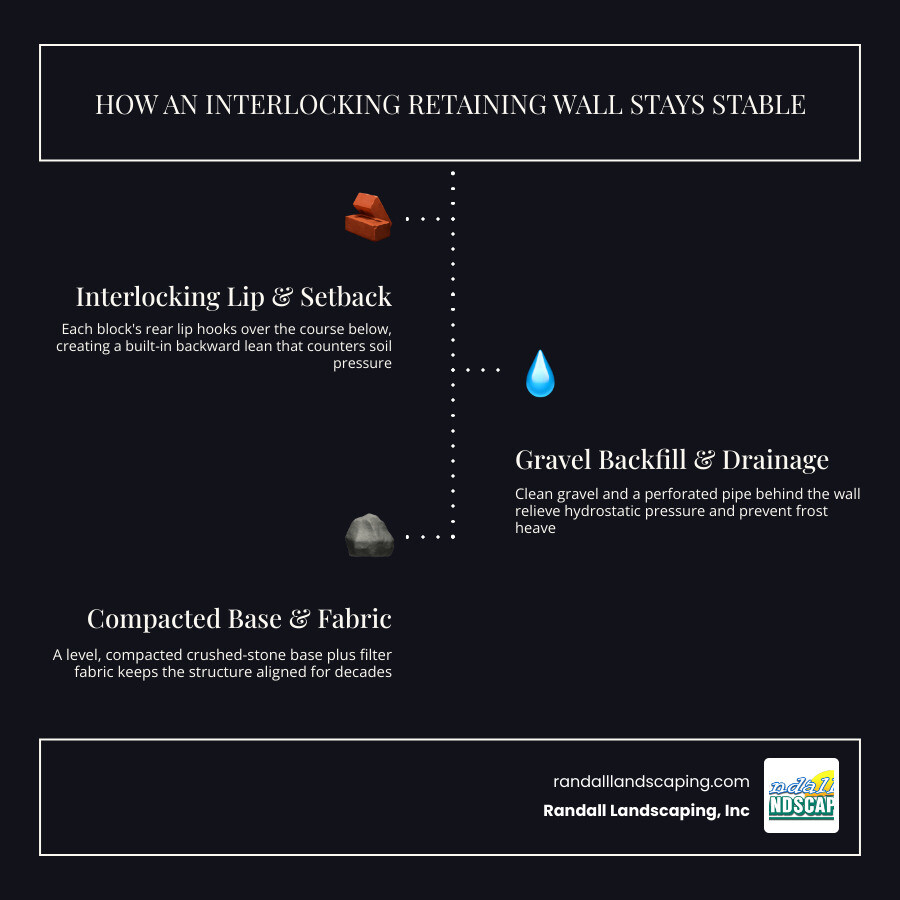
Interlocking block retaining wall terms explained:
What an Interlocking block retaining wall Is and Why It Holds Better
An Interlocking block retaining wall is a segmented, mortarless wall built from concrete units that mechanically connect to one another. Instead of relying on mortar to become one rigid mass, the wall gains stability from:
- block-to-block interlock
- built-in setback, also called batter
- the weight of the wall itself
- compacted base material
- free-draining gravel behind the wall
- controlled water movement away from the structure
That combination matters because retaining walls are not just decoration. A true retaining wall is holding back soil, water, and sometimes extra weight from patios, driveways, fences, or people walking above.
A short garden border can get away with much less. A retaining wall cannot.

How interlocking retaining wall blocks differ from mortared and non-interlocking blocks
Traditional mortared masonry walls are rigid. That can look great, but rigid systems are less forgiving when the ground moves with frost, settlement, or seasonal moisture changes. In Merrimack Valley and Southern NH, that movement is not exactly rare.
Interlocking blocks are different because they are designed to dry-stack. Common systems use:
- a rear lip
- tongue-and-groove edges
- pins
- shear keys
- notches or grooves for alignment
These features help each course lock into the course below without mortar.
Compared with non-interlocking wall blocks, interlocking units are usually better for true retaining work because they self-align and create consistent setback. Non-interlocking blocks are often better suited to very low landscape walls, edging, or freestanding decorative features unless the system is specifically engineered otherwise.
The design features that make an Interlocking block retaining wall stable
The small details in the block shape do a lot of heavy lifting.
Common stability features include:
- Rear lip: creates automatic setback from course to course
- Tongue-and-groove connection: helps prevent sliding and keeps alignment consistent
- Pins or clips: lock upper blocks to lower blocks in some systems
- Shear keys: resist movement between courses
- Trapezoid shape: makes gentle curves easier without custom cutting
- Hollow or drainage-friendly cores: can help reduce weight and improve drainage paths in some systems
Many high-quality concrete wall blocks are manufactured to at least 5000 PSI compressive strength, which helps explain why properly built segmented walls can last for decades.
Where interlocking blocks are the right choice and where they are not
Interlocking blocks are usually the right choice for:
- yard slopes
- terraced planting areas
- erosion control
- raised patios
- level lawn transitions
- driveway edge support when properly designed
- residential retaining walls under about 4 feet for experienced DIYers
They are usually not the best choice for casual guesswork on:
- walls over 4 feet without engineering
- walls with heavy vehicle loads above
- sites with severe drainage problems
- unstable or clay-heavy soils without proper design
- steep slope failures already in progress
- freestanding walls where a different wall type is more appropriate
If you want a broader overview of wall types and applications, see our more info about retaining walls.
Design Rules Before You Build
Before anyone digs a trench, the smart questions are:
- How tall is the wall?
- What is above the wall?
- Where will the water go?
- What is the soil like?
- Will the wall curve, step, or turn a corner?
- Does the town require a permit?
This is the part people skip because it is less fun than stacking blocks. It is also the part that keeps the wall from becoming a very expensive pile of regret.
Safe height ranges for DIY walls vs engineered walls
A common rule of thumb is:
- Under 4 feet: often manageable for DIY if drainage, base prep, and local code compliance are handled correctly
- Over 4 feet: generally requires professional design, and often permits
- Over 4 feet with surcharge loads: definitely not a casual weekend project
Research consistently points to walls over 4 feet as the threshold where engineering review becomes important. Some systems allow much taller walls with reinforcement and geogrid, but those are engineered structures, not guess-and-go projects.
In our service area, local permit requirements can vary by town, so always check before building.
Layout, setback, curves, corners, and caps
Good layout saves time later.
Use a string line, marking paint, and careful measurements to set:
- wall length
- finished face line
- curve radius
- corner locations
- stair transitions
- cap direction and overhang
Curved walls are easier with trapezoidal interlocking blocks. Gentle arcs are usually no problem. Tight curves may require a specific block system or some cutting.
Capstones matter too. They give the wall a finished appearance and help protect the courses below. On most projects, we secure caps with exterior-grade concrete adhesive.
Choosing block size, weight, color, and texture for the project
Choose the block based on the job, not just the color sample.
Smaller blocks are easier for DIY work and tight access areas. Heavier blocks are often better for bigger walls and tougher loading conditions. Residential units commonly weigh around 50 to 80 pounds each, while large commercial interlocking units can weigh thousands of pounds and require equipment to place.
You will also see a wide range of:
- smooth or split-face textures
- tumbled or chiseled looks
- grays, browns, charcoals, reds, and blended tones
- straight-face and corner units
- matching caps
| Block type | Typical use | Approx. weight | Best fit |
|---|---|---|---|
| Light-duty residential | garden terraces, low retaining walls | 40-80 lbs | DIY-friendly small projects |
| Mid-duty residential | 2-4 ft retaining walls | 60-100 lbs | most backyard slope work |
| Heavy-duty / engineered | taller walls, load-bearing areas | 100 lbs to several tons | pro installation |
Pick a block that matches:
- wall height
- soil pressure
- site access
- desired look
- whether curves or corners are needed
- whether the system has matching caps and corners
Base Prep and Drainage: The Part That Determines Whether the Wall Lasts
If we could put one sentence in giant letters over every retaining wall project, it would be this:
Drainage and base prep matter more than the block brand.
Foundation preparation for an Interlocking block retaining wall
A stable wall starts below grade.
Typical foundation prep includes:
- excavating a trench wide enough for the block plus room behind for drainage stone
- burying part of the first course
- placing at least 6 inches of compacted crushed stone base
- compacting in lifts
- screeding the base level
- checking front-to-back and side-to-side accuracy constantly
A common guideline is to bury about half the height of the first block, plus include around 6 inches of compacted gravel base. The trench width often needs to be wider than the block itself so the base fully supports the unit and the drainage zone fits behind it.
Why drainage matters more than most homeowners expect
Water is the villain in most retaining wall failures.
Without drainage, water builds hydrostatic pressure behind the wall. That pressure can cause:
- bulging
- leaning
- sliding
- washout
- frost heave
- cracked caps
- soil movement behind the wall
A properly drained wall can last for decades with minimal maintenance. A poorly drained wall can start misbehaving long before the landscaping around it has even filled in.
This is especially important in our Massachusetts and Southern NH climate, where freeze-thaw cycles can turn trapped water into expanding pressure.
The right drainage assembly behind the wall
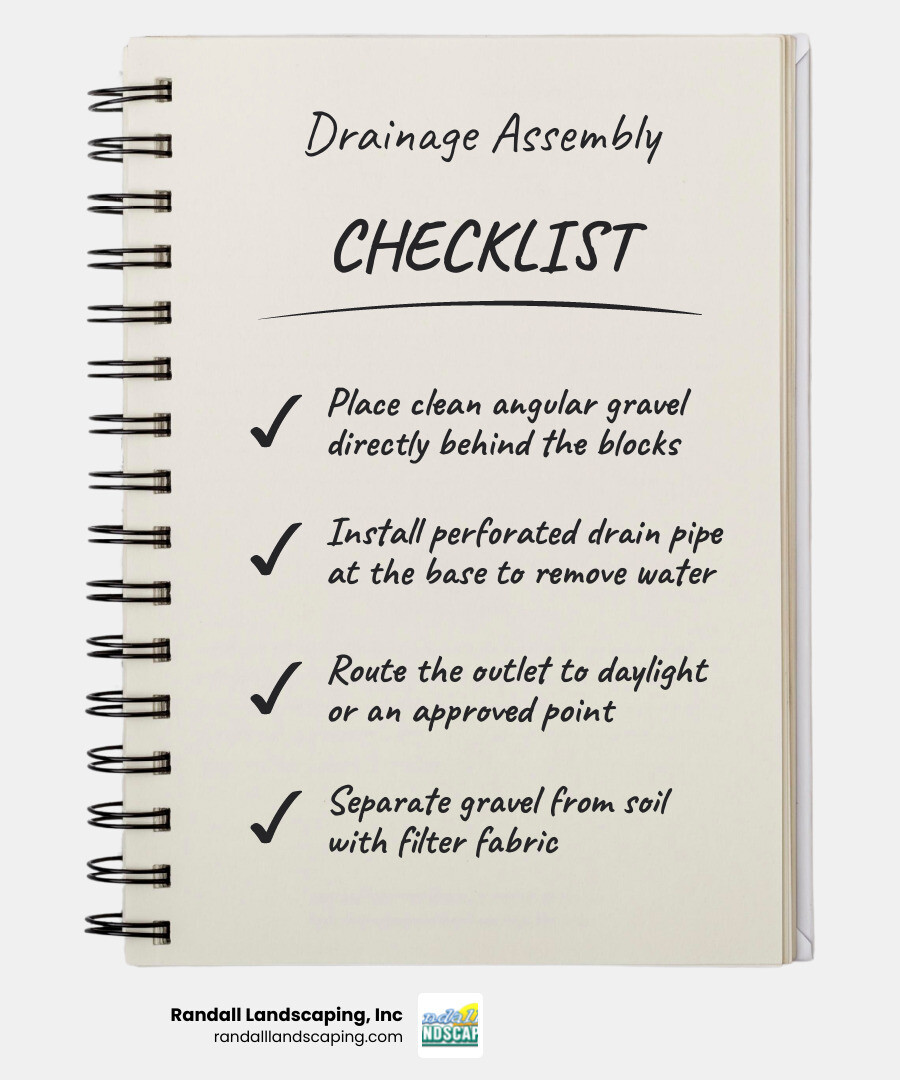
A proper drainage zone usually includes:
- clean angular gravel directly behind the wall
- a perforated drain pipe at the base
- an outlet path to daylight or an approved drainage point
- filter fabric separating gravel from native soil
- compacted soil placed in controlled layers behind the gravel zone
Many mortarless systems are intentionally designed to let incidental water move through or around the blocks more easily than rigid mortared walls. For more on how these systems manage water, see Mortarless retaining wall systems.
How to Build an Interlocking Block Retaining Wall Step by Step
This is the simplified field sequence for a typical residential wall.
Step 1: Mark, excavate, and prepare the trench
Before digging, call 811 to locate utilities.
Then:
- Mark the wall layout with paint, stakes, or a hose for curves.
- Excavate the trench to the required depth and width.
- Remove soft or organic material.
- Add crushed stone base in layers.
- Compact each lift thoroughly.
- Screed the top of the base level.
Do not use loose topsoil, sand-only fill, or random leftover stone. A retaining wall base is not a junk drawer.
Step 2: Set and level the first course perfectly
The first course is everything.
- Place the first row on the prepared base.
- Level each block side-to-side and front-to-back.
- Check alignment with a string line.
- Bury the required portion of the first course.
- Adjust with base material, not with wishful thinking.
If the first course is off, every course above it will be off too, just more expensively.
Step 3: Stack, stagger, backfill, and compact each course
Once the base course is perfect:
- Brush debris off the top of the blocks.
- Install the next course according to the block’s interlock system.
- Stagger vertical joints in a running bond pattern.
- Fill behind the wall with clean gravel.
- Compact backfill in lifts.
- Keep native soil separated from gravel with filter fabric where needed.
- Recheck setback and face alignment constantly.
Hand-operated compactors are usually safer close to the wall than large equipment during installation.
Step 4: Add pipe, fabric, and capstones to finish the wall
Finish the system, not just the face.
- Install perforated drain pipe at the base behind the wall.
- Slope the pipe to a proper outlet.
- Continue gravel backfill as the wall rises.
- Fold filter fabric over the top of the gravel zone if needed.
- Install capstones with adhesive.
- Grade the surface so water sheds away from the wall.
If you enjoy technical rabbit holes, the basic concept of interlocking wall geometry has even been explored in systems like this interlocking retaining wall block system patent.
Common installation mistakes that cause failure
Here are the mistakes we see most often:
- poor base compaction
- unlevel first course
- no drain pipe
- using clay soil directly behind the wall
- skipping gravel backfill
- failing to maintain setback
- not staggering joints
- planting large trees too close
- ignoring heavy loads above the wall
- building too tall without engineering
If you are thinking about doing the work yourself, our more info about DIY retaining walls can help you decide whether it is truly a DIY job or a “maybe let’s not learn this one the hard way” job.
Cost, Maintenance, and When to Hire a Professional
Average material and project costs in 2026
Based on internet averages, interlocking retaining wall block materials typically run about $15 to $35 per square foot.
Installed project costs vary much more. In 2026, a realistic broad internet-average range for complete projects is often around:
- $30 to $60 per square foot for simpler small walls
- $60 to $120+ per square foot for more complex projects
- $120 to $180+ per square foot for difficult access, taller walls, drainage complications, demolition, or reinforcement
These are average internet-based price ranges, not actual pricing from Randall Landscaping, Inc.
Budget line items usually include:
- block materials
- base stone
- drainage stone
- perforated pipe
- fabric
- caps
- excavation
- delivery
- disposal
- labor
- possible engineering or permits
What affects the total budget the most
The biggest cost drivers are usually:
- wall height
- total wall length
- poor soil conditions
- tight site access
- need for drainage outlets
- reinforcement such as geogrid
- caps and corners
- demolition of an old failed wall
- machine access vs hand-carry installation
A short, straight wall in open access is one thing. A terraced wall system on a tight sloped lot in January mud is another thing entirely.
Ongoing maintenance for a long-lasting wall
A well-built interlocking wall is low-maintenance, not no-maintenance.
We recommend:
- checking the wall annually for movement or separation
- keeping drain outlets clear
- watching for erosion at the top or ends
- controlling weeds in joints and at the base
- checking cap adhesion
- regrading low spots that direct water toward the wall
- avoiding large root systems too close behind it
If a wall is already leaning, settling, or cracking, our more info about retaining wall repair explains what can be repaired and what usually needs rebuilding.
When a homeowner should stop and call a pro
Call a professional if your project includes:
- a wall over 4 feet
- steep slopes
- water flowing toward the wall
- driveway or vehicle loads above
- clay-heavy or unstable soils
- multiple tiers
- stairs or complex corners
- permit drawings or engineering
- an existing failed wall
If you are comparing options, our more info about retaining wall contractors can help you understand what to look for.
Frequently Asked Questions About Interlocking block retaining wall Projects
How long does an interlocking block retaining wall last?
A properly installed wall can last for decades. Some systems are designed with 50-plus-year expectations when base prep and drainage are done correctly. Longevity depends less on the face block and more on what is behind and beneath it.
Do I really need gravel and a perforated pipe behind the wall?
Yes. Absolutely yes.
The gravel creates a free-draining zone. The pipe gives water a path out. Without both, water pressure builds behind the wall and greatly increases the risk of bulging, leaning, and failure.
Can I build a curved wall with standard interlocking blocks?
Usually, yes. Many interlocking blocks are slightly trapezoidal, which allows gentle curves without special pieces. Tight radiuses may still need a specific block type, careful layout, or some cutting.
Conclusion
An Interlocking block retaining wall works because the system is simple in the right ways: solid base, built-in setback, compacted backfill, and reliable drainage. Skip any of those, and the wall may eventually tell you about it in the least polite way possible.
If you want a wall that actually stays put in Merrimack Valley or Southern NH, plan it carefully, build the base right, and never treat drainage like an optional upgrade.
And if you would rather have it designed and installed by a team that does this every day, we are here to help. Explore our more info about retaining walls to see how we approach durable, clean-looking walls that are built to last.