
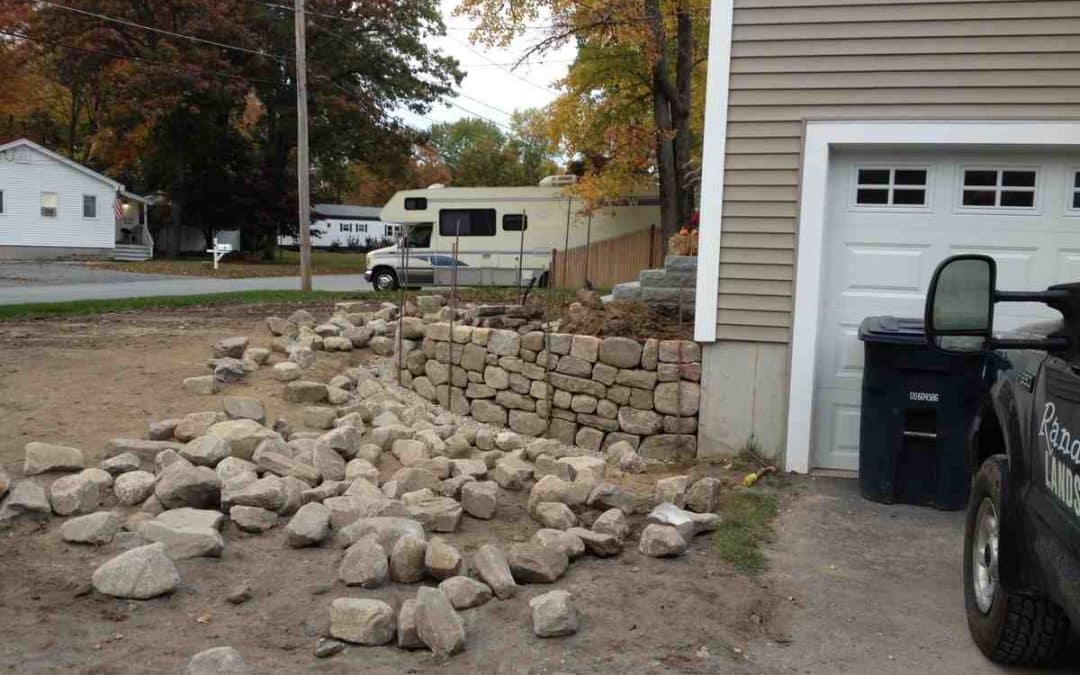
Is Your Landscape Wall Repair a DIY Job or a Pro Job?
Landscape wall repair is something most homeowners in Southern NH will face at some point. Here’s a quick breakdown of what to do based on your situation:
Quick guide by damage type:
| Damage Type | DIY or Pro? | Urgency |
|---|---|---|
| Hairline cracks | DIY | Low |
| Spalling or crumbling mortar | DIY | Medium |
| Minor lean (<1 inch) | DIY (if under 4 ft) | Medium |
| Bulging blocks | Pro recommended | High |
| Horizontal cracks | Pro required | Very High |
| Leaning >2 inches | Pro required | Very High |
| Wall over 4 feet high | Pro required | Immediate |
A landscape wall that’s cracking, leaning, or pulling away from the soil isn’t just an eyesore. It’s a sign that something structural is going wrong underneath. Left untreated, the problem typically gets worse – research shows leaning walls can deteriorate 15-20% annually without intervention.
The good news? Many common problems – like minor cracks, loose mortar, or a slight lean in a short wall – are well within reach for a motivated DIYer with the right tools and approach.
But get it wrong, and a $1,500 repair can turn into a $15,000 rebuild.
This guide walks you through the do’s and don’ts so you know exactly what you’re dealing with before you pick up a shovel.
I’m Tommy Randall, owner of Randall Landscaping, Inc., and I’ve been building and repairing landscape walls across Massachusetts and Southern NH since 2006. Over nearly two decades, landscape wall repair has been one of the most common calls we get – and one of the most misunderstood DIY projects homeowners attempt.
Explore more about Landscape wall repair:
Identifying Signs and Assessing Landscape Wall Repair Needs
Before you can fix a wall, you have to be a bit of a detective. In our experience working throughout the Merrimack Valley, most wall issues don’t happen overnight. They whisper before they scream.

Common red flags include:
- Leaning Sections: If the top of the wall is tilting forward, the weight of the soil behind it is winning the tug-of-war.
- Bulging Blocks: This often looks like a “belly” in the middle of the wall. It’s a classic sign of internal pressure.
- Horizontal Cracks: These are much scarier than vertical ones. A horizontal crack suggests the wall is bowing under extreme stress.
- Separation from Structures: If your wall was once flush against your house or a set of stairs and now there’s a gap, the foundation is likely shifting.
- Efflorescence: Have you noticed a white, powdery substance on your bricks or blocks? That’s salt left behind by evaporating water. It tells us that water is trapped inside the wall, which is a recipe for disaster during a New England winter.
For a deeper dive into why these structures fail, check out this guide about proper wall design.
Assessing the Severity of Landscape Wall Repair
How do you know if you should grab a trowel or your phone? We use a few “rules of thumb” here at Randall Landscaping.
First is the 4-foot rule. Most local building codes in towns like Salem or Windham require an engineer’s touch for any wall over four feet tall. These walls hold back massive amounts of earth—sometimes several tons—and if they fail, they don’t just fall; they collapse.
Second, distinguish between structural and cosmetic damage. A small crack in the mortar of a decorative garden wall is cosmetic. A block that has shifted two inches forward is structural. If you see soil washing out from behind the wall or the base of the wall sinking into the ground, you have a foundation issue that a simple patch won’t fix. You can find more details on our repair-retaining-walls page.
When to Call a Professional
We love a good DIY spirit, but some jobs are simply dangerous. You should call us or another local professional if:
- Cracks are wider than 1/4 inch: Large gaps mean the wall is no longer a single unit.
- The wall is leaning significantly: Anything more than a 2-inch lean is statistically likely to worsen by 15-20% every year.
- The wall supports a “surcharge”: If there is a driveway, a swimming pool, or a shed sitting on the land directly above the wall, the stakes are too high for a DIY fix.
- You see a “blowout”: If a section of the wall has already collapsed, the rest is likely unstable.
Why Walls Fail: Drainage, Soil, and Structural Causes
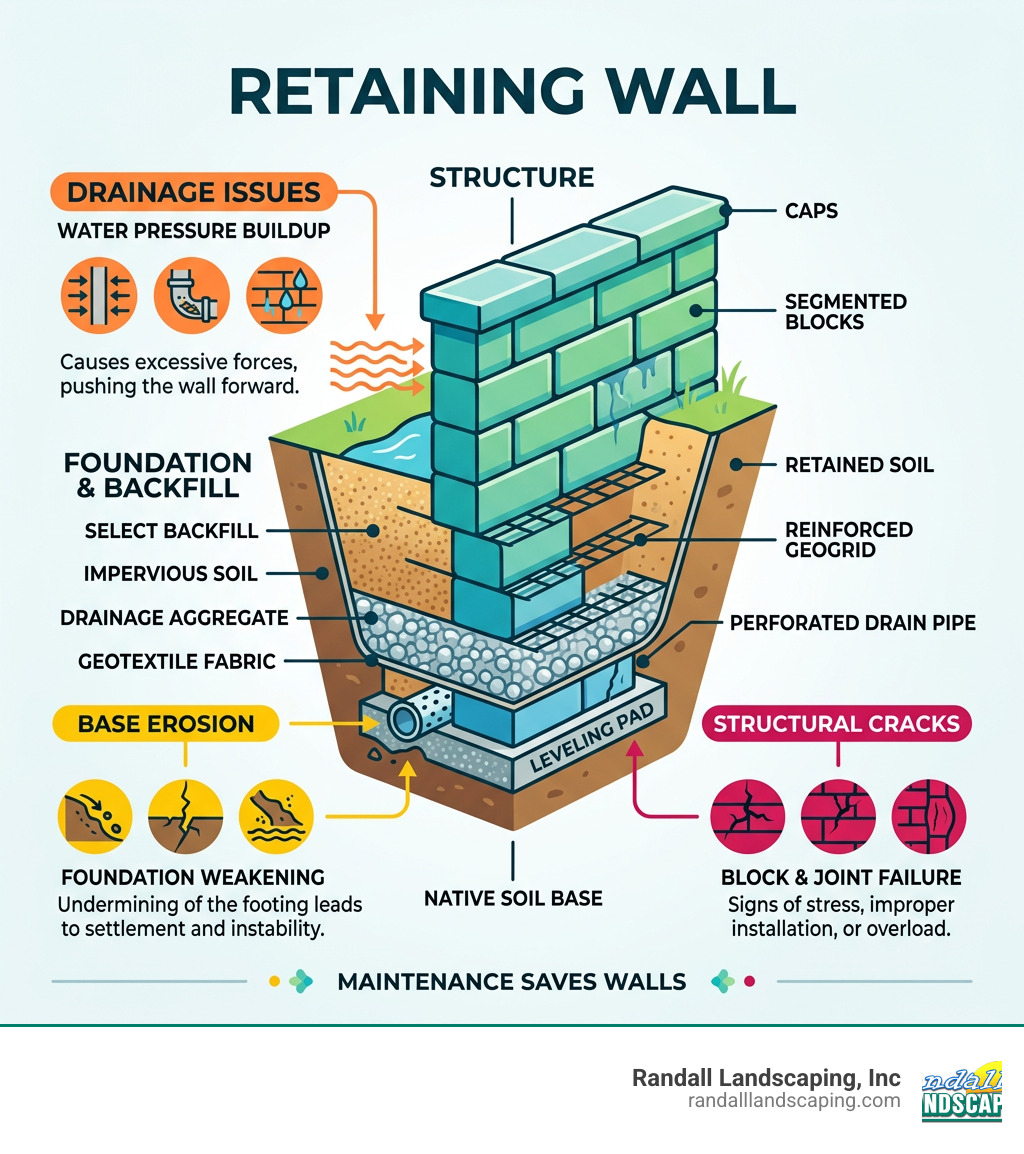
In the Merrimack Valley and Southern NH, we deal with a lot of clay and loam. These soils are heavy and hold onto water like a sponge. When water gets trapped behind a wall, it creates hydrostatic pressure. This is the #1 reason for landscape wall repair.
Other culprits include:
- Soil Expansion: Clay soil expands when it freezes. This “frost heave” can push even the heaviest stones out of alignment.
- Surcharge Loads: Sometimes a wall was built to hold back dirt, but then someone parked a truck above it. That extra weight pushes the wall forward.
- Foundation Erosion: If water pools at the base of the wall, it can soften the soil the wall sits on, causing it to sink or tilt.
To understand how the ground beneath your feet affects your masonry, read more info about soil’s role.
The Role of Drainage in Landscape Wall Repair
If you don’t fix the water, you haven’t fixed the wall. Period. A proper repair must include ways for water to escape. This usually involves weep holes (small gaps in the wall face) or a French drain (a perforated pipe buried in gravel behind the wall).
Using the right backfill is also critical. You want clean, angular gravel that allows water to flow down to the pipe rather than sitting against the wall. We’ve put together a complete-retaining-wall-repair-guide that explains these drainage systems in detail.
Soil Compaction and Stability
When we rebuild a section of a wall, we don’t just throw the dirt back in. We do it in “lifts”—small layers of about 4 to 6 inches—and compact each one firmly. We also use geotextile fabric to keep the dirt from clogging up our drainage gravel. Without these steps, the soil will eventually settle, and you’ll be right back where you started.
Essential Tools and Materials for DIY Success
If you’ve decided to tackle a minor landscape wall repair, you’ll need more than just a hammer. Here’s what we recommend for different wall types:
| Wall Type | Essential Materials | Key Tools |
|---|---|---|
| Concrete Block | Masonry adhesive, leveling sand | Dead blow hammer, torpedo level |
| Brick | Type N mortar, bonding agent | Magnusson 44mm Masonry Bolster |
| Natural Stone | Stone dust, landscape fabric | Sledgehammer, Forney Wire Scratch Brush |
| Timber | Galvanized spikes, wood preservative | Chainsaw, 4-foot level |
For mortar-based repairs, using a high-quality product like Blue Circle Quality Assured Mortar ensures a better bond. Once your repair is dry and hardened, applying a sealer like Thompson’s WaterSeal can help prevent future frost damage.
Step-by-Step Guide to Fixing Cracks, Bulges, and Leaning
Repairing Minor Cracks and Spalling
For small cracks in concrete or brick walls, the goal is to create a “key” for the new material to stick to.
- Clean it out: Use a Forney Wire Scratch Brush to remove loose debris.
- V-Groove: Use a hammer and chisel to widen the crack into a “V” shape. This gives the mortar more surface area to grab onto.
- Apply Bonding Agent: We recommend Sika SikaBond SBR+ to help the new mortar stick to the old surface.
- Fill and Smooth: Press the mortar firmly into the crack and smooth it with a trowel.
Fixing Leaning or Bulging Sections
If a section of a dry-stack (no mortar) block wall is bulging, you have to take it apart to fix the root cause.
- Dismantle in a V-shape: Take off the cap stones and then remove blocks in an inverted pyramid shape, going at least two blocks wider than the damaged area.
- Excavate: Dig out the dirt at least 12 inches behind the wall.
- Check the Base: Ensure the gravel foundation is level and compacted. If it has sunk, add more crushed stone and tamp it down.
- Rebuild with Reinforcement: As you put the blocks back, use geogrid (a heavy-duty plastic mesh) between the layers. This mesh extends into the soil behind the wall, using the weight of the dirt to hold the blocks in place.
- Backfill properly: Use angular gravel and a perforated pipe for drainage.
For more complex structural stabilization, we sometimes use advanced methods like helical-anchors-retaining-wall-repair.
Professional vs. DIY: Safety, Permits, and Cost Analysis
Choosing between DIY and hiring us often comes down to a balance of time, safety, and long-term value. While DIY can save you $15 to $50 per square foot in labor costs, a professional repair often includes engineering and drainage solutions that a homeowner might miss.
Average Costs for Landscape Wall Repair
Based on internet data averages, here is what you might expect to pay (keep in mind these are estimates and not actual quotes for Randall Landscaping):
- DIY Material Costs: $500 – $1,500 (covers gravel, pipe, and a few replacement blocks).
- Minor Professional Fixes: $200 – $1,000 (small cracks or individual block replacement).
- Professional Structural Repair: $2,500 – $18,000+ (includes excavation, drainage retrofitting, and wall stabilization).
- Full Wall Rebuild: $3,000 – $40,000+ (depending on height, length, and material).
If your wall is over 3-5 feet tall, you’ll likely need a permit (costing $50-$200) and potentially an engineer’s stamp. For more on what to look for when hiring help, see our retaining-wall-builders-hiring-guide.
Frequently Asked Questions about Landscape Wall Repair
How long does a properly repaired landscape wall typically last?
A well-done landscape wall repair should last as long as the original wall was intended to.
- Concrete Blocks: 50–100 years.
- Natural Stone: Centuries (if the drainage is right).
- Timber: 20–40 years (wood eventually rots, even if treated).
What is the most common mistake in DIY landscape wall repair?
Ignoring the drainage. Many people just push the blocks back and fill the hole with the same dirt they dug out. Without adding gravel and a pipe, the hydrostatic pressure will just push the wall back out within a year or two.
Can I reinforce an existing wall without a full rebuild?
Sometimes! If the wall is structurally sound but just starting to lean, we can install helical anchors or ground anchors. These act like giant screws that go through the wall and deep into the stable soil behind it, “pinning” the wall in place.
Conclusion
A beautiful landscape wall is the backbone of your yard’s design, but it requires maintenance. We recommend an annual inspection every spring. Look for new cracks, check that your weep holes aren’t clogged with mud, and make sure large trees aren’t growing too close—their roots can be incredibly destructive.
Whether you decide to tackle your landscape wall repair this weekend or you’d rather have our team at Randall Landscaping, Inc. handle the heavy lifting, the most important thing is to act early. A small lean is a project; a collapsed wall is a catastrophe.
If you’re in Andover, Dracut, Pelham, or anywhere in the Merrimack Valley, reach out to us for a professional assessment of your retaining-walls. We’re here to make sure your landscape stays exactly where it belongs.