
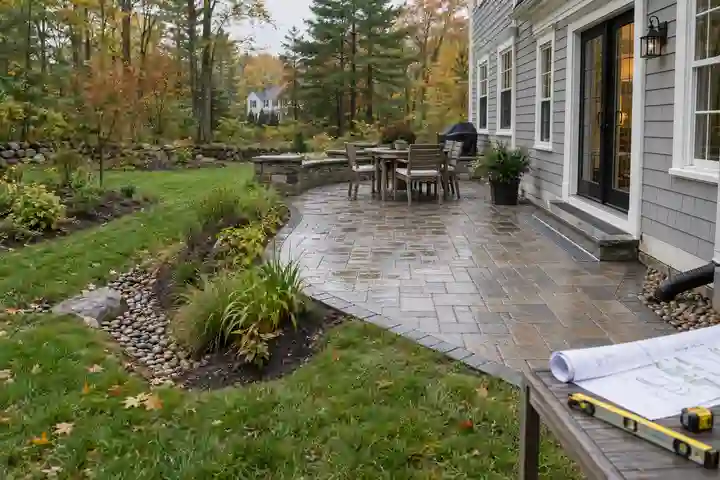
Patio drainage planning should happen before the first paver is ordered. The surface, base, surrounding grade, roof runoff, soil, and discharge location all affect where rain and snowmelt go. If those pieces are considered separately, a patio can look finished while water collects at an edge, moves toward the house, or freezes across a walking route.
The first design question is not “Which drain should we add?” It is “Where does water start, where can it safely end, and what has to happen between those two points?” For a Southern New Hampshire patio, the answer also needs to account for frozen ground, snow storage, spring melt, and repeated freeze-thaw conditions.
Map the Water Before Designing the Patio
A useful patio drainage plan starts with a simple water map. Walk the site during rain and again after the storm. Mark the following on a photo or sketch:
- roof downspouts and sump or foundation discharge points;
- high and low areas around the proposed patio;
- doors, basement windows, steps, and foundation edges;
- existing lawn swales, catch basins, retaining walls, and drains;
- areas where water ponds after the rest of the property dries;
- soil that stays soft or erodes; and
- the winter snow pile and the route its meltwater takes.
Do not limit the map to the patio footprint. A downspout uphill or a compacted strip beside the driveway may contribute more water than the patio surface itself. Likewise, the apparent low side may not be a safe outlet if it sends runoff onto a walk, toward a neighbor, or back against a wall.
Five Drainage Decisions That Belong in the Design
| Decision | What the plan should answer | Warning sign during a site walk |
|---|---|---|
| Incoming water | Which roof, slope, or paved areas send water toward the patio? | A downspout empties beside the footprint or an uphill lawn channels runoff to one corner. |
| Surface grade | How will the finished surface move water away from the house and doors? | Existing grades are flat, reverse-sloped, or constrained by a low threshold. |
| Base and soil | Can the subgrade and base support the patio and the intended drainage approach? | The site stays wet, has fill of unknown depth, or shows settlement nearby. |
| Collection or infiltration | Will water shed to a stable landscape area, enter a drain, or pass through a permeable system? | There is no identified destination beyond “the low side.” |
| Winter behavior | Where will snow be stored, and can meltwater cross and refreeze on a route? | The only outlet crosses steps, a gate, or the main walk. |
1. Separate source water from patio water
Roof runoff should not be treated as if it simply fell on the patio. Downspout flow is concentrated and may require its own route. The U.S. Environmental Protection Agency describes downspout disconnection as redirecting roof drainage to a rain barrel, cistern, or permeable area rather than sending it directly into a storm sewer. The appropriate destination depends on the property, but the principle is useful: identify concentrated sources instead of asking the patio to absorb every flow. See the EPA’s overview of green infrastructure types.
2. Design surface and subsurface drainage together
A finished paver surface and the layers below it operate as a system. Surface grade moves water across the patio; bedding, base, subgrade, edge restraints, and any drain or outlet determine what happens underneath and at the perimeter.
The Concrete Masonry & Hardscapes Association states that surface and subsurface drainage, along with pavement grades, should be designed together for interlocking concrete pavement. Its application guide also notes that drainage is essential where water meets headers and other restraints. That is why copying a slope number from a generic diagram is not a complete design. The installer must evaluate the actual elevations, thresholds, soil, base, and outlet. Review the association’s interlocking concrete pavement application guide.
3. Choose conventional or permeable paving for the site—not the label
Conventional pavers typically move water across the surface to an edge or drainage feature. Permeable interlocking pavers are designed so water passes through aggregate-filled joints into open-graded layers below. The EPA explains that those systems may infiltrate water into soil or route it through an underdrain, depending on site conditions.
Permeable is not automatically the right answer for every patio. Soil infiltration, separation from buildings, groundwater considerations, sediment exposure, construction details, and maintenance all matter. Randall’s existing guide to how permeable paver systems manage water covers that choice in depth. This article’s job is earlier: make sure the drainage question is defined before the patio system is selected.
4. Give water a complete destination
“Add a channel drain” is not a complete plan unless the outlet is also identified. A collection point can fail if its pipe is too shallow for the site, has nowhere lawful and stable to discharge, is vulnerable to sediment, or exits where water will freeze on another surface.
A complete concept identifies the source, conveyance path, outlet, overflow route, and maintenance access. If the site is constrained by a steep grade, retaining wall, neighboring property, septic components, or municipal drainage, the project may require design or permitting input beyond a normal patio estimate.
5. Test the plan against winter use
Picture the property in February and during a March thaw. Snow piled on the patio’s low side can temporarily block the intended outlet. Meltwater that crosses a shaded walk may refreeze. Plowing or shoveling can also move joint material and debris toward drains.
Ask where snow will go, which paths must stay usable, and how drain inlets or permeable joints will be kept clear. A system that works in a summer thunderstorm still needs a reasonable winter operating plan.
Questions to Ask During a Patio Estimate
Bring your water map and ask the same questions of every contractor:
- What existing water reaches this area? Ask the contractor to point out roof, slope, and paved-surface contributions.
- Which direction will the finished patio drain? The answer should reference actual elevations and building openings, not only a general rule.
- What is the outlet or infiltration strategy? You should be able to trace the proposed route from source to safe destination.
- How do the base and soil affect the design? Wet soil, fill, ledge, or past settlement should change the conversation.
- What happens during overflow and snowmelt? Every system needs a response when water exceeds normal conditions or an outlet is temporarily obstructed.
- Who is responsible for connected work? Clarify downspouts, drains, retaining walls, grading, permits, utility marking, and landscape restoration.
- What maintenance will the drainage features need? Ask how to inspect and clean joints, inlets, pipes, and outlets without damaging the patio.
Red Flags That Deserve More Investigation
Pause the design if water already enters the building, the proposed patio would sit close to a low door or window, a retaining wall shows movement, the only apparent outlet crosses a property line, or the area remains saturated long after rain. Those conditions do not automatically rule out a patio, but they do mean the drainage and structural questions must be resolved before finishes and patterns drive the project.
Also be cautious when a proposal describes only the surface material. A patio installation scope should make the base, grade, edge treatment, drainage approach, transitions, and restoration visible enough to compare.
Make Drainage Part of the Patio Brief
A patio drainage plan should be understandable before construction begins: where water comes from, how the patio and base will handle it, where it will go, what happens during overflow or snowmelt, and who owns connected work. That brief gives material and layout decisions a sound foundation.
Randall Landscaping designs and installs paver, brick, and stone patios throughout Southern New Hampshire and the Merrimack Valley. Review the company’s patio design and installation service, then request an estimate with your site photos and water map. The first conversation can then focus on the whole property rather than a drain chosen in isolation.