Why Patio Design and Installation Transforms Your Outdoor Living
Patio design and installation is the process of creating a functional, beautiful outdoor living space by carefully planning, selecting materials, and constructing a durable hardscape surface. Here’s what you need to know to get started:
Key Steps in Patio Design and Installation:
- Planning – Determine location, size, shape, and functionality based on how you’ll use the space
- Material Selection – Choose from concrete pavers, natural stone, brick, or poured concrete based on budget and style
- Site Preparation – Excavate and prepare a stable base with proper drainage
- Installation – Lay materials with correct techniques and edge restraints
- Finishing – Add polymeric sand, seal if needed, and furnish your new outdoor room
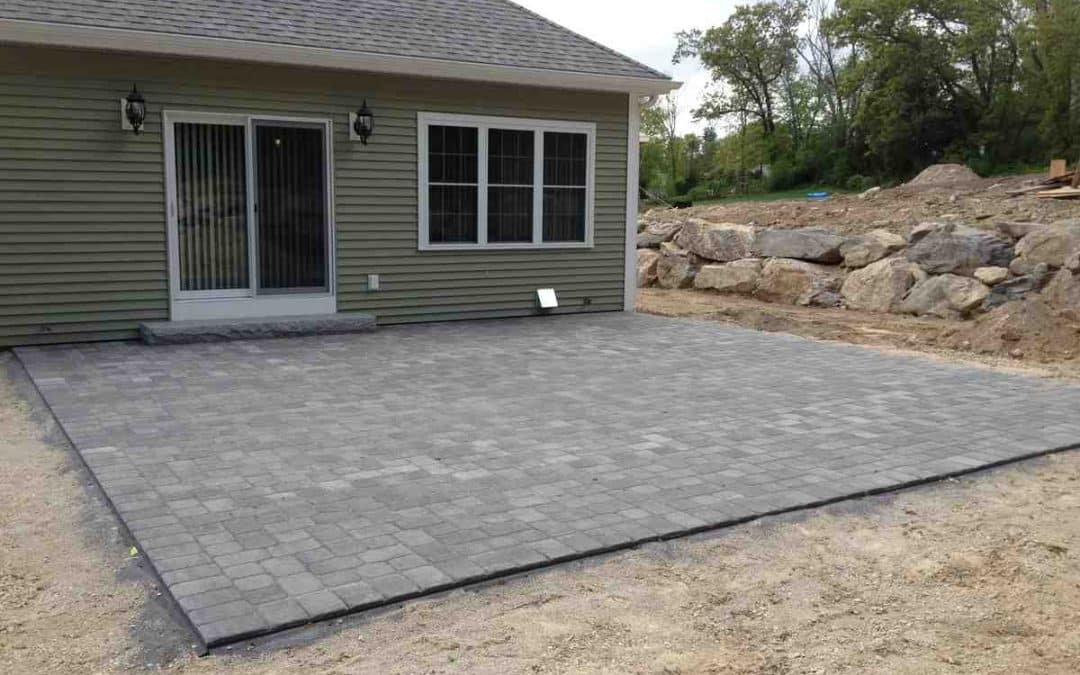
Outdoor patios are frequently viewed as an extension of indoor living space—and for good reason. A well-designed patio adds valuable square footage to your home, creates a perfect spot for entertaining guests, and provides a peaceful retreat right in your own backyard.
The impact goes beyond aesthetics. A professionally installed patio can significantly boost your property value while solving common yard challenges like uneven terrain, poor drainage, or underused space. Whether you want a cozy nook for morning coffee or a grand entertaining area complete with an outdoor kitchen and fire pit, the right patio transforms how you experience your home.
But success depends on getting the fundamentals right. From choosing materials that suit your climate to ensuring proper drainage and base preparation, every decision matters. Poor planning or installation can lead to sinking pavers, drainage failures, and costly repairs down the road.
I’m Tommy Randall, owner of Randall Landscaping, Inc., and I’ve been creating custom outdoor spaces across Massachusetts and New Hampshire since 2006, with patio design and installation as one of our core specialties. Our team has completed hundreds of patio projects, and I’ve seen how the right approach makes all the difference in creating a space that lasts for decades.
, Phase 2 Material Selection (pavers, stone, concrete), Phase 3 Installation (excavation, base, laying materials), Phase 4 Furnishing (furniture, lighting, features), Phase 5 Maintenance (sealing, cleaning, repairs) - patio design and installation infographic")
Common patio design and installation vocab:
Phase 1: Planning Your Perfect Patio
The first step in any successful patio design and installation project is thorough planning. This phase is where your dreams meet reality, laying the groundwork for a functional and beautiful outdoor space. We consider how you envision using your patio, where it will be located, and how it interacts with the natural environment around it.

When planning your patio, we always advise our clients to think about its primary functionality. Will it be a tranquil space for morning coffee, a lively hub for entertaining, or perhaps a combination of both? This initial vision guides decisions on size, shape, and features. Key considerations include:
- Location: The most common location is adjacent to the house, offering easy access and acting as a natural extension of your indoor living space. This also provides a built-in sun and wind barrier and makes it easier to attach awnings or covers. However, a detached patio can create a more secluded oasis deeper in your yard. We’ll help you decide what works best for your lifestyle and property.
- Sun Exposure: Do you want a sun-drenched spot for sunbathing or a shady retreat for peaceful relaxation? We’ll assess the sun’s path throughout the day to ensure your patio is placed optimally for your desired use.
- Drainage: Proper drainage is crucial to prevent water issues, weed growth, and mildew. We always ensure your patio drains away from your house and integrates with your yard’s overall drainage plan. Avoid low spots on your property, as excessive moisture can disturb the ground beneath your patio and lead to problems.
- Privacy and View: We can help create privacy where needed, using screen plantings to block views of neighbors or soften views of other structures. Conversely, we can design your patio to highlight desirable views, maximizing your enjoyment of your property.
- Utility Access: If you’re dreaming of an outdoor kitchen, fire pit, or extensive lighting, we’ll consider the proximity to plumbing, septic, and electrical lines during the planning stage to ensure seamless integration.
For more detailed planning insights, you can explore resources like the Planning Guide: Patios. Our goal is to create a patio that perfectly complements your home and lifestyle. Find out more about our services for Patio Design and Construction.
How to Choose the Right Size and Shape
Choosing the right size and shape for your patio is a critical step in patio design and installation, directly impacting its functionality and aesthetic appeal. We base this on your intended use and the number of people you wish to accommodate comfortably.
Think about the patio’s purpose:
- Dining Area: If you plan to host outdoor meals, you’ll need enough space for an appropriately sized dining table and chairs, plus room for guests to move around easily.
- Lounging Space: For a relaxation zone, consider the footprint of lounge chairs, sofas, or sectionals.
- Traffic Flow: Ensure there are clear pathways to and from the house, other yard features, and within the patio itself, without constantly bumping into furniture.
A good rule of thumb is to outline your desired patio area with stakes and string or spray paint and live with it for a few days. This helps visualize the space and ensure it feels right. We’ll draw these features to scale in our designs to ensure everything fits nicely, from your grill to your favorite outdoor sectional.
Whether you prefer clean, straight lines and rectangular shapes for a modern look, or unique curvilinear shapes and flowing lines for a more organic feel, we’ll design based on your preferences. For inspiration, explore our Custom Outdoor Patios to see various shapes and sizes we’ve brought to life.
Creative Solutions for Challenging Yards
Even the most challenging yards in the Merrimack Valley and Southern New Hampshire can be transformed into stunning outdoor living spaces through clever patio design and installation. We specialize in finding creative solutions for sloped and small yards.
For properties with steep slopes, multi-level or tiered patios are often the perfect answer. Instead of fighting the grade, we accept it to add functional square footage to your landscape. These designs can incorporate different zones for various activities, such as an upper level for dining, a middle level for a fire pit, and a lower level for grilling or an outdoor kitchen. This approach not only maximizes usable space but also adds visual interest and architectural depth to your outdoor environment. We can integrate retaining walls into the design, which are essential for structural integrity on slopes and can double as built-in seating.
Small yards also present unique opportunities. Even compact spaces can become highly functional and visually appealing with thoughtful design. The key is to define specific areas to maximize functionality. For example, a distinctive hardscape can create a focal point, drawing the eye and making the space feel larger. We can design an open space for entertaining or dining, or create a cozy nook for quiet contemplation. Incorporating elements like vertical gardens, built-in benches, or strategically placed planters can add greenery and seating without overwhelming the area. A well-designed patio, regardless of size, can significantly improve your outdoor living experience. If you’re in Windham, NH, and have a challenging yard, we’re ready to help with your Patio Design in Windham NH.
Key Factors in Your Patio Design and Installation Budget
Understanding the factors that influence the cost of patio design and installation is crucial for effective budgeting. While we always provide transparent quotes for our services, it’s helpful to know the general elements that contribute to the overall investment.
Key cost factors include:
- Square Footage: Simply put, larger patios require more materials and labor, increasing the total cost.
- Material Choice: As you’ll see in the next section, patio materials vary widely in price, from budget-friendly concrete to high-end natural stone.
- Site Preparation: Yards with significant slopes, poor drainage, or existing structures that need removal will require more extensive and costly preparation.
- Labor Costs: The complexity of the design, the type of materials used, and the necessary site work all impact the labor required for installation.
- Added Features: Incorporating elements like outdoor kitchens, fire pits, seating walls, pergolas, or intricate lighting systems will add to the budget.
Here are some ways to budget effectively for your patio project:
- Prioritize: Decide which features are “must-haves” and which are “nice-to-haves” that could be added later.
- Get Detailed Quotes: We provide comprehensive estimates that break down material and labor costs, helping you understand where your money is going.
- Consider Phased Installation: For larger projects, you might consider building your patio in phases to spread out the cost over time.
- Material Alternatives: Discuss with us if there are more budget-friendly material options that still achieve your desired aesthetic.
The following average costs for patio materials are based on internet data from 2024 reports and are not actual costs for Randall Landscaping. Prices can vary significantly based on regional availability, supplier, and project complexity.
- Poured Concrete: Generally ranges from $2 to $15 per square foot, but can go up to $30 or more for stamped or colored finishes.
- Concrete Pavers: Typically falls between $8 and $15 per square foot, potentially reaching $40+ for premium pavers or complex patterns.
- Brick: Costs usually range from $10 to $20 per square foot, but can extend to $60+ for specialty bricks or intricate designs.
- Natural Stone: This is often the most expensive option, ranging from $15 to $50 per square foot, and can exceed $150 for rare stones or custom cuts.
Investing in quality patio design and installation ensures longevity and minimizes future repair costs.
Phase 2: Choosing the Right Patio Materials
The materials you select for your patio play a huge role in its overall look, feel, and durability. This choice is a cornerstone of effective patio design and installation, impacting everything from aesthetics to long-term maintenance. We guide our clients in the Merrimack Valley and Southern New Hampshire to select materials that not only match their vision but also stand up to our local climate.

When considering patio materials, we look at several factors:
- Durability: How well will the material withstand foot traffic, furniture, and environmental elements like freeze-thaw cycles?
- Aesthetics: Does the material’s color, texture, and pattern complement your home’s architectural style and existing landscape?
- Climate Suitability: Certain materials perform better in our specific climate, resisting cracking from frost or excessive heat absorption.
- Maintenance Needs: Some materials require more frequent cleaning, sealing, or weed prevention than others.
Our expertise in Patios and Walkway Installations allows us to recommend the best options for your specific project.
Comparing Popular Patio Materials
Let’s explore some of the most popular patio materials we work with, examining their characteristics and helping you make an informed choice for your patio design and installation.
| Material | Average Cost/sq. ft. (Internet Data, 2024) | Lifespan | Maintenance | Key Pros & Cons |
|---|---|---|---|---|
| Concrete Pavers | $8 – $40+ | 30-50+ years | Low. Individual pavers are easy to replace. May require sealing and joint sand replenishment. | Pros: Versatile styles, durable, easy repairs. Cons: Can settle if base is poor, potential for weeds in joints. |
| Natural Stone | $15 – $150+ | 50-100+ years | Low. Requires occasional cleaning. Sealing is recommended to prevent stains. | Pros: Best natural beauty, extremely durable, high-end appeal. Cons: Highest cost, installation is labor-intensive, surface can be uneven. |
| Poured Concrete | $2 – $30+ | 20-40 years | Low. Requires sealing to prevent stains and surface damage. | Pros: Budget-friendly, versatile finishes (stamped, colored), smooth surface. Cons: Prone to cracking (especially in cold climates), repairs are noticeable. |
| Brick | $10 – $60+ | 50-100+ years | Low. Can be swept and washed. Individual bricks can be replaced if damaged. | Pros: Classic, timeless aesthetic, very durable, retains color well. Cons: More limited in color/style than pavers, can be slippery, susceptible to moss growth. |