Why Timely Retaining Wall Repair Matters
Repairing retaining wall structures quickly can prevent catastrophic failure and save you thousands of dollars. A leaning, cracked, or bowing wall isn’t just an eyesore—it’s a serious safety hazard that threatens your property and home’s foundation.
Quick Answer: When to Repair vs. Replace
- DIY Repair: Walls under 4 feet with minor cracks, a few loose blocks, or small drainage issues.
- Professional Repair: Walls leaning significantly, major structural damage, or walls near your home.
- Full Rebuild: Severe base failure, widespread cracking, or significant wall shifting.
Retaining walls are critical for holding back soil, preventing erosion, and creating usable flat areas on sloped properties. When they fail, the consequences can be severe, including property damage, collapsed landscaping, and flooding.
Many failing walls can be saved if you catch the problem early. Most issues stem from water pressure (hydrostatic pressure), poor drainage, or an inadequate foundation. The key is to identify and fix the root cause.
As Tommy Randall, owner of Randall Landscaping, Inc., I’ve been repairing retaining wall systems throughout Massachusetts and New Hampshire since 2006. I’ve seen how addressing problems early can save homeowners from complete rebuilds. In this guide, I’ll help you assess your wall’s condition, know when to DIY, and when to call the pros.

Must-know repairing retaining wall terms:
Why Retaining Walls Fail: Common Causes and Telltale Signs
A retaining wall is a supportive barrier designed to hold back earth, but it’s constantly battling immense natural forces. When a wall shows distress, it’s because these forces have overwhelmed its design. Understanding these common causes is the first step toward effective repairing retaining wall issues.
The primary culprit is hydrostatic pressure—the force exerted by water in the soil. When soil becomes saturated, it gets heavier and pushes against the wall. If the wall lacks adequate drainage, this water has nowhere to go. This is a common issue in the Merrimack Valley and Southern New Hampshire, where heavy rainfall and freeze-thaw cycles make water management critical. Waterlogged soil from poor drainage or clogged weep holes turns a vital safety feature into a liability.
Another major factor is improper construction. A wall should have a slight backward lean (‘batter’) to resist soil pressure. Walls built perfectly vertical are more prone to leaning. Other construction flaws include an inadequate footing (unstable base) or missing ‘tie-backs’ that anchor the wall to the soil. Using native soil for backfill instead of proper gravel also amplifies drainage problems.
Surcharge loads (additional weight from a patio or driveway behind the wall) and natural forces like tree roots and freeze-thaw cycles also contribute to failure. The expansive clay/loam soils in New England can create “slip planes” where water travels, causing soil movement and immense stress.

Understanding these issues is crucial. The test of a well-built wall is what’s behind it. For more insights, see our resources on quality retaining walls.
Signs Your Wall Needs Repair
Keep an eye out for these common signs of distress:
- Leaning or Tilting: The wall is no longer vertical. This is a clear sign of structural stress that can escalate quickly.
- Bowing or Bulging: A curve or bulge in the wall suggests immense pressure from behind, often due to waterlogged soil.
- Cracks in Concrete or Mortar: While fine hairline cracks can be normal, large, spreading, or step-pattern cracks are a red flag for structural failure.
- Crumbling Materials: If the blocks, stone, or brick are deteriorating or flaking, the wall’s integrity is compromised.
- Rotting Wood: For timber walls, soft spots or visible rot are critical signs of water damage.
- Soil Separation Behind the Wall: A gap between the wall and the soil indicates the wall is moving forward.
- Water Damage: Pooling water at the base or signs of erosion point to drainage problems that need immediate attention.
Ignoring these warning signs can lead to more extensive and costly repairs. For more on preventing these issues, check out this guide on proper wall construction.
Assessing the Damage: DIY Fix or Call a Professional?
Once you spot trouble, the next step in repairing retaining wall problems is assessing the damage’s severity. This determines if a DIY fix is safe or if it’s time for experts. Safety is paramount, as a failing wall can collapse suddenly, posing a risk of injury or death.
When to DIY: A DIY repair may be suitable for minor issues on shorter walls.
- Walls under 4 feet tall: These exert less pressure. Always check local building codes for permit requirements.
- Minor cracks: Small, non-spreading cracks that don’t suggest structural movement.
- A few loose blocks: If the overall structure is sound and only a few units need replacing.
- Small drainage issues: A single clogged weep hole or minor surface water pooling.
- DIY repair costs for a small section can be as low as $100 to $200 for materials.
When to call a pro: For anything beyond minor fixes, professional help is essential.
- Significant leaning or bowing: A lean of more than 1/2 inch over 4 feet indicates a serious structural problem.
- Large or spreading cracks: These signal deep structural distress.
- Signs of base failure: Heaving, sinking, or significant settlement.
- Walls over 3-4 feet tall: The forces are immense and require specialized knowledge and equipment.
- Walls near structures: If the wall is close to your home or garage, the risk is too high for a DIY attempt.
- Uncertainty: If you’re unsure about the process, calling a professional is the safest bet.
Attempting a DIY fix on a major problem often leads to costlier interventions later. A professional repair can extend a wall’s life by 10-20 years.
| Feature | DIY Repair (Minor Issues) | Professional Repair (Moderate to Severe) |
|---|---|---|
| Scope | Small, localized damage; aesthetic fixes | Structural issues; significant movement; drainage overhauls; rebuilds |
| Cost | $100 – $500 (materials only) | $1,000 – $7,500+ (labor, materials, expertise) |
| Time | A few hours to a weekend | Days to weeks |
| Skill Level | Basic construction knowledge; physical labor | Specialized engineering, geotechnical, and construction expertise |
| Long-term Success | Temporary fix if root cause not addressed; few years | Addresses root cause; extends wall life by 10-20 years |
| Safety | Moderate risk if not careful | Minimal risk to homeowner; professional safety protocols |
For more guidance, check out our retaining wall builders hiring guide.
How to assess the severity of a leaning retaining wall
Follow these steps to assess your wall’s lean:
- Use a 4-foot level: Place it vertically against the wall and measure the gap at the top.
- Minor lean: Less than 1/4 inch over 4 feet.
- Moderate lean: 1/4 to 1/2 inch over 4 feet.
- Serious lean: More than 1/2 inch over 4 feet. This requires immediate professional attention.
- Inspect the base for heaving: Look for upward shifting at the bottom course of blocks.
- Look for widespread cracking: Cracks across multiple sections suggest a larger failure.
- Monitor over time: Take dated photos and measurements. If the lean is accelerating, it’s a serious concern.
- Check for drainage issues: Look for missing drain outlets or water pooling at the base.

An engineering inspection is a wise investment for walls over 36 inches high or those showing a serious lean.
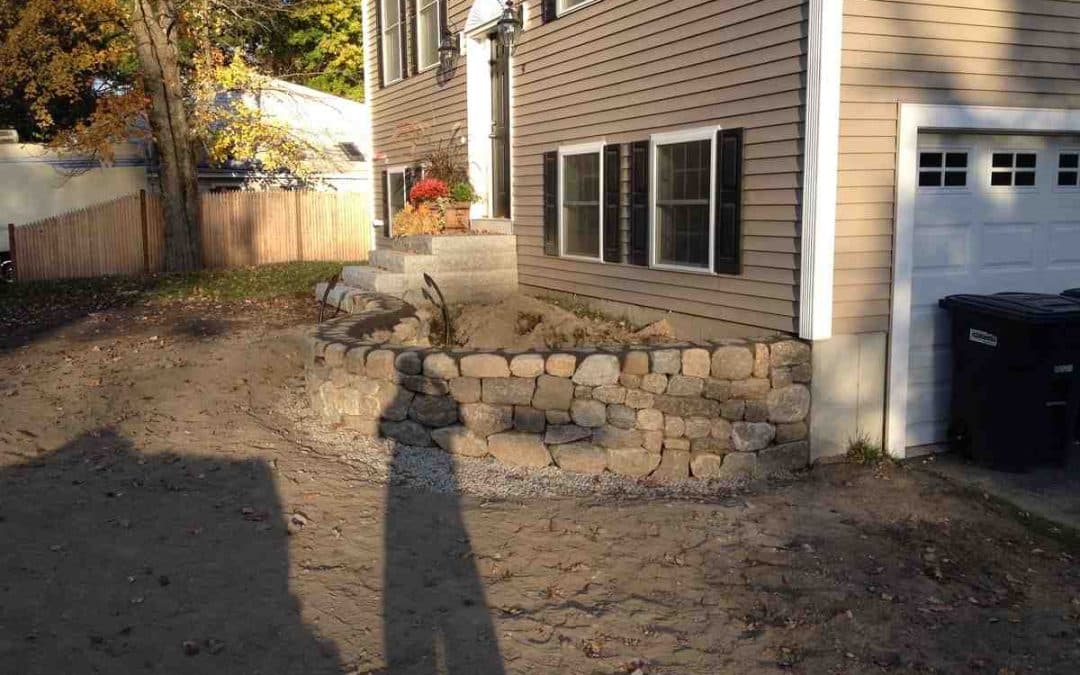
A Step-by-Step Guide for Repairing a Retaining Wall
This guide covers repairing retaining wall sections with minor damage, like a few loose blocks, on walls under 4 feet tall where the overall structure is sound.
Disclaimer: This guide is for minor repairs on short walls only. For any significant lean, widespread damage, or walls taller than 4 feet, consult a professional. Always wear work gloves and eye protection.
Essential Tools and Materials for DIY Repair:
- Shovel, Tamping Tool, Wheelbarrow
- 4-foot and torpedo Bubble Level
- Sledgehammer, Chisel & Hammer
- Shop Vacuum/Broom, Tape Measure
- Eye Protection & Work Gloves
- Replacement Blocks/Bricks/Timber
- Drainage Rock (3/4-inch angular stone) & Crushed Stone (fine)
- Masonry Block Adhesive
- Landscape Fabric
- 4-inch Perforated Drain Tube (recommended)
For more on hardscaping, see our page on hardscaping retaining walls.
Step 1: Excavate and Disassemble the Damaged Section
- Mark the Repair Area: Mark a V-shape around the damaged area, extending a couple of blocks wider than the visible issue and going down to the base.
- Prepare the Site: Lay a tarp in front of the wall to protect your lawn and collect debris.
- Remove Cap Blocks: Gently tap caps with a sledgehammer to loosen them, then lift them off. Use a chisel if they are adhered.
- Disassemble Wall Blocks: Starting from the top, carefully remove the blocks within your marked area. Store them in order for easier reassembly.
- Dig Out Backfill: Excavate the soil and gravel behind the exposed section down to the wall’s base. Save any clean drainage rock for reuse.
Step 2: Address the Root Cause
This is the most critical step. Simply replacing blocks won’t solve the underlying problem.
- Improve the Base: If the base is unstable, dig a trench at least 10 inches deep and 24 inches wide. Fill with 8 inches of compacted 3/4-inch angular rock, topped with 2 inches of fine crushed stone. Tamp this new base until it’s firm and level.
- Install Drainage: If drainage is poor, install a 4-inch perforated drain pipe at the base of the excavation, behind the wall. Slope the pipe towards an outlet, cover it with landscape fabric, and then a layer of drainage rock.
- Remove Invasive Tree Roots: Cut back any roots that are pushing against the wall.
- Clean Remaining Blocks: Use a broom or shop vacuum to clean the tops of the remaining blocks in the wall for a level surface.
For more on repair principles, check out this guide on repairing a retaining wall.
Step 3: Rebuild and Backfill for a successful retaining wall repair
- Lay the Base Course: Lay the first course of blocks on the new compacted base, ensuring each block is perfectly level. Set this course at least six inches below the final ground level for stability.
- Stack New Courses: Continue stacking blocks, setting each course back about 3/4 inch from the one below to create the necessary ‘batter’ (backward lean). Stagger the joints between courses.
- Backfill with Gravel in Lifts: After each course, backfill the area behind it with about 12 inches of 3/4-inch angular drainage rock to prevent water pressure buildup.
- Tamp the Backfill: Lightly tamp the gravel after each 4-inch lift to compact it without disturbing the wall.
- Replace Cap Blocks: Secure the cap blocks with masonry block adhesive, staggering them over the seams of the course below.
Following these steps creates a more stable structure. For more expert tips, see our complete retaining wall repair guide.
Advanced Professional Solutions for Repairing Retaining Wall Structures
When damage is too extensive for a simple repair or rebuild, advanced professional solutions offer a permanent and safe fix. These innovative techniques reinforce the existing wall and address root causes, often providing a cost-effective alternative to a full rebuild. We offer these specialized services in areas like Andover, MA, and Salem, NH. For more on these systems, explore our retaining wall anchors complete guide.
Using Helical Anchors for a permanent retaining wall repair
One of the most effective methods for a leaning or bowing wall is installing helical anchors—giant steel screws driven deep into the stable soil behind the wall.
How they work: Helical anchors extend far behind the wall into undisturbed, load-bearing soil, effectively “tying back” the wall to a stable point. The installation process involves:
- Access: Small holes are cut into the wall’s face.
- Driving Anchors: Using hydraulic equipment, the anchors are screwed into the soil until they reach stable ground.
- Stabilization: A steel plate is placed against the wall’s face and secured to the anchor with a nut, stabilizing the wall. The holes are then patched.
- Straightening: The nuts can be gradually tightened over time to pull a leaning wall back toward a plumb position.
Benefits:
- Cost-Effective: Significantly less expensive than a full teardown and rebuild.
- Less Disruptive: Minimizes disturbance to your landscape.
- Can Straighten the Wall: Actively pulls a wall back into alignment.
- Permanent Solution: Provides long-lasting stabilization.
This method is a testament to modern engineering in repairing retaining wall structures. For more details, visit our page on helical anchors retaining wall repair.
Other Professional Methods
Beyond helical anchors, other robust solutions include:
- Geosynthetic Reinforcement: Strong, synthetic mesh (geogrids) is layered into the backfill during reconstruction to stabilize the soil mass and distribute loads.
- Gabion Walls: Wire cages filled with rocks can be used to buttress a failing wall or as a new, permeable structure that reduces hydrostatic pressure.
- Poured Concrete Reinforcement: New concrete with rebar is poured behind or in front of a damaged wall to create a stronger, monolithic structure.
- GCS Wall Systems: An advanced method using geosynthetics to confine soil particles, dramatically increasing the soil’s shear resistance and overall wall stability.
These methods are typically used after a thorough geotechnical analysis reveals complex soil conditions. Learn more about our expertise from our work as sandstone retaining wall builders.
Frequently Asked Questions about Retaining Wall Repair
We hear many questions about repairing retaining wall issues from homeowners in areas like Dracut, MA, and Windham, NH. Here are the most common ones.
What are the consequences of ignoring a failing retaining wall?
Ignoring a failing wall is a gamble. The primary risks include:
- Catastrophic Failure: The wall can suddenly collapse, releasing tons of soil and debris.
- Property Damage: A collapse can damage landscaping, fences, sheds, or even your home’s foundation.
- Landslides and Erosion: Unretained soil can erode rapidly, destabilizing your property.
- Safety Risks: A collapsing wall poses a serious threat of injury or death.
- Increased Repair Costs: A small problem will become a much larger and more expensive one to fix.
How much does repairing a retaining wall cost?
The cost varies widely based on the damage, materials, and repair method. These are average costs based on internet data and not actual costs for Randall Landscaping, as every project is unique.
- DIY Repair Costs: For minor fixes on short walls, material costs can range from $100 to $500.
- Professional Repair Costs: For stabilizing a leaning wall or rebuilding a section, expect to pay $1,000 to $7,500 or more.
- Helical Anchor Repair: This method is often significantly less expensive than a full rebuild, which can cost tens of thousands.
- Full Rebuild Costs: A complete reconstruction can start at $10,000 and easily exceed $30,000+ for larger walls.
Choosing a professional is an investment in the safety and longevity of your landscape.
How long does a retaining wall repair last?
The longevity depends on the repair quality and whether the root cause was fixed.
- DIY Patch Repairs: Superficial fixes that don’t address the root cause (like poor drainage) may only last a few years.
- Professional Repairs: A proper repair that fixes the underlying problem can add 10-20 years or more to the wall’s life.
- Full Rebuilds: A correctly built new wall should last for decades, often 50 years or more.
The key to a long-lasting repair is addressing the root cause. For more on ensuring quality, see our insights on retaining wall construction contractors.
Conclusion: Secure Your Landscape for the Long Term
Repairing retaining wall issues is critical for a safe and functional landscape. The key is early detection. Regularly inspect your walls for leaning, cracking, or drainage problems. Assess the issue to determine if it’s a minor DIY fix or if it requires professional expertise. Always prioritize quality materials and proper drainage for long-term stability.
For complex issues or walls near your home in areas like Dracut, Methuen, or Salem, professional help is crucial. Our team at Randall Landscaping, Inc. brings years of experience and a commitment to quality and reliability. We understand the unique soil and climate challenges of the Merrimack Valley and Southern New Hampshire and are equipped to provide lasting solutions.
Don’t let a failing retaining wall compromise your property. For a professional assessment and a durable solution, explore our expert retaining wall repair services. We’re here to help you secure your landscape for the long term.