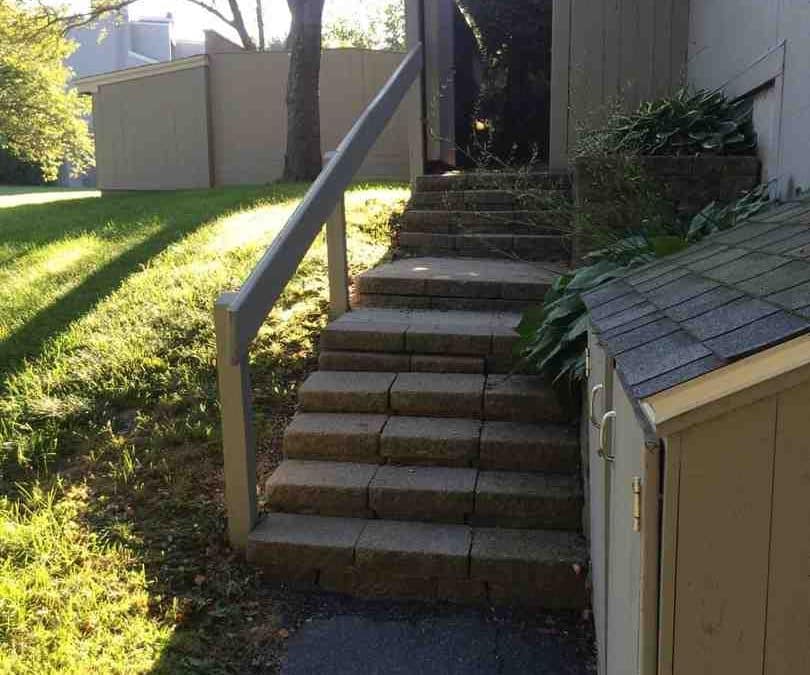
Why Landscape Wall Construction Can Transform Your Outdoor Space
Landscape wall construction involves building walls to hold back soil, create level spaces, and define outdoor areas. These versatile structures prevent soil erosion, enable terraced gardens, provide seating, and boost your property’s curb appeal.
Key Steps in Landscape Wall Construction:
- Planning and Design: Measure the area, check local permits, and choose materials.
- Base Preparation: Excavate a trench, add and compact a gravel base.
- First Course: Lay the foundation blocks perfectly level, burying them halfway for stability.
- Building Up: Stack subsequent courses with staggered joints, backfilling with drainage stone as you go.
- Finishing: Install capstones, ensure proper drainage, and add landscaping.
Whether building a simple garden wall or a structural retaining wall, the principles are similar. The most critical factor for success is proper base preparation. A solid, level foundation prevents settling, cracking, and future repairs.
I’m Tommy Randall, owner of Randall Landscaping. Since 2006, my team and I have specialized in landscape wall construction and hardscape installation throughout Massachusetts and New Hampshire, creating countless retaining walls and decorative stone features that blend structural integrity with stunning design.

Landscape wall construction terms you need:
Understanding Your Wall: Types, Purposes, and Materials

Understanding what type of wall you need, its purpose, and the best materials is the foundation for a successful landscape wall construction project. This initial planning saves time, money, and frustration.
What is a Landscape Wall?
A landscape wall is a multi-purpose feature that solves problems and adds beauty. Its primary purpose is often soil erosion control, stopping rainwater from washing away valuable topsoil. Walls also excel at creating usable flat space from slopes, turning a difficult grade into terraced gardens or a level area for a Patio Design and Construction. Finally, they define outdoor areas by creating boundaries and add significant aesthetic value to your yard.
Types of Landscape Walls
Understanding the different types helps you choose the right approach.
- Structural walls are heavy-duty walls over 2 feet tall designed to hold back significant soil pressure from driveways, patios, or steep slopes. Walls over 3-4 feet often require permits and professional engineering.
- Non-structural walls are typically under 2 feet tall and focus more on aesthetics, such as garden walls or decorative borders.
- Retaining walls are a specific type of structural wall built to resist soil pressure and manage slopes. For complex projects, our professional Retaining Walls services are available.
- Freestanding walls and seat walls don’t retain soil but create boundaries, seating, or decorative elements.
Choosing the Best Material for Your Project
The material you choose affects the project’s cost, installation difficulty, and final appearance.
| Material | Durability | Cost | Ease of Installation | Aesthetic |
|---|---|---|---|---|
| Concrete Blocks | Excellent – long-lasting, weather resistant | Moderate | High – interlocking systems | Versatile colors and textures |
| Natural Stone | Excellent – timeless, extremely durable | High – can be very expensive | Low to Moderate – heavy, irregular | Organic, rustic, timeless |
| Timber | Moderate – needs maintenance, can rot | Low – often half the price | High – lightweight, easy to cut | Natural, blends with landscape |
| Brick | Excellent – very durable | Moderate to High | Moderate – requires mortar skills | Traditional, classic, formal |
- Concrete blocks are popular for DIY projects due to modern interlocking systems that don’t require mortar. They come in a wide variety of colors and textures.
- Natural stone offers timeless character, but it is heavy and often more expensive. For expert installation, consider Sandstone Retaining Wall Builders.
- Timber is a cost-effective and lightweight option, but it requires regular sealing to prevent rot and will eventually need replacement.
- Brick provides a classic, formal look and is very durable, but it typically requires mortar skills to install properly.
For more guidance, More on garden wall materials offers additional insights on material selection.
Planning Your Project: Design, Regulations, and Tools

Proper planning is essential for successful landscape wall construction. A few hours of preparation will save you days of frustration and ensure your project aligns with your budget and local regulations.
Essential Planning and Design Steps
First, perform a site assessment to understand water flow, tree roots, and how the wall fits into your overall Hardscaping plan. Next, measure and mark the wall’s location using stakes and string (a garden hose is great for visualizing curves). When calculating materials, use the manufacturer’s coverage charts and order 10% extra to account for cuts and breakage. Plan ahead for how you will construct curves and corners, as they may require special blocks or cutting.
Navigating Permits and Regulations
This step is critical. Local building codes vary, so never assume you don’t need a permit.
- Permit Requirements: Most areas allow walls under 3-4 feet without a permit, but some towns are stricter. Walls over 4 feet almost always require professional engineering and permits.
- Call 811: Before digging, call 811. This free service marks underground utility lines, preventing a dangerous and costly accident.
- HOA Rules: If you have a Homeowners Association, check their guidelines for rules on wall height, materials, and colors.
For more regulatory details, consult resources like Building a landscape retaining wall from Oregon State University Extension.
Tools and Materials Checklist
Having the right tools and materials is non-negotiable for a quality result.
- Essential Tools: You’ll need a spade shovel, hand tamper, wheelbarrow, 4-foot standard level, torpedo level, rubber mallet, measuring tape, and string line.
- Safety Gear: Always use safety glasses, work gloves, and sturdy boots.
- Base Materials: Use crushed gravel (¾-inch minus) for the base, not rounded pea gravel. You will also need paver base or coarse sand for fine leveling.
- Drainage: Get a 4-inch perforated drainage pipe and non-woven filter fabric.
- Adhesive & Reinforcement: You’ll need Construction Adhesive for capstones. Taller walls may require rebar or geogrid mesh for reinforcement.
The Ultimate Guide to Landscape Wall Construction

With planning complete, it’s time to build. Successful landscape wall construction depends on following each step methodically, as each stage builds upon the last.
Essential Base Preparation for Landscape Wall Construction
The foundation is the most critical part of the wall.
- Excavate: Dig a trench 4 to 16 inches deep (deeper for taller walls) and twice the width of your blocks. Remove all topsoil and organic matter.
- Compact Soil: Thoroughly compact the bottom of the trench with a hand tamper to create a solid base.
- Add Gravel Base: Spread 3 to 8 inches of crushed gravel (¾-inch minus) in the trench. Avoid rounded pea gravel, which can shift.
- Compact Gravel: Compact the gravel in layers, adding a light mist of water to reduce dust. The finished base should be solid and unyielding.
Laying a Level First Course
This course dictates the straightness of the entire wall. Take your time to get it perfect.
Start at the lowest point of the wall’s location. Place the first block, ensuring it is perfectly level from front to back and side to side using a 4-foot level. Use a rubber mallet and coarse sand for fine adjustments. This first course should be buried about halfway into the ground to anchor the wall and prevent it from shifting forward.
Building Subsequent Courses and Backfilling
With the base course set, the rest of the wall builds in a steady rhythm: stack, check level, and backfill.
- Stagger Joints: Offset the vertical joints of each course by at least half a block from the course below for structural integrity.
- Sweep Clean: Before placing each new course, sweep the top of the blocks below to ensure a solid, stable connection.
- Backfill As You Go: After each course is laid, place 8 to 12 inches of drainage rock (crushed gravel) directly behind the wall. Compact this backfill in 8-inch lifts, being careful not to hit the wall itself.
- Use Filter Fabric: Install non-woven landscape fabric between the drainage gravel and the native soil to prevent clogging of your drainage system.
Proper Drainage for Landscape Wall Construction
Poor drainage is the #1 cause of wall failure. Saturated soil creates immense hydrostatic pressure that can destroy a wall.
For walls over 4 feet tall or in areas with wet soil, a perforated drain pipe is essential. Lay a 4-inch pipe at the base of the wall in the drainage gravel, with the holes facing down. The pipe must slope gently downhill and exit to daylight, allowing water to drain away freely. Also, grade the soil behind the wall to direct surface water away from the structure.
Reinforcement for Taller Walls
Walls over 4 feet or those supporting heavy loads require engineered reinforcement.
- Geogrid Mesh: This high-strength fabric is laid between block courses and extends back into the soil. When compacted, it creates a reinforced soil mass that helps the wall resist pressure.
- Timber Wall Reinforcement: Timber walls use deadmen (T-shaped anchors buried in the hillside) and rebar driven through the timbers into the ground for stability.
Finishing Touches and Long-Term Care
Once the main structure is complete, the finishing details will lift its appearance and ensure its longevity.
Capping and Finishing Your Wall
The capstones are the crowning glory of your landscape wall.
- Secure Capstones: Use a high-quality masonry or landscape wall construction adhesive to secure capstones to the top row of blocks. Ensure surfaces are clean and dry.
- Create an Overhang: For a professional look and to shed water, capstones should overhang the wall face by 1 to 1.5 inches.
- Cut to Fit: Use a masonry chisel or diamond saw to cut blocks or capstones for a perfect fit, always wearing safety gear.
- Clean the Wall: After the adhesive cures, use a stiff brush to remove residue. For stubborn stains or efflorescence (white powder), a specialized cleaner can be used.
- Add Landscape Lighting: Integrate low-voltage lighting to highlight the wall’s texture and improve safety at night.
Maintaining Your Landscape Wall
A little maintenance will keep your wall looking great for years.
- Inspect Regularly: Look for any signs of shifting, cracking, or bulging. Address minor issues promptly.
- Clean as Needed: Brush off any efflorescence that appears.
- Check Drainage: Ensure drain pipe outlets are clear of debris and that water is flowing away from the wall.
- Seal Timber Walls: If you built a timber wall, re-apply a quality sealant regularly to protect it from moisture and decay.
Creative Design Ideas
A landscape wall is also a design opportunity.
- Tiered Walls: On steep slopes, build two or more shorter, tiered walls to create planting beds and add visual depth.
- Curved Walls: Add soft, organic lines to your landscape with curved walls.
- Integrated Planters: Build planter pockets into the wall or create raised beds behind it to add greenery.
- Frame a Patio: Use a wall to border or retain a new Patio Design for a cohesive outdoor room.
- Built-in Seating: Use wider capstones on a low wall to create practical and attractive built-in seating.
Frequently Asked Questions about Building Landscape Walls
How high can I build a landscape wall without a permit?
This varies significantly by location. Typically, walls under 3 to 4 feet in height do not require a permit, but some municipalities have stricter rules, setting the limit as low as 2 feet. Walls near property lines or supporting significant loads may also have different requirements. Always check with your local building department before starting any landscape wall construction to confirm height limits, setback rules, and permit needs. A quick call can prevent fines and the need to rebuild.
What is the most important step in landscape wall construction?
Without question, preparing a solid, level base is the most critical step. The entire wall’s stability depends on its foundation. An improperly prepared base will lead to shifting, settling, and eventual wall failure. The first course of blocks must be perfectly level, as any small imperfection will be magnified as you build higher. This involves proper excavation, removing all topsoil, and laying and compacting a crushed gravel base until it is rock-solid.
Can I use the excavated soil for backfill?
No, you should never use excavated topsoil or organic material as backfill directly behind your wall. Organic soils hold water, which creates immense hydrostatic pressure against the wall. They also decompose over time, causing the ground to settle and destabilizing the structure. The area immediately behind your wall—typically 8 to 12 inches deep—must be filled with clean, free-draining crushed gravel. You can use the excavated topsoil to backfill behind this drainage zone or in other parts of your yard, like garden beds.
Transform Your Landscape with a Professional Touch
Building a landscape wall construction project can be a rewarding DIY experience. By following the key steps—from planning and material selection to proper base preparation and drainage—you can build a durable and stunning wall that adds value to your property.
However, some projects are best left to professionals. Structural walls over 4 feet high, sites with complex drainage issues, or walls supporting heavy loads require specialized knowledge and equipment to be built safely and correctly.
If your project in the Merrimack Valley or Southern New Hampshire seems too complex, such as a structural Retaining Walls Tewksbury MA, consider partnering with experienced Hardscape Landscapers.
At Randall Landscaping, Inc., we’ve been building high-quality landscape walls since 2006. Our focus on quality work and 100% reliability ensures your investment is built to last. We handle the permits, engineering, and construction, providing peace of mind and a beautiful, professional result.
Ready to bring your vision to life? Explore our professional retaining wall services and let’s discuss how we can transform your outdoor space.