
Transform Your Yard with an Instant Green Lawn
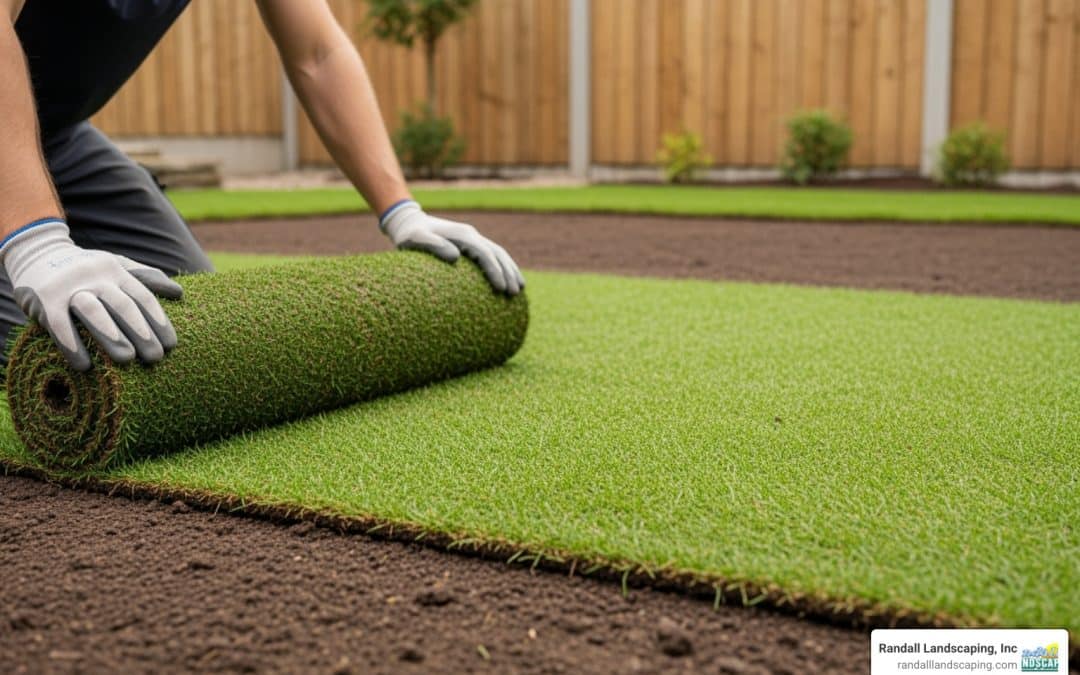
Laying garden turf is the fastest way to get a lush, green lawn. Unlike seeding, which takes weeks or months, turf provides an instant, beautiful yard.
Quick Answer: How to Lay Garden Turf
- Prepare the ground – Remove old grass, weeds, and debris
- Level and firm the soil – Add topsoil if needed
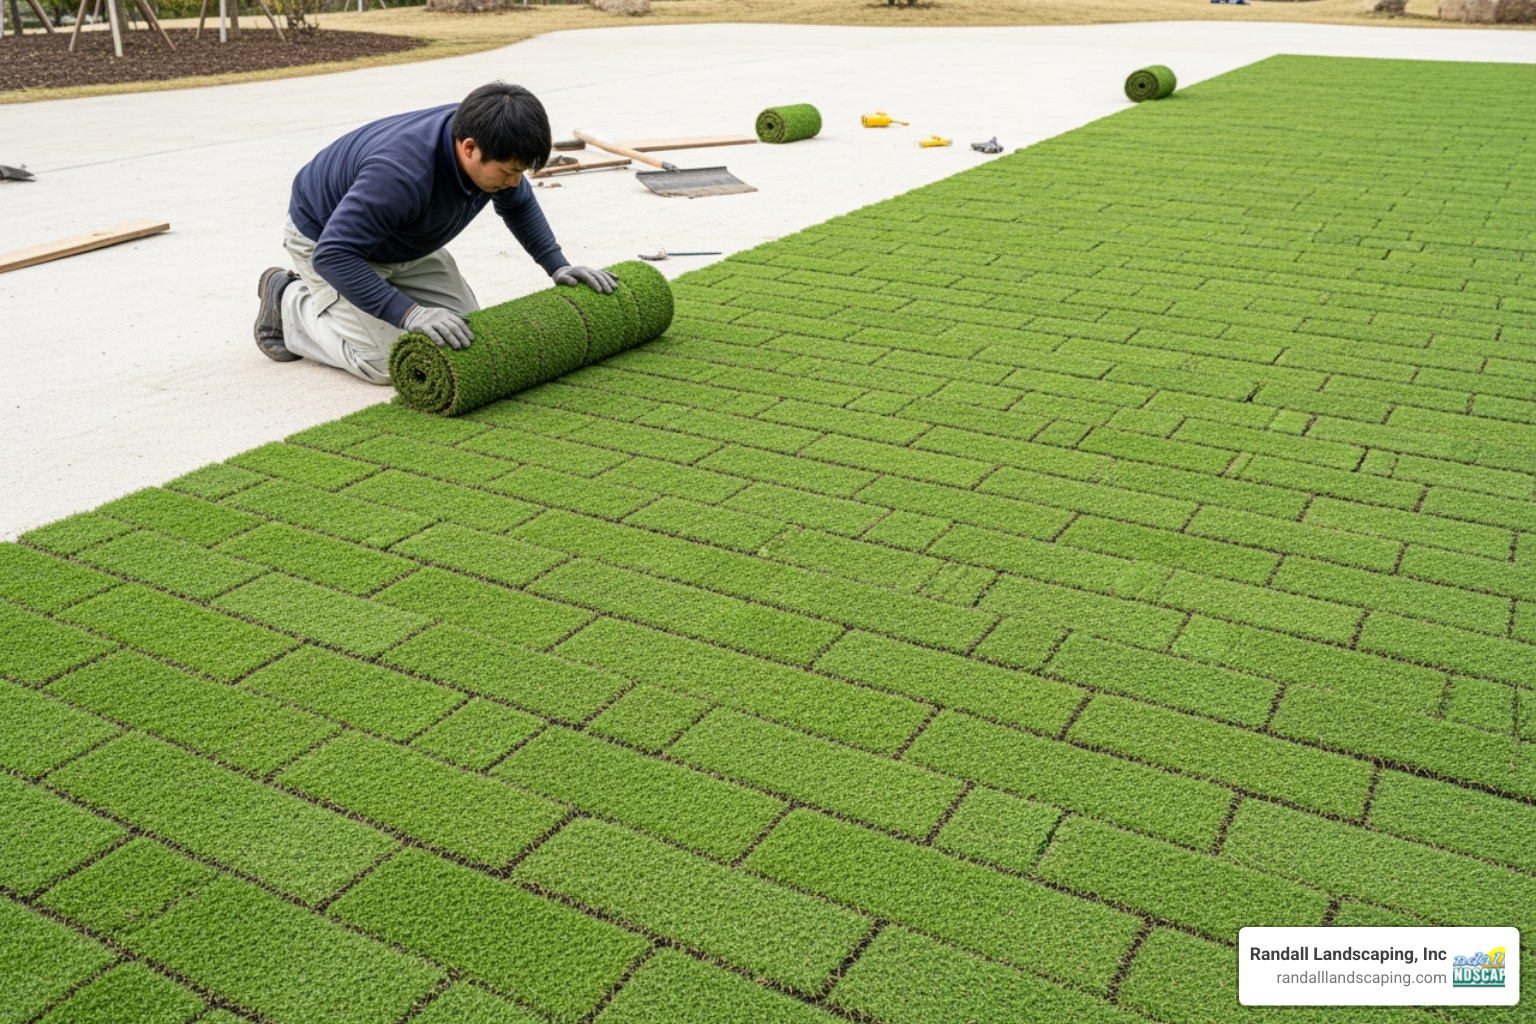
- Lay turf within 24 hours of delivery in a brick pattern
- Water immediately and keep moist for 2-3 weeks
- First mow when grass reaches 2-3 inches (usually 2-3 weeks)
While it seems like a big project, laying turf is straightforward with the right steps. Success depends on proper ground preparation and consistent watering during the first few weeks. The main advantage of turf over seed is the instant, thick, weed-free result. It’s perfect for families with children or pets who need a usable lawn quickly, while seed can take 6-8 weeks to establish.
Best timing for laying turf is spring or autumn, when cooler temperatures and natural rainfall help establishment. Avoid summer’s heat and winter’s frost for the best results.
I’m Tommy Randall, owner of Randall Landscaping. Since 2006, I’ve helped homeowners across Massachusetts and New Hampshire create beautiful lawns. My experience shows that success in laying garden turf comes down to proper preparation and following the right steps.
Laying garden turf terms you need:
- cost of grass per square metre
- garden water irrigation system installation
- professional sprinkler installation
Before You Begin: Planning for a Perfect Lawn
Proper planning is essential before laying garden turf. Choosing the right turf, timing, and tools beforehand ensures the project runs smoothly and prevents problems later.
Choosing the Right Turf for Your Garden
Not all grass is the same. Choosing turf that matches your garden’s conditions is critical for a thriving lawn.
- Shade Tolerance: For areas under trees or in dim corners, choose a shade-tolerant variety that won’t thin out.
- Drought Resistance: For sunny spots or to conserve water, drought-resistant turf can handle dry spells without turning brown.
- Foot Traffic: For lawns with active kids or pets, you’ll need durable turf. Most domestic turf uses a mix of hard-wearing perennial rye grasses. For a pristine but more delicate look, fine turf with fescues is an option.
- Soil Conditions: Sandy soil dries out quickly; adding organic matter helps it retain moisture. Clay soil can become waterlogged; mixing in organic matter and coarse sand improves drainage.
Good quality turf should be a consistent rich green, weed-free, and have a uniform thickness (usually 3-6mm) to ensure it roots quickly.
Turf vs. Seed: Which is Right for You?
This choice comes down to your priorities: instant results versus lower upfront cost.
| Feature | Laying Garden Turf | Sowing Grass Seed |
|---|---|---|
| Instant Results | Yes, a lush green lawn in hours. | No, takes weeks or months to establish. |
| Cost | Generally more expensive upfront. | Less expensive upfront. |
| Effort | Thorough ground prep and immediate laying. | Ground prep, but less intense immediate labor. |
| Weed Control | Delivered largely weed-free. | More susceptible to weeds. |
| Establishment | Roots in 2-3 weeks. | Can take 6-8 weeks to grow. |
| Erosion | Provides immediate erosion control. | Less effective for immediate control. |
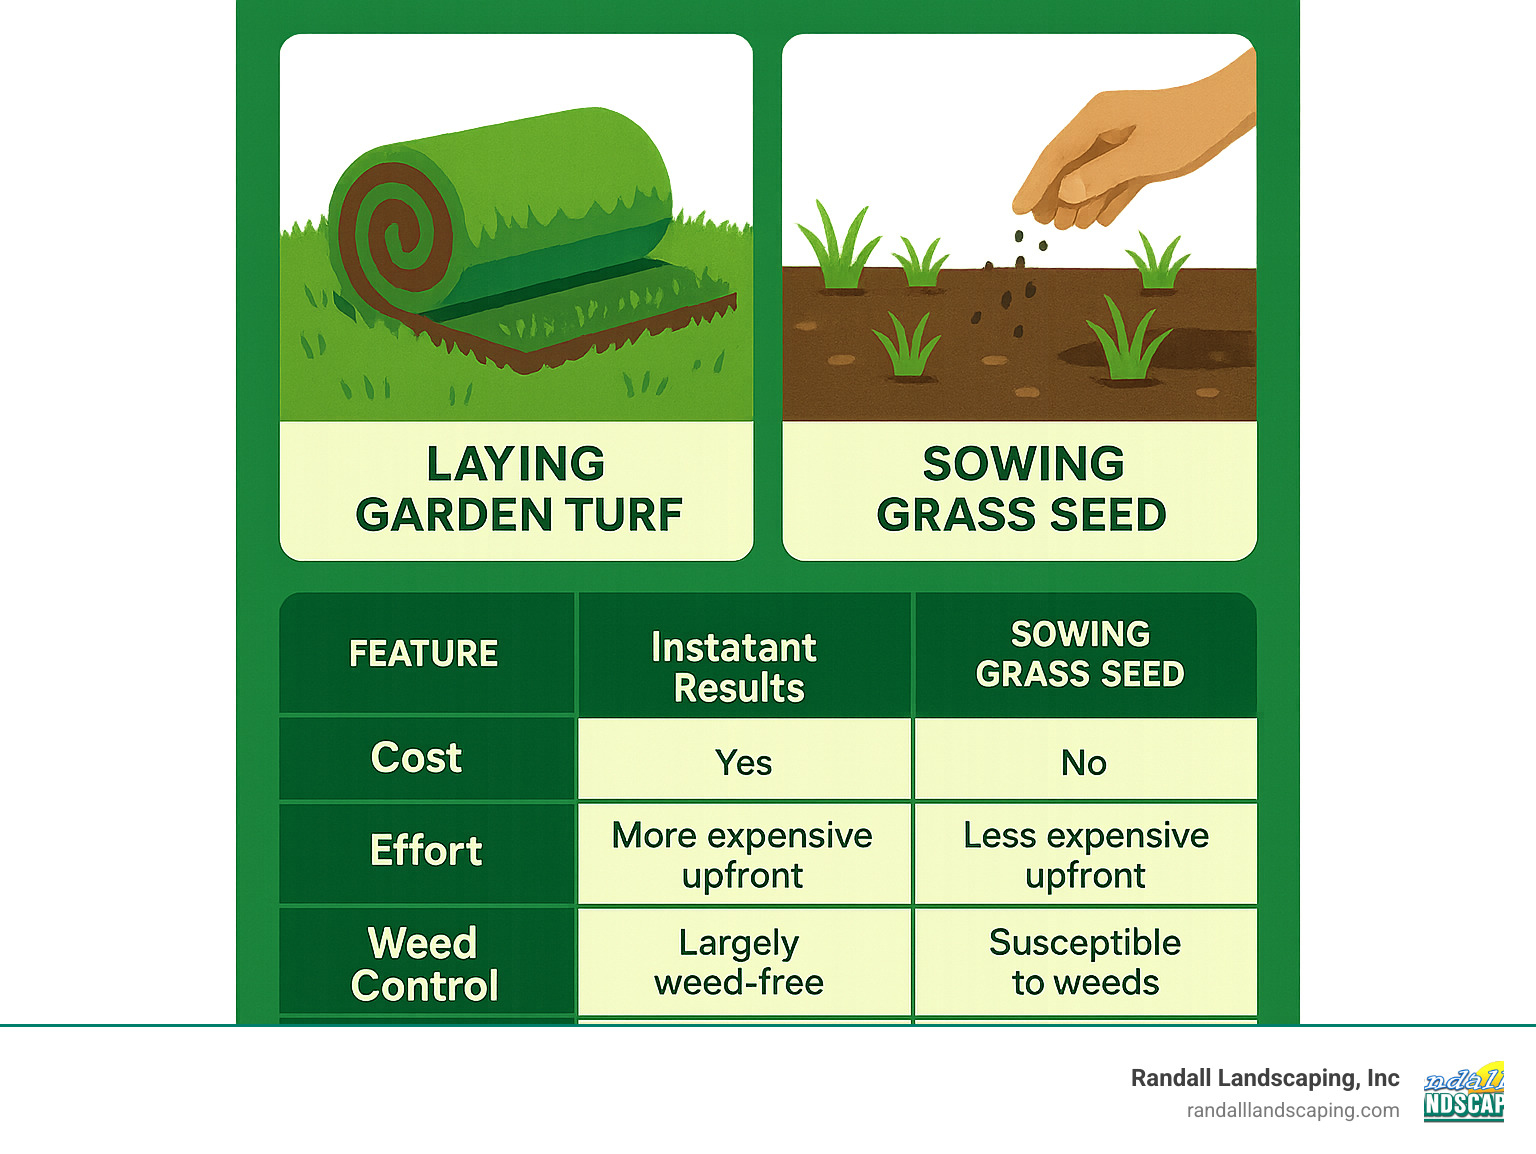
Turf provides instant results and excellent weed control. Seed is less expensive but requires a long wait and more effort to manage weeds during establishment.
For large areas or slopes, hydroseeding is another option. It’s often more cost-effective than turf for big spaces and works well on hills, but offers fewer grass varieties.
When is the Best Time to Lay Turf?
While you can lay turf almost any time the ground isn’t frozen or waterlogged, some seasons are better than others.
- Spring (mid-March to May): Warm soil and a mix of sun and rain encourage good root growth.
- Autumn (mid-September to November): Often considered ideal. The soil is still warm, and cooler air with more rain reduces watering needs.
Avoid laying garden turf in the heat of summer (June-August) due to high watering demands. Winter is also not ideal, as cold temperatures slow root development.
Essential Tools and Materials
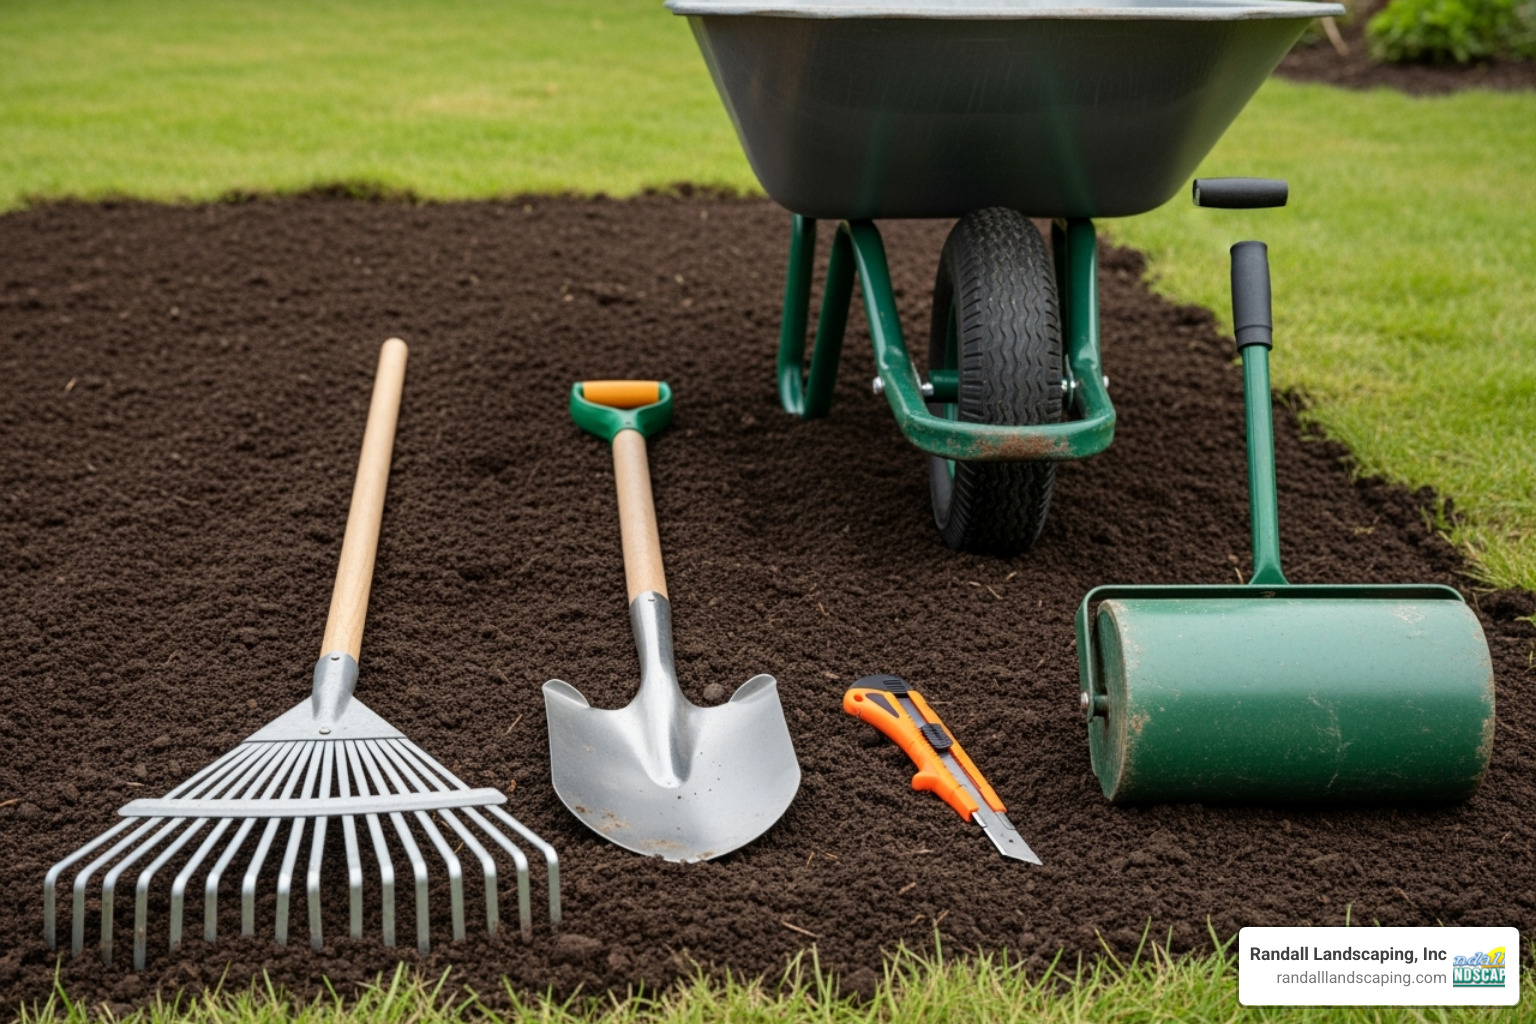
Having the right tools makes laying garden turf much easier. You’ll need a sharp spade, a garden rake, and a wheelbarrow. For large areas, renting a turf cutter to remove old grass is a worthwhile investment. A garden hose with a sprinkler, wooden planks for walking on the prepared soil, and a sharp knife for cutting are essential. Finally, gather high-quality topsoil, pre-turfing fertilizer, gardening gloves, and sturdy boots.
Estimating Costs
To avoid budget surprises, plan your costs for turf, soil, and tool rentals. Measure your garden accurately (length x width for rectangles). For irregular shapes, break the area into simpler shapes and add them together. Always add 5-15% extra to your total to cover cuts and mistakes.
Turf costs vary by grass type and quality. Based on internet data, prices can range from £5 to over £20 per square meter for premium varieties. These are average costs and not actual prices for Randall Landscaping. For accurate pricing, get quotes from local suppliers. Learn more about the cost of grass per square metre on our site.
Factor in the cost of topsoil if needed, as well as tool rental for items like turf cutters, which save significant time and effort.
Your Step-by-Step Guide to Laying Garden Turf
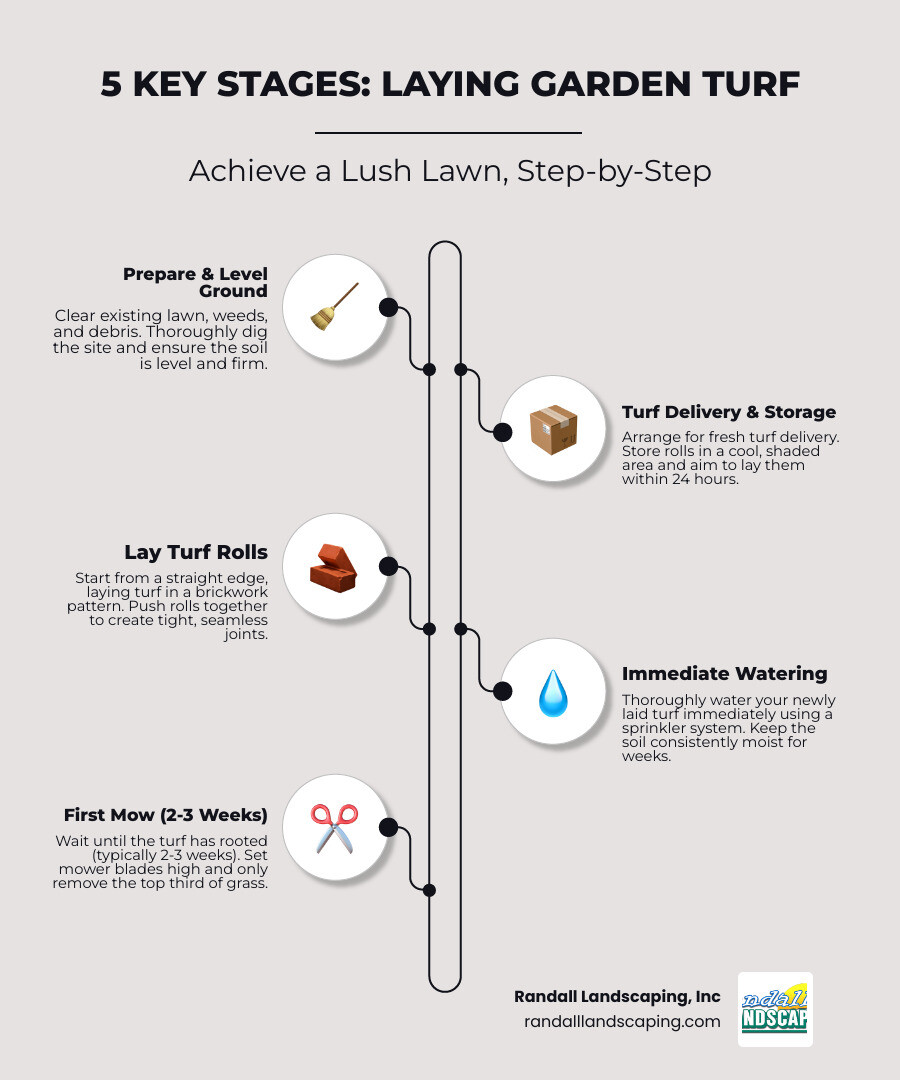
With planning complete, it’s time to lay your turf. This guide covers the physical process for achieving an even, beautiful lawn. Success depends on three key stages: ground preparation, correct laying technique, and proper watering.
Step 1: Essential Ground Preparation for Laying Garden Turf
A well-prepared base is the most important step in laying garden turf. Rushing this stage will lead to problems later.
- Clear the Area: Remove the existing lawn, all weeds (digging out perennial roots), rocks, and debris. A turf cutter is highly recommended for large areas.
- Dig the Soil: Dig or rotovate the soil to a depth of 15-25cm (6-10 inches). This loosens compacted soil, allowing new roots to establish. For more detail, see guides on how to thoroughly dig the lawn site.
- Improve Soil Quality: Work well-rotted manure or garden compost into the soil. For sandy soil, this helps retain moisture. For clay soil, mixing in coarse sand or grit improves drainage. If your soil is poor, add a layer of at least 10-15cm of good topsoil.
- Settle and Level: Let the soil settle for a few days to a week to prevent future dips. Then, rake the area to create a fine, even surface. Consult guides on levelling the soil for best results.
- Firm the Ground: Walk systematically across the area with small, heavy steps to remove air pockets. Rake again to keep it level. Repeat until the ground is uniformly firm.
- Apply Fertilizer: Just before laying, lightly rake a pre-turfing fertilizer into the top few inches of soil to provide essential nutrients.
Step 2: Best Practices for Laying Garden Turf Rolls
With your ground prepared, it’s time to roll out the turf.
- Work Quickly: Turf is a living product, so lay it within 24 hours of delivery. If delayed, unroll it in a shaded, moist area.
- Start Straight: Begin laying turf along a straight edge, like a patio or driveway, for a clean first row.
- Use Planks: Always work from wooden planks placed on the prepared soil or newly laid turf to prevent footprints and compaction.
- Use a Brick Pattern: Stagger the joints of each row, like bricks in a wall, to create a seamless, stronger lawn.
- Ensure Tight Joints: Butt each roll snugly against the previous one. Do not stretch the turf, and leave no gaps between pieces.
- Avoid Overlapping: Overlapping pieces create bumps and prevent proper soil contact.
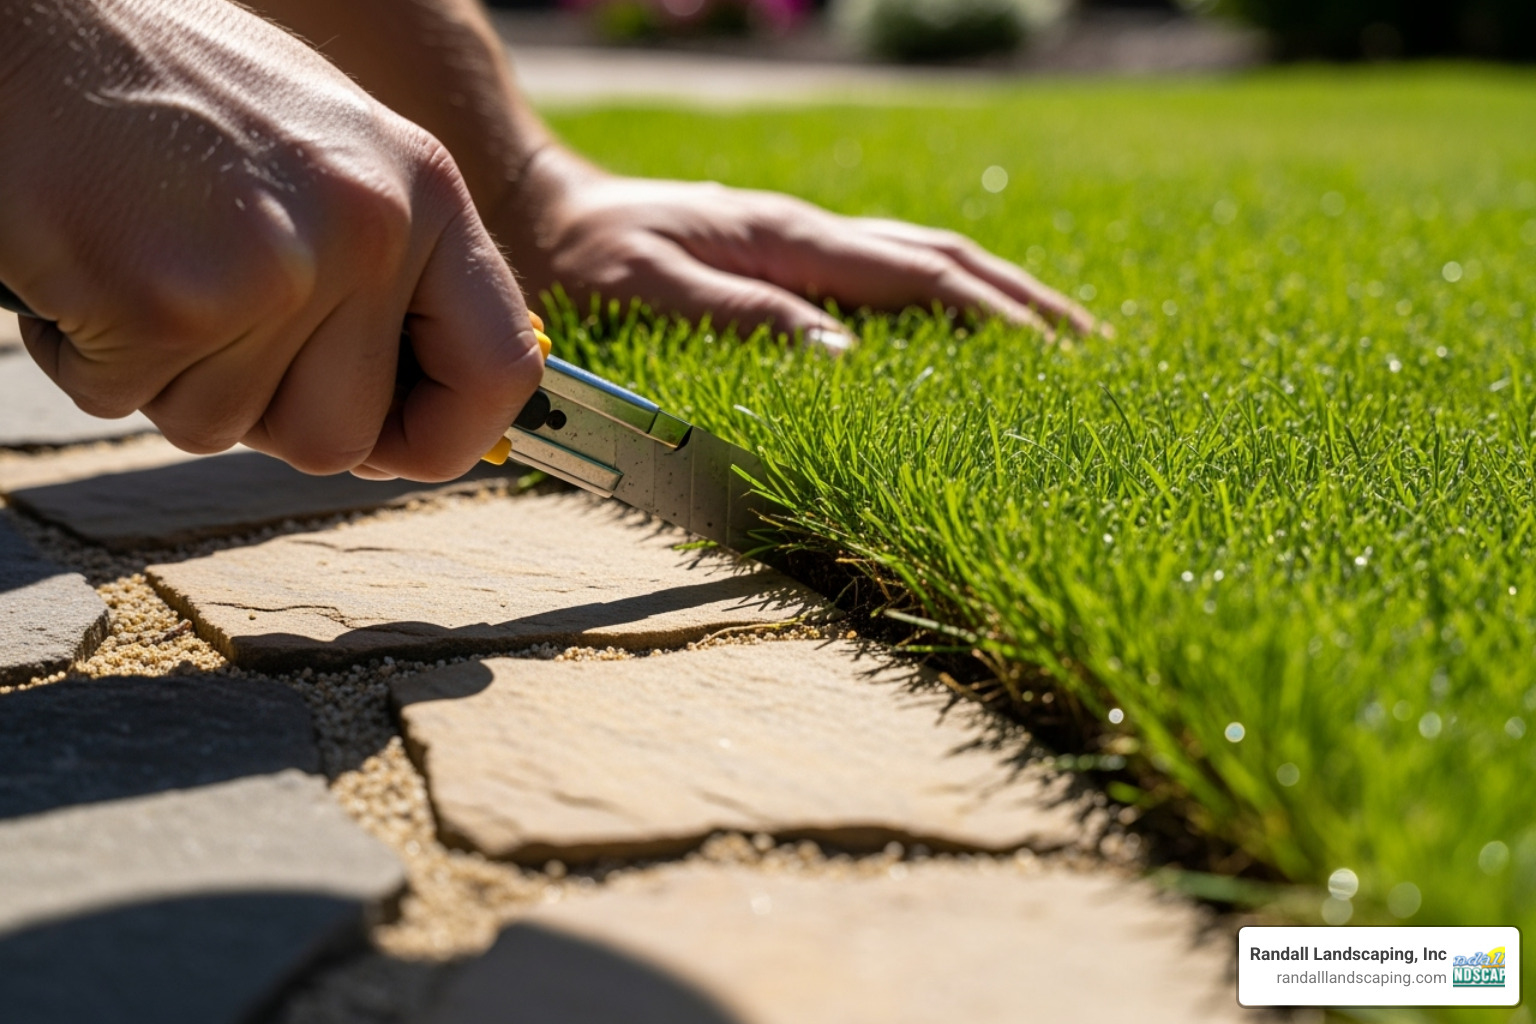
- Cut Precisely: Use a sharp knife or lawn edger to trim turf neatly around edges and obstacles.
- Firm Down: Gently pat down each section with the back of a rake to ensure good soil contact, which is vital for rooting. A lightweight roller can be used for larger areas.
For those who prefer a professional touch, our team offers Professional Sod Installation services.
Step 3: Watering Your New Lawn
Watering is critical for laying garden turf successfully. Your new turf is very thirsty for the first few weeks.
Water immediately and thoroughly after laying. The goal is to soak the turf and the top 2.5-10cm of soil beneath it. Lift a corner to check that both the turf’s underside and the soil are damp.
For the first 2-3 weeks, your lawn needs consistent watering, possibly daily in hot or windy conditions. The goal is to keep the turf moist but not waterlogged. Check soil moisture daily by lifting a corner.
Use a sprinkler system for even coverage, and water in the early morning or late evening to minimize evaporation.
How to Lay Turf Around Awkward Obstacles
Not all gardens are simple rectangles. Trees, paths, and corners require careful work when laying garden turf. The key to handling these obstacles is patience and precision cutting with a sharp knife to create a custom fit for your garden’s features.
Laying Turf Around Trees
Trees require special attention to protect their root systems and create a neat finish.
- Avoid Root Damage: When preparing the ground, work gently near the trunk and avoid digging deeply over surface roots.
- Level Carefully: Level the soil around the tree base to create a smooth, gentle slope away from the trunk.
- Cut to Fit: Use curved cuts to fit the turf around the trunk’s natural shape. Make relief cuts to help the turf conform without bunching.
- Ensure Soil Contact: Press the turf firmly into place around the base to eliminate air pockets.
- Use Shade-Tolerant Turf: If the tree casts significant shade, use a turf variety that can thrive with less sunlight.
Laying Turf Along Paths and Edges
Clean edges are the mark of a professional installation.
- Prepare Edges: Ensure path edges are clean, well-defined, and free of debris.
- Match Path Height: Level the soil to match the path height for easier mowing and to avoid a tripping hazard.
- Cut Precisely: Use a sharp knife or lawn edger for clean, straight lines. Aim for a snug fit with no gaps between the turf and the path.
- Consider a Border: Adding a border of stones or mulch can prevent grass from creeping over the path and creates a polished look.
Fitting Turf into Corners
Corners can be tricky, but patience and accurate cutting lead to professional results.
- Avoid Stretching: Never stretch turf to make it fit, as it will shrink back and leave gaps. Measure and cut precisely.
- Fit Neatly: Work methodically, using relief slits for inside corners to prevent bunching and careful trimming on outside corners to avoid overlaps.
- Water Thoroughly: Corners, especially outside ones, dry out faster. Give them extra water during the establishment period to encourage strong root growth.
Aftercare: Keeping Your New Lawn Healthy
After laying garden turf, the next few weeks of aftercare are crucial for establishing strong roots. This initial period requires consistent, gentle care to ensure your lawn thrives for years to come.
When and How to Mow Your New Turf
Timing and technique are critical for the first mow.
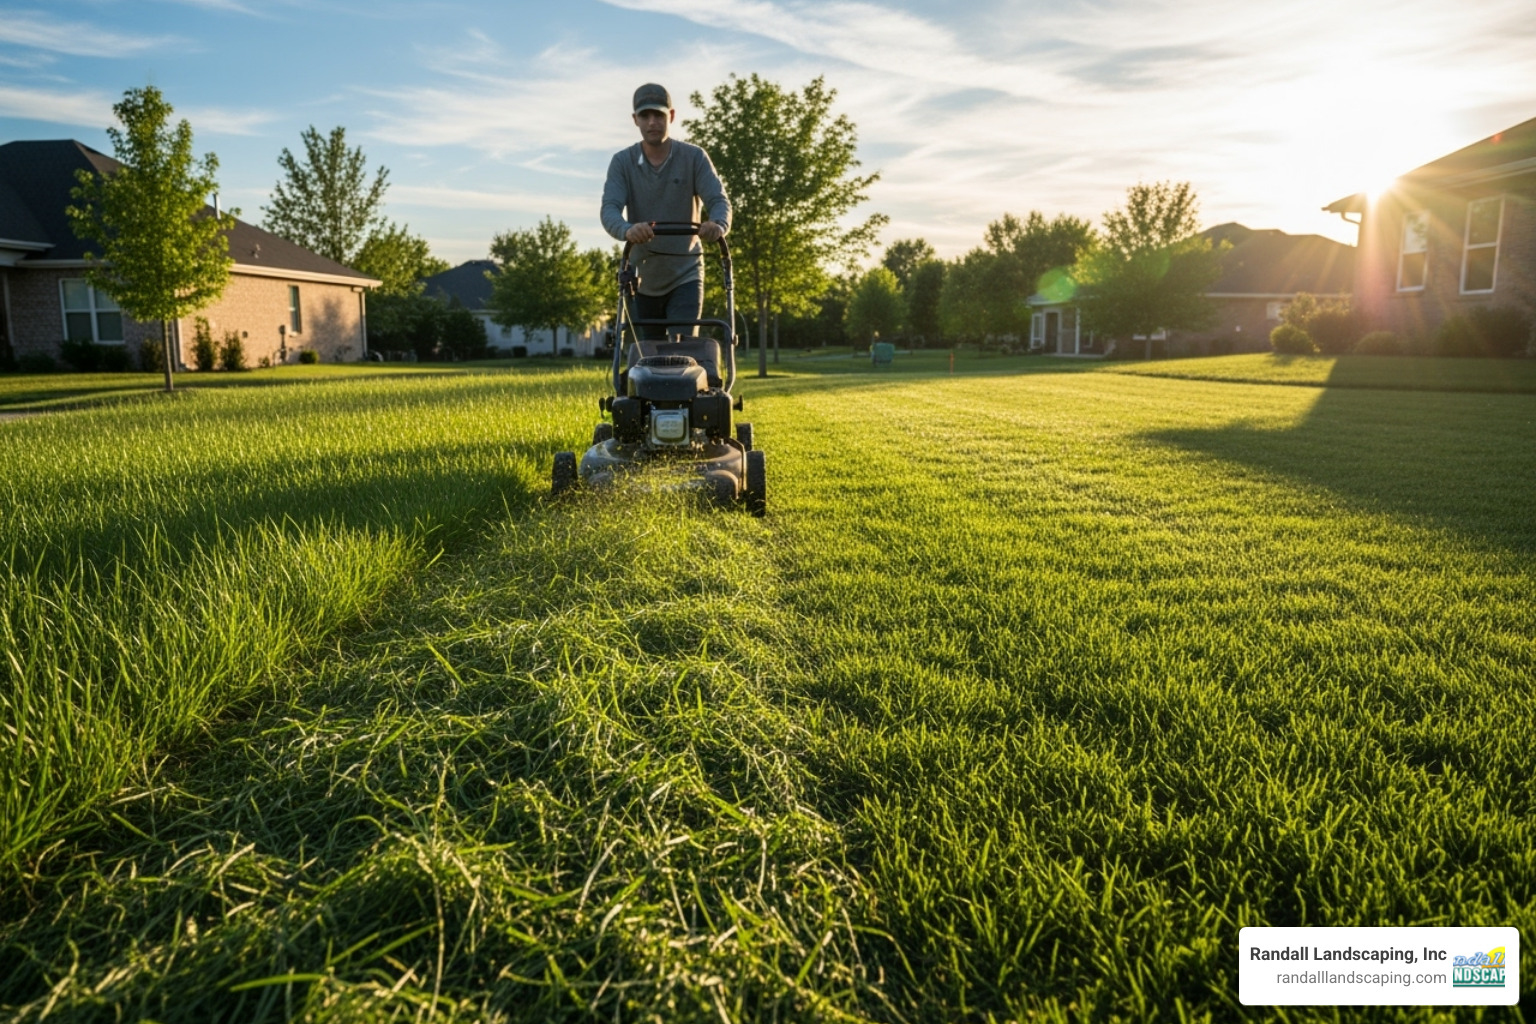
Wait for proper rooting before mowing, which usually takes 2-3 weeks. To check, gently try to lift a corner of a turf roll. If it resists, the roots have taken hold. If it lifts easily, wait another week.
For the first mow, set your lawnmower blades to their highest setting (typically 2.5-5cm or 1-2 inches) to only trim the tips. Sharp mower blades are essential, as dull blades tear grass and cause stress.
The golden rule is to never remove more than one-third of the grass blade’s height in a single mowing. This applies to all future mows.
After the first few mows, you can gradually lower the blade height over several weeks to your desired lawn height.
For year-round professional care, Randall Landscaping offers comprehensive Landscape Maintenance Services.
Long-Term Watering and Feeding
Once the turf is rooted, transition from daily care to a sustainable long-term routine.
Water deeply but less frequently. Instead of daily light watering, switch to deeper soaks further apart. This encourages roots to grow deeper into the soil, making the lawn more drought-resistant and hardy.
Fertilize after 6 weeks to give your established turf a nutrient boost. Apply a balanced fertilizer (look for NPK on the label) according to the manufacturer’s instructions. For autumn-laid turf, it’s often best to wait until the following spring.
For seasonal care, feed your lawn every 6-8 weeks during the growing season. Spring and fall applications are the most important for promoting healthy growth and preparing the lawn for the dormant season.
Frequently Asked Questions about Laying Turf
Even with careful planning, issues can arise when laying garden turf. Here are common problems and their solutions.
Why is my new turf turning yellow or developing gaps?
Yellowing or gaps are usually fixable. The most common causes are:
- Watering Problems: New turf is very thirsty, especially at the joints between rolls. Under-watering causes yellowing and shrinkage, which creates gaps.
- Poor Soil Contact: Air pockets between the turf and the soil prevent roots from accessing moisture and nutrients.
The Fix: Water thoroughly and consistently, checking daily by lifting a corner to ensure the soil beneath is moist. Tamp down any loose areas to ensure good soil contact. For existing gaps, top-dress the joints with a mix of fine sand and sieved topsoil, brushing it into the spaces to help the turf knit together.
Why is my new lawn sinking in places?
A bumpy lawn usually points back to inadequate ground preparation.
- Uneven Ground Preparation: If the soil wasn’t properly leveled and firmed, soft spots will settle over time, creating depressions.
The Fix: For small depressions, you can carefully work sieved topsoil into the low spots. For larger sunken areas, you must lift the affected turf, add and firm more topsoil to level the area, and then replace the turf and water it well.
What should I do with leftover turf rolls?
Don’t throw away extra rolls; they can be very useful.
- Use for Patching: Keep a few rolls in a shaded spot for a couple of weeks. If any sections fail to establish, you’ll have matching turf for repairs.
- Compost the Excess: Stack leftover rolls grass-side down in a corner. In a year or two, you’ll have rich compost.
- Use as Mulch: Lay the turf upside down in vegetable beds to suppress weeds and add organic matter to the soil as it decomposes.
Conclusion: Enjoy Your Beautiful New Lawn
Stepping back to admire a newly laid lawn is incredibly satisfying. While laying garden turf is a significant project, it’s achievable with the right approach. Success hinges on three elements: thorough preparation, consistent watering, and patience. A well-prepared base and diligent initial watering are the foundation for a healthy lawn with deep roots.
Your new lawn is a living investment that will provide a beautiful outdoor space for years to come. The instant results of turf mean you can start enjoying your yard right away.
Don’t be discouraged by minor issues; address them promptly and maintain a consistent care routine.
For homeowners in the Merrimack Valley or Southern New Hampshire who prefer leaving this project to the professionals, Randall Landscaping offers expert New Lawn Installation services. Our team handles everything from ground preparation to final watering instructions, ensuring a perfect result. With our commitment to quality work and 100% reliability, you can relax knowing your garden is in capable hands.
Whether you DIY or call in professionals, the result is a beautiful, healthy lawn that improves your home and provides years of enjoyment.